
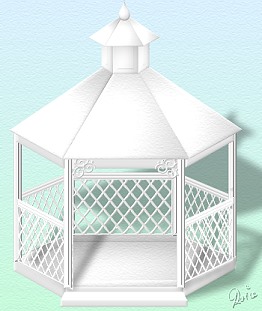
THE GAZEBO PI VERSION: 8 (but should be possible in 6 & 7- though some shape names may have changed). LEVEL: Intermediate - some knowledge of basic tools is assumed MAIN TOOLS USED: Path Drawing Tool, Path Edit Tool, Transform Tools, Shadow, Texturizer filter (optional), EasyPalette (optional), Trace (optional). NECESSARY DOWNLOADS: Click Here to download the hexagon and lattice shapes zip file. TERMS OF USE: Please Read - Thank You! |
|
INSTRUCTIONS |
|
|
|
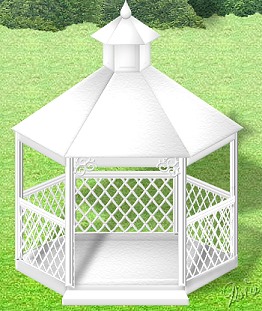
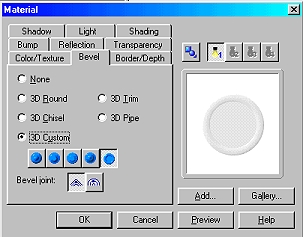
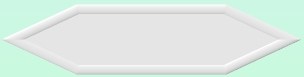
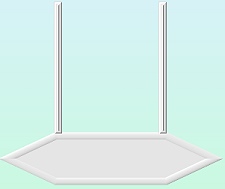
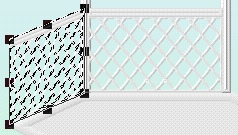
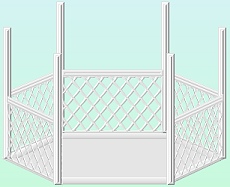
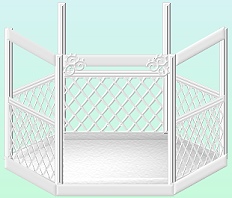
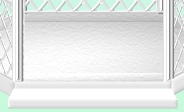
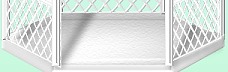
THE FLOOR AND SIDES Before you start the tutorial, download and unzip the shapes ufos from the link above. 1. Open a new canvas, 350W x 415H pixels. You can use any colour background - but we are going to be working in white for the whole gazebo, so a colour which shows this up well will be needed. I chose a two-colour, top to bottom gradient from Hex#DAF0FE to Hex#C7FADB. 2. Open the hexagon.ufo in PI and drag the shape to your main canvas. Close the hexagon canvas. 3. Keeping the shape selected, click on the Path Drawing Tool and change the colour to white, Mode - 3D Round: Border - 10: Depth - 6. 4. Click on the Material Box/Bevel and change the bevel to the Custom Bevel shown in the first pic opposite. 5. Now use the Transform Tools/Resize to make the shape 300W x 70H pixels. 6. Using the Path Drawing Tool, Shape - Rectangle: Color - white: Mode - 3D Round: Border - 6: Depth - 30: draw a shape 10W x 175H pixels.
7. In the Material Box/Bevel, apply the bevel shown opposite.
8. Right Click/Duplicate this piece and put in place on the gazebo base.
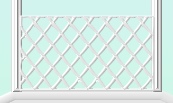
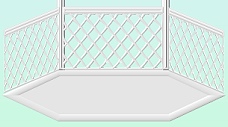
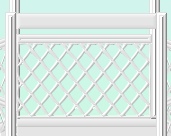
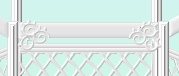
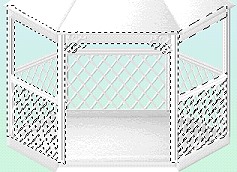
9. Now open the lattice.ufo in PI and drag the shape to the main canvas. If you wish to know how to make your own lattice, there are instructions for this at the end of the tutorial. 10. Click on the Path Drawing Tool and change the colour to white, Mode - 3D Round: Border - 5: Depth - 5. Put in place on the gazebo. 11. Using the Path Drawing Tool, Shape - Rectangle: Colour - white: Mode - 3D Round: Border - 5: Depth - 10, draw a shape 135W x 10H pixels. 11. Change the Bevel to the same one that you used in 4. above and put the piece in place as a rail above the lattice. 12. Select the lattice and the rail and Right Click/Merge As Single Object. 13. Right Click Duplicate this piece then use the Transform Tools/Resize to make the piece 75 pixels wide (see pic opposite). 14. Now use the Transform Tools/Slant to pull down the left hand side (use the CENTER point to drag downwards) into the position illustrated.
15. Right Click/Duplicate this piece.
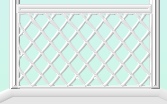
16. Use the Transform Tools/Rotate & flip - to flip the duplicate Horizontally and put in place on the right-hand side.
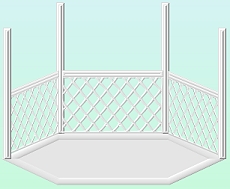
17. Now select one of the back posts and Right Click/Duplicate TWICE.
18. Put in place as the side posts. 19. Select the left-hand side lattice/rail and Right Click/Duplicate. 20. Move this over to the right-hand side and put in position as the front lattice. 21. Select the right-hand side lattice/rail and Right Click/Duplicate. 22. Move this over to the left hand side and put in position. 23. Again, select one of the back posts and Right Click/Duplicate TWICE.
24. Put in position as the front two posts. Notice that these posts are slightly wider apart than the back two posts - to maintain correct perspective.
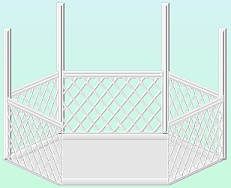
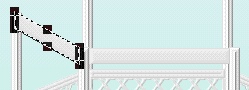
25. Using the Path Drawing Tool, Shape - Rectangle: Colour - white: Mode - 3D Round: Border - 3: Depth - 5, draw a shape 140W x 15H pixels and put in place. 26. Right Click/Duplicate this piece and use the Transform Tools/Resize to make it 65W x 15H pixels. 27. Put in place against the left-hand side post and then use the Transform Tools/Slant to create the shape shown. Please note that the slanted side piece should come to the CENTRE of the upright posts on the far left and right! 28. Right Click/Duplicate this piece. Use the Transform Tools/Rotate & flip - to flip the piece Horizontally and then put in place on the right-hand side of the gazebo. 29. Select the three pieces you just made and Right Click Duplicate. 30. Place at the bottom of the gazebo and use the Transform Tools/Resize to stretch them so they fit the base (see pic opposite).
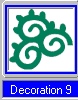
31. Using the Path Drawing Tool, Custom Shape - Decoration 9: Colour - white: Mode - 3D Round: Border - 5: Depth - 5, draw a shape 33W x 34H pixels and put in place as decoration for the door. 32. Right Click/Duplicate this shape. Use the Transform Tools/Rotate & flip - to flip the piece Horizontally and put in place. 33. Click on the hexagonal floor piece and in the Path Panel/3D, click on the More button next to lighting. Change the number of Lights to 2 and make the second light Spot instead of Direct - OK. 34. I have added a texture here - using the Texturizer filter - but this is not vital. If you don't have this filter you could always add a Bump from the Easy Palette/Material Attribute Gallery for added interest. The first part of your gazebo is now done - have a quick coffee and then let's make a roof! |
|
|
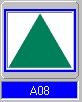
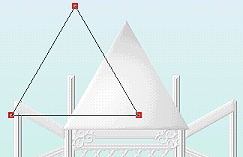
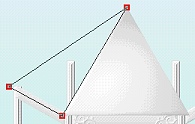
THE ROOF 35. Using the Path Drawing Tool, Custom Shape - A08 (Triangle - either Triangle in PI 10): Mode - 3D Round: Border - 6: Depth - 6: draw a shape 170W x 146H pixels and put in place as shown. Put in place as the centre piece of the roof. (This shape should have retained the lighting settings from the floor piece). 36. Right Click/Duplicate this piece of roof and then click on the Editing button on the Attribute Toolbar to go into Path Edit Mode. 37. Under 'Edit Point' on the Attribute Toolbar, click on the Delete button (the minus sign) and delete the centre point from each side of the triangle (If you are using PI 10 version or later you will not need to do this as the triangle does not have the extra nodes in those versions). 38. Click back on the Pick Point under 'Edit Point' and move the three points to the positions shown. Don't forget - you can click the Toggle button on and off to check if your shape is correct in 3D Round Mode without leaving Path Edit mode.
39. Once you are happy with the shape, click on the Editing button again to return to 3D Round Mode. 40. Right Click/Duplicate this piece of roof, then use the Transform Tools/Rotate & flip - to flip the piece Horizontally. Put in place as the right-hand side of the roof. Once again I have used the Texturizer filter to add a little detail to the roof pieces but you can leave them plain, recolour the roof or add a bump from the EasyPalette instead. 41. Using the Path Drawing Tool, Shape - Rectangle: Mode - 3D Round: Border - 8: Depth - 5: draw a shape 35W x 50H. 42. In the Material Box/Bevel alter the bevel to the Custom one used for the posts in instruction 7 above and put the piece in place as shown. 43. Right Click/Duplicate this piece and use the Transform Tools/Resize to change the width to 15 pixels - the use the Transform Tools/Slant again to create the shape shown. 44. Right Click/Duplicate this piece - then use the Transform Tools/Rotate & flip - to flip it horizontally and put in place on the right-hand side. 45. Select the three triangular roof pieces and Right Click/Duplicate. 46. Right Click/Merge As Single Object - then use the Transform Tools/Resize to make the duplicate 96W x 45H pixels. Put in place at the top of your gazebo.
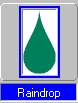
47. Using the Path Drawing Tool, Custom Shape - Raindrop: Mode - 3D Round: Border - 18: Depth - 7: draw a small shape and put in place as shown.
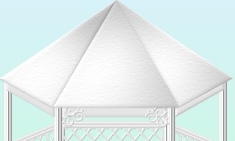
OK - that's the roof - now only the step to do and we're finished! |
|
|
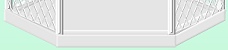
THE STEP 48. Using the Path Drawing Tool, Shape - Rectangle: Mode - 3D Round: Border - 5: Depth - 5: draw a shape 158W x 10H pixels. 49. Using the Transform Tools/Perspective, widen the lower edge of this shape just a little - not too much now, or the perspective will be all wrong! 50. In the Path Panel/3D/Lighting - click on the light bulb and use this on the shape to lighten it. You can use this method to add a little 'sunlight' to various parts of your gazebo. If you wish to lighten parts that are image objects such as the lattices at the front, you can select the piece then click on Format/Brightness & Contrast - then click on the top right square and OK. 51. Draw another rectangle to fit below this piece to complete the step. |
|
|
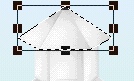
FINISHING TOUCHES Now I'm going to add some shadows to the gazebo. Remember some shadows fall inside structures - so we're going to do those first. 52. Select all the pieces of the gazebo shown opposite and Right Click/Merge As Single Object.
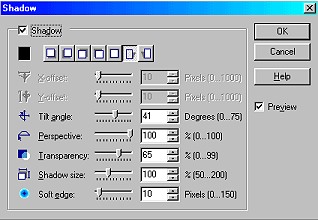
53. Right Click/Shadow - and apply a shadow with the settings shown.
54. Right Click/Split Shadow - then select the shadow alone. 55. Use the Object Paint Eraser to remove all the shadow which falls outside the gazebo. TIP! If you are going to save this gazebo for future use in different pictures, be sure to check for any shadow that falls OUTSIDE your canvas and erase that too! 56. Now Right Click/Select All Objects. Right Click/Merge As Single Object. 57. Apply the same shadow settings to the whole gazebo but reduce the shadow size to 80. 58. Once again Right Click/Split Shadow and remove the excess shadow at the front of the gazebo. All you need to do now is make a nice setting for your gazebo and you're done! |
|
|
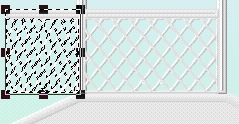
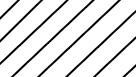
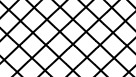
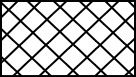
HOW TO MAKE A LATTICE (Optional) a) Open a canvas the size you wish to make a lattice - for this tutorial the size is 136W x 77H pixels. b) Using the Line & Arrow Tool, Border - 1: draw a series of lines at regular intervals across the rectangle. c) Once you have all the lines in place, Right Click/Select All Objects and Merge As Single Object.d) Duplicate this object then use the Transform Tools/Rotate & flip - to flip this copy Horizontally. e) Put in place and then Right Click/Merge All. f) Using the Outline Drawing Tool - Shape Rectangle: Border - 1: draw a black rectangle around the edge and Right Click/Merge. g) Click on Edit/Trace, accept the defaults and OK. h) Change the Mode from Horizontal Deform to 3D Round and there is your lattice - easy! |
 |
|
|
Free Spirit Graphics If you would then like an invitation to join, please Email Me. We'd love to have you along! |
|
|
If you need any help - or want to make suggestions to improve this tutorial - or for new ones |
|


This site © Rosie Hardman-Ixer 2001/2/3 |