
NON-STICK FRYING PAN PI VERSION: 7/8/XL. LEVEL: Beginner MAIN TOOLS USED:Path Drawing Tool, Outline Drawing Tool, Path Edit, EasyPalette. TERMS OF USE: Please Read - Thank You! |
|
INSTRUCTIONS |
|
|
TOOL ICONS FOR BEGINNERS
|
|
|
|
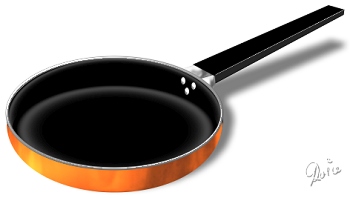
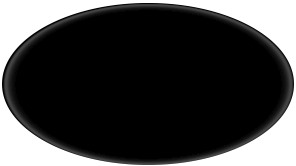
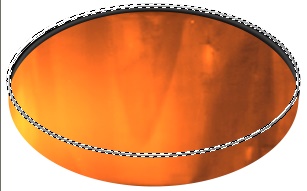
THE PAN One of the reasons for writing this tutorial is to show the lovely, soft, effective shading that can be obtained when using a Metallic setting in conjunction with a black 3D Round object.... the first two pieces of this pan will show you exactly what I mean! 1. Open a new, white canvas, 500W x 300H pixels. 2. Using the Path Drawing Tool, Shape - Ellipse: Color - Black: Mode - 3D Round: draw a shape 290W x 160H pixels. 3. In the Path Panel, use the settings Border - 29: Depth - 5: then click on the lightbulb beneath Light 1 and move your cursor to approximately the point shown above/left until you create a small, shaded rim around the top edge of your shape. 4. Now click on the Material button on the Attribute Toolbar and click on the Shading tab. Check the Metallic option and OK.
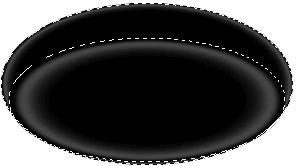
5. Now draw another ellipse, 275W x 125H with the same colouring, mode and shading. 6. In the Path Panel use the settings Border - 47: Depth - 7: for this piece. Now put the two pieces together as shown.
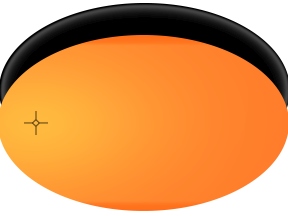
7. Now draw another ellipse: Color - any for the moment: Mode 3D Trim, Border - 1: Depth - 30: 290W x 175H pixels. Open the EasyPalette/Material Attribute Gallery/Metallic and fill this shape with preset Silver 1. In the Reflection gallery, click on the R02 thumbnail.
8. Change the Color to a colour of your choice - mine is an orange colour - Hex#F83E07.
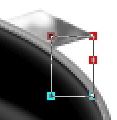
9. In the Path Panel use the lightbulb feature again (this time select Light 2 first) and move the cursor over to the left of the shape until you get the shading shown above/left. Put this piece in place. When you release the button your shape should now look like the one opposite.
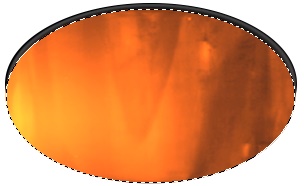
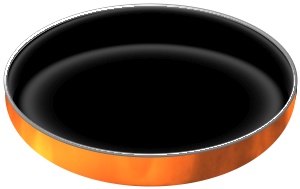
10. Now use the Outline Drawing Tool: Shape - Ellipse: Color - grey (Hex#C8C8C8): Mode - 3D Round: Outline Width - 2: draw a shape 290W x 152H pixels. 11. Once again, click on the Material button on the Attribute Toolbar and click on the Shading tab. Check the Metallic option and OK. 12. Put this piece in place as shown.
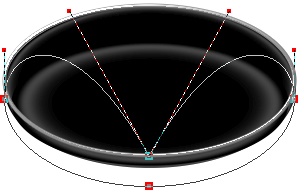
13. Now reselect the Path Drawing Tool and the orange shape. Click on the Editing button to go into Path Edit mode.
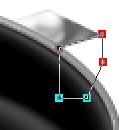
14. Drag the centre node down so that it lies behind the grey ellipse as shown.
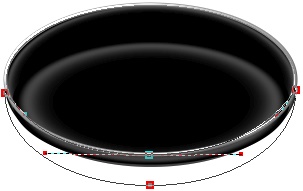
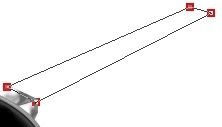
15. Now use the control handles to shape the upper line so that it lies behind the grey ellipse. Make sure that side bits of the the black ellipse beneath this shape are completely covered by the outline of the orange shape. You may have to lift the two outside nodes up slightly to do this. Keep checking with the Toggle button to see how your shape is looking.
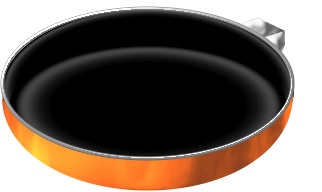
16. Once you have completed the shape to your satisfaction, click on the Editing button again to return to 3D Trim mode. There's the main part of your pan - not too difficult was it? |
|
|
THE HANDLE 17. Using the Path Drawing Tool, Shape - Rectangle: Color - Silver (EasyPalette/Material Attribute Gallery/Metallic/Silver), Border - 2: Depth - 4: draw a shape 26W x 17H pixels. 18. Now use the Transform Tools/Slant to pull the piece into shape in the two stages shown left. 19. Right Click/Arrange/Send to Back and make sure that this piece fits just under the rim of the pan. 20. Now draw another silver rectangle 20W x 30H pixels and then click on the Editing button to go into Path Edit mode. 21. On the Attribute Toolbar, under 'Edit point' click on the Plus (+) sign and Add a node to the right hand line as shown. 22. Now pull the bottom right-hand node to the left. Pull the top left-hand node downwards and to the left as shown so that the line of the piece runs along the side of the previous silver shape. 23. Click on the Editing button to return to 3D Round mode and then Right Click/Arrange/Send to Back.
Your handle sleeve should now look like the one opposite.
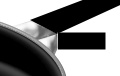
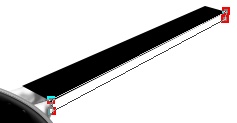
24. Using the Path Drawing Tool, Shape - Rectangle: Color - Black: Mode - 3D Round: Border - 2: Depth - 4: draw a shape 215W x 20H pixels. 25. Click on the Material box/Shading tab, change the shading back to Phong, under the Reflection tab uncheck any Reflection that is checked, under Lighting reduce the number of lights to 1 and OK. 26. Now click on the Editing Button to go into Path Edit mode again. 27. Pull the four nodes into the positions shown, being careful to follow the lines of the silver sleeve. The far end of the handle should be narrowed slightly. 28. Click the Editing button to return to 3D Round Mode. 29. Draw another small rectangle as shown. 30. Click on the Editing Button to go into Path Edit mode again and use the control handles to create the side of the handle as illustrated. Use the lightbulb feature in the Path Panel/3D Tab (click on the little light bulb beneath Light No 1 and move the cursor to the top of the shape) to put the light at the top of this piece as shown in the final picture below. 31. Finally, click on the silver sleeve of the handle to select that preset and then draw a small, 3D ellipse shape 5W x 9H pixels for one of the rivet heads. Right Click/Duplicate this piece twice and put all three rivets in place on the inside of the pan as shown. |
|
|
|
 |
|
|
Free Spirit Graphics If you would then like an invitation to join, please Email Me. We'd love to have you along! |
|
|
If you need any help - or want to make suggestions to improve this tutorial - or for new ones |
|
 - Easy Palette
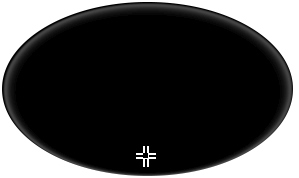


This site © Rosie Hardman-Ixer 2001/2/3/4 |