
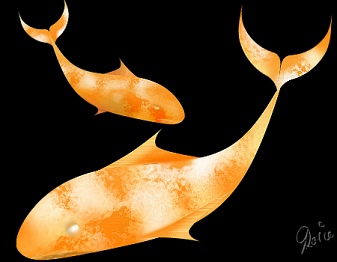
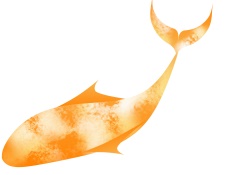
SIMPLE GOLDEN CARP PI VERSION: 8 (or 7). LEVEL: Beginner MAIN TOOLS USED: Path Drawing Tool, EasyPalette/Wrap Gallery - Bend Text and Text Wrap, Transform Tools/Rotate & flip and Rotate freely, Paint Tools/Paintbrush, Texture, Retouch Tools - Dodge & Burn (optional). TERMS OF USE: Please Read - Thank You! |
|
INSTRUCTIONS |
|
|
IMPORTANT NOTE - PLEASE READ! When drawing shapes which are later to be used in the Wrap Galleries it is essential that these shapes are drawn to size - i.e. you draw them to the size specified with the Path Drawing Tool. Drawing them approximately to size and then using the Transform Tools to resize them is NOT the same thing and the Wrap Galleries will not work properly if you do this. You will end up with a tiny little shape that does not look like the one in the tutorial. If, for any reason, you cannot draw the shape to size using the numbers at the bottom left of the PI workspace for reference (inexperience with the mouse, shaking hands etc), and HAVE to use other tools to correct the size of your path shape - then you will need to Right Click/Convert Object Type/Reset Text/Path Object before you continue. |
|
|
|
BODY, TAIL & FIN SHAPES
1. Open a new, white or black canvas, 450W x 350H pixels.
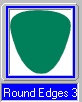
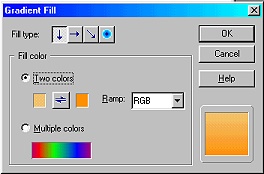
2. Using the Path Drawing Tool, Color - any for now: Custom Shape - Round Edges 3: Mode - 2D: draw a shape approximately 75W x 77H pixels. 3. Click on Color/Gradient Fill and fill this with a two colour-gradient from Hex#F7BC5B to Hex#FF8000 with a top-to-bottom fill as shown.
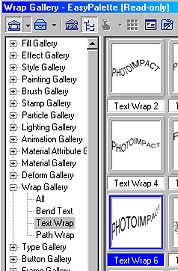
4. Open the EasyPalette/Wrap Gallery/Text Wrap and double click on Text Wrap 6.
OK - that's the body shape (told you it was easy!)! Now let's do the tail!
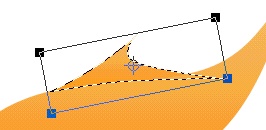
5. Now using the Custom Shape - Wave 3, same colours and Mode - draw a shape 100W x 40H pixels. 6. Open the EasyPalette/Wrap Gallery/Bend Text and double click on Bend 6. 7. Right Click/Convert Object Type/From Text/Path to Image.
8. Use the Transform Tools/Rotate & Flip to flip the shape Vertically and put in place as shown.
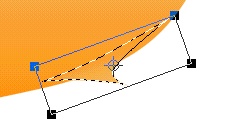
9. Right Click/Duplicate this piece.
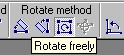
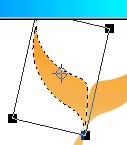
10. Flip the duplicate and use the Transform Tools/Rotate freely to turn the duplicate piece slightly so that it is aligned as shown.
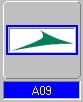
11. Using Custom Shape A09 - same colours and Mode - draw a shape 180W x 67H pixels.
12. Use the Transform Tools/Rotate freely to turn the duplicate piece slightly so that it is aligned as shown. 13. Right Click/Arrange/Send to Back. 14. Draw another fin shape 140W x 55H pixels and then Right Click/Convert Object Type/From Text/Path to Image. 15. Use the Transform Tools/Rotate & Flip to flip the shape Vertically and then Horizontally. 16. Use the Transform Tools/Rotate freely to turn the duplicate piece slightly so that it is aligned as shown.
OK - that's all the main pieces done - now to add some more colouring to the fish... |
|
|
MOTTLING THE FISH 17. First of all Shift/Click to select the body and two tail pieces of the fish. 18. Right Click/Merge As Single Object. 19. Now select the Paintbrush Tool, Size - 75: Trans - 0: Soft Edge - 100: Preset - None: as shown. Set the Color to Hex#FCE794.
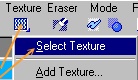
20. Click on the Texture button/Select Texture and select Paper50.jpg.
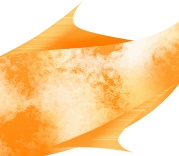
21. Now paint some mottling on the body of your fish as shown.
22. Change the size of the brush to 30 and do the same on the tail.
23. Now change the Color to white.
24. Add some white mottling to the fish - using the same size brushes as before - 75 for the body and 30 for the tail.
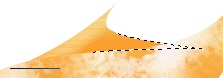
25. Now select the top fin and Right Click/Convert Object Type/From Text/Path to Image.
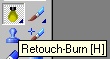
26. Using the Paintbrush again - this time set the Preset to Ribbon and then change the settings for Size, Color and Trans to those shown opposite. 27. Stroke a line of colour down the left edge of the fin as shown. 28. (Optional) you can also use the Retouch Tools/Burn to add some extra shading to the fin.
29. Use the same methods to add some shading to the lower fin as shown.
30. Shift/Click to select all parts of the fish and then Right Click/Merge As Single Object.
31. Use the Retouch Tools/Blur to soften the lines between the fins and the fish.
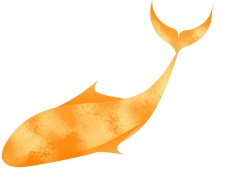
32. All that remains is to create an eye for your fish. If you're good with the painting tools you might like to paint this but I did it by drawing a small path shape circle - Color - Hex#FDECD0. I used Right Click/Convert Object Type to convert it to an image and then painted a darker rim. 33. I created a highlight in the eye by using the Retouch Tools/Dodge. 34. Finally I selected the eye and the fish - Right Click/Merge As Single Object then used the Retouch Tools/Blur to slightly soften the line around the eye and painted in a mouth line.
All fin-ished! I can see you're a dab hand at this... didn't even char the fins... you're a ray of sunshine to have about the place..... OK, ok.... I'll stop now.... :-) |
 |
|
|
Free Spirit Graphics If you would then like an invitation to join, please Email Me. We'd love to have you along! |
|
|
If you need any help - or want to make suggestions to improve this tutorial - or for new ones |
|


This site © Rosie Hardman-Ixer 2001/2/3 |