
EASY FLOWERING PLANTS PI VERSION: 8 (also suitable for version 7). LEVEL: Beginner MAIN TOOLS USED: Path Drawing Tool, Line & Arrow Tool, EasyPalette/Wrap Gallery/Bend Text, Paint Tools/Paintbrush, Retouch tools/Burn/Dodge (optional), Transform Tools. TERMS OF USE: Please Read - Thank You! |
|
INSTRUCTIONS |
|
|
IMPORTANT NOTE - PLEASE READ! When drawing shapes which are later to be used in the Wrap Galleries it is essential that these shapes are drawn to size - i.e. you draw them to the size specified with the Path Drawing Tool. Drawing them approximately to size and then using the Transform Tools to resize them is NOT the same thing and the Wrap Galleries will not work properly if you do this. You will end up with a tiny little shape that does not look like the one in the tutorial. If, for any reason, you cannot draw the shape to size using the numbers at the bottom left of the PI workspace for reference (inexperience with the mouse, shaking hands etc), and HAVE to use other tools to correct the size of your path shape - then you will need to Right Click/Convert Object Type/Reset Text/Path Object before you continue. |
|
|
|
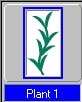
DRAWING THE LEAVES/STEMS 1. Open a new, white canvas, 300W x 300H pixels. 2. Using the Path Drawing Tool, Custom Shape - Plant 1: Mode - 2D: draw a shape 40W x 80H pixels.
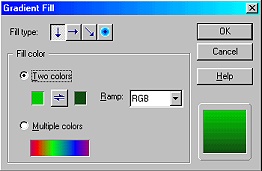
3. Click on Color/Gradient and fill with a two-color gradient - light green to dark green (I used Hex#00C400 to Hex#063806) as shown.
4. Right Click/Copy (or Ctrl + C) - then Right Click/Paste (or Ctrl + V).
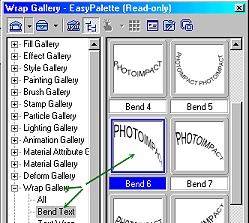
5. Now open the EasyPalette/Wrap Gallery/Bend Text and double click on Bend 6 to apply to your shape.
6. This gives you the first shape shown opposite. Now Right Click/Paste another copy of the first shape and this time apply Bend 9. Put in place (illustration 2 opposite).
7. Using another copy - apply Bend 12 and put in place. 8. Now another copy - apply Bend 11 and put in place. (You can of course add more leaves, make some smaller, or put them in any position to make up your own version of a plant - the one opposite is just a suggestion).
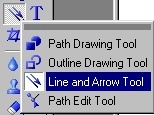
9. Using the Line & Arrow Tool (in the Path Panel - Outline - size 1: NO arrow) draw some stems for your flowers.
OK - now onto the flowers! |
|
|
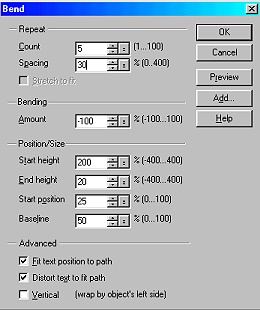
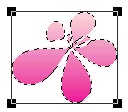
THE FLOWERS Although there are flower shapes which you can use straight from the Custom Shape selection if you choose, we are going to make flowers using the Bend Text Gallery again. 10. Using the Path Drawing Tool, Shape - Ellipse, Color - any you like (I am using a pink, two-color gradient for mine): Mode - 2D, draw a shape 20W x 45H pixels. 11. Now on Bend 19 - Right Click/Modify Properties and Apply. Change the Count to 5 and the Spacing to 30 and OK (see settings illustration opposite to check your settings).
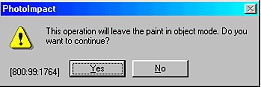
This should give you a shape like that opposite. 12. Now using the Paint Tools/Paintbrush (I am using gold & yellow colours), click on the Mode button on the Attribute toolbar to go into 'Paint as object' mode, then paint some dots in the centre of your flower. 13. Click back on the Pick Tool and in the box that comes up, asking if you want to leave the paint in object mode - click Yes. 14. Shift/Click to select the petals and the painted center - then Right Click/Merge As Single Object. You might like to save this flower separately for future use?
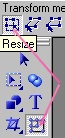
16. Now use the Transform Tools/Resize to resize the flower to a more appropriate size for your plant and put in place on one of the stems.
17. Right Click/Copy & Right Click/Paste this flower a few times.
18. Now by using the Transform tools/Resize, Distort, Rotate or Perspective on each of the flowers, you can alter the size and shape
19. (Optional) I have now used the Retouch Tools/Burn and Dodge (see note below) to add some extra shading and highlights to the leaves of my plant. NOTE: Before you can use these tools you will need to select the leaf shape you wish to shade, then Right Click/Convert Object Type/From Text/Path to Image.
20. Once you are happy with your plant, Right Click/Select All Objects - then Right Click/Merge As Single Object.
21. You can add a shadow to the plant if you wish, depending on the type of picture you are going to use the plant for. |
|
|
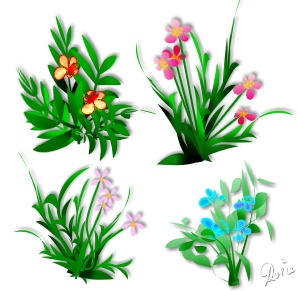
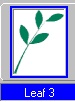
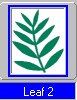
OTHER EXAMPLES The plants opposite were made exactly the same way - but starting with different leaf shapes and experimenting with the various Bend options in the Bend Text Gallery for the leaves and flowers.
The last example (pink flowers) uses a simple Custom Shape (Flower 2) for the flowers.
I hope the tutorial has given you some ideas for making quick and easy flowering plants using the Wrap Gallery/Bend Text. It's worth experimenting with different starting shapes for the flowers and also playing with the various settings for the different wraps. Yo could also try the Text Wrap and Path Wrap galleries as some of them can produce wonderful, multi-petalled flowers - such as Path Wrap 16 on a simple ellipse. Have fun planting out your virtual garden! |
 |
|
|
Free Spirit Graphics If you would then like an invitation to join, please Email Me. We'd love to have you along! |
|
|
If you need any help - or want to make suggestions to improve this tutorial - or for new ones |
|


This site © Rosie Hardman-Ixer 2001/2/3 |