
ARTIST'S EASEL PI VERSION: 6/7. LEVEL: Intermediate - some basic knowledge of Path/Transform Tools is assumed. MAIN TOOLS USED: Path Tools YOU WILL ALSO NEED: A picture of your choice to stand on your easel if you want to make a complete picture and not just an object to store in your EasyPalette. TERMS OF USE: Please Read - Thank You! |
|
INSTRUCTIONS |
|
|
|
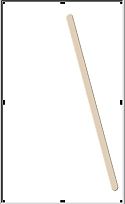
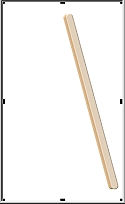
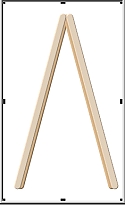
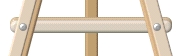
THE MAIN FRAME - PART 1 1. Open a new white canvas - 225W x 375H pixels. 2. Using the Path Tools - Shape - Rounded Rectangle: Colour pale brown: Mode - 3D Round: Border - 2: Depth - 30: draw a shape 12W x 340H pixels. 3. Using the Transform Tools/Rotate by Degree, rotate this 15% to the left as shown. 4. Right Click/Duplicate this piece. Change the Colour to a darker brown. Right Click/Arrange/Send to Back. Put in place as shown. 5. Shift/Click to select both pieces then Right Click/Duplicate them. 6. Using the Transform Tools/Rotate and Flip - flip the duplicate pieces Horizontally. 7. Put in place then select the darker left-hand piece - Right Click/Arrange/Send to Back. Your pic should now look like the picture opposite. 8. Right Click/Select All Objects, Right Click/Merge as Single Object. |
|
|
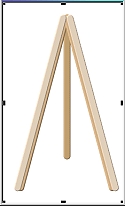
THE MAIN FRAME - PART 2 9. Using the Path Tools - Shape - Rounded Rectangle: Colour - darker brown: Mode - 3D Round: Border - 3: Depth - 30: draw a shape 12W x 260H pixels to make the third leg of the easel. 10. Using the Path Tools - Shape - Rounded Rectangle: Mode - 3D Round: Border - 3: Depth - 30: draw a shape 160W x 12H pixels to make a strut for the front of the easel. 11. Right Click/Duplicate this shape and recolour it in the lighter brown.12. Select both pieces of the strut, arrange as shown and Right Click/Merge as Single Object. 13. Right Click/Arrange/Send Backward behind the main frame. Put in place as shown to make an A-Frame. Right Click/Select All Objects. Right Click/Merge as Single Object. 14. Open a NEW canvas. (I am doing this to ensure that these pieces are not accidentally merged with the main frame!) Using the Path Tools - Shape - Rectangle: Mode - 3D Round: Border - 2: Depth - 30: draw a shape 150W x 6H pixels for the canvas holder. Right Click Duplicate this shape. 15. Using the Path Tools (same settings) - draw a shape 75W x 10H pixels in a light cream colour.
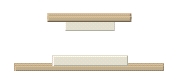
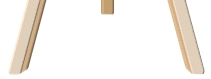
16. Put these three shapes together as shown in the illustration opposite and then select all three and Right Click/Merge as Single Object. 17. Using the same method make a smaller version of the canvas holder as shown and then use the Transform Tools/Rotate and Flip to flip this piece Vertically. 18. You should now have two pieces as shown. 19. Return to your original canvas. Using the Path Tools - Shape - Circle: Colour - Grey: Mode - 3D Round: Border - 3: Depth - 30: draw a shape for the bolt head. Right Click Duplicate this shape and put both pieces in place on the easel. 20. Right Click/ Select All Objects. Right Click/Merge as Single Object. Now, using the Object Paint Eraser, shape the bottom of the easel legs as shown. I used a size of 7 to do this. 21. Drag the two canvas holder pieces from the second canvas to the main one (you can now close the second canvas). Do NOT merge the three pieces - then you can move the canvas holders to fit different-sized pics!
This might be a GOOD time to save your easel in the EasyPalette! |
|
|
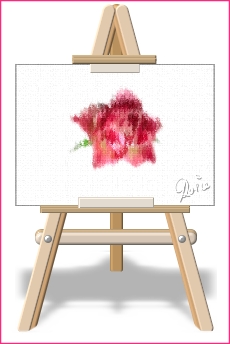
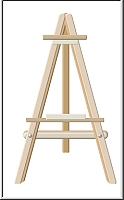
FINISHING TOUCHES 22. Now open the picture which you wish to use, this is the time to open it and resize it to fit your easel. 23. Once you have done this, use Right Click/Send Backward to send your picture behind the canvas holders.
24. Right Click/Select All Objects. Right Click/Merge as Single Object.
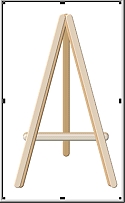
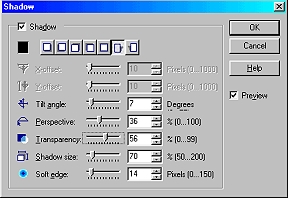
25. Right Click/Shadow - and apply the Shadow settings shown opposite. You are all ready to invite people to your studio! |
 |
|
|
Free Spirit Graphics If you would then like an invitation to join, please Email Me. We'd love to have you along! |
|
|
If you need any help - or want to make suggestions to improve this tutorial - or for new ones |
|
This site © Rosie Hardman-Ixer 2001/2/3 |