
PANELLED FRONT DOOR PI VERSION: 7 (also possible in V6 but some presets are unavailable in the EasyPalette). LEVEL: Intermediate (some knowledge of tools is assumed). MAIN TOOLS USED: Path Drawing Tool, Continue Draw, Path Edit Tools, Shadow/Split Shadow, Effect/Ripple, EasyPalette/Material Attribute Gallery. TERMS OF USE: Please Read - Thank You! |
|
INSTRUCTIONS |
|
|
|
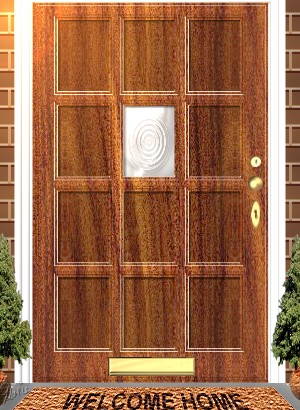
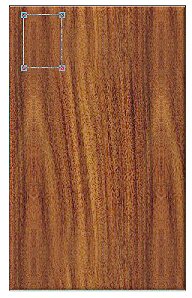
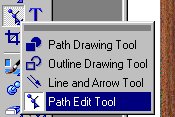
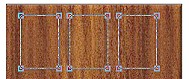
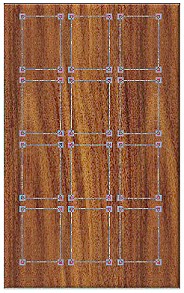
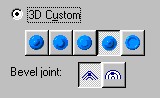
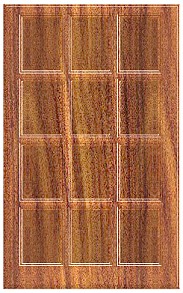
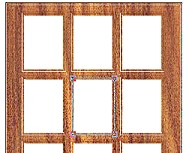
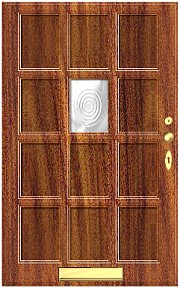
THE WOODEN DOOR 1. Open a new, white canvas 300W x 415H pixels. 2. Using the Path Drawing Tool: Shape - Rectangle: Mode - 3D: Border - 6 : Depth - 30: draw a shape 235W x 380H pixels. 3. Apply a wood preset of your choice. I am using a Wood Preset - Vertical 12 by Fr. Michael (hosted by the PIRC, these are available Here. Click on Cool Stuff #3 - Free Presets on the right-hand side). If you use these presets you will need to reset the Border to 6 after applying the preset. 4. Right Click/Duplicate this shape and line it up exactly on top of the first one. (Right Click/Align/Center Both). 5. Select the top shape only and then change the Mode to Continue Draw. 6. Draw a rectangle 50W x 70H pixels as shown in the first illustration. 7. Click on the Path Edit Tool and then click on Duplicate TWICE. Line up the three rectangles as shown. 8. Shift/Click to select each of the three rectangles and then click on Align/Top - then Align/Distribute Horizontally. 9. Click on Group. Click on Duplicate THREE times. 10. Put the four groups of rectangles in place as shown. NOTE: There should be a slightly larger space at the bottom of the door where we are going to put the letterbox (mail slot) and on the right hand side where we are going to put the handle/doorknob. 11. Shift/Click to select all the Groups, then clicking on Align/Left and Align/Distribute Vertically. 12. Once you are sure you have all the rectangles lined up correctly and in place on the door - click out of Path Edit Mode and back into 3D Round Mode. 13. Now open the Material box. Click on the Bevel tab and apply the Custom Bevel shown in the illustration opposite and OK. Click on the Light tab and change the number of lights to 2 and OK. 14. Now, using bulb no 1 in the Path Panel, click on the icon below it to play with the lighting. (Move your mouse over the graphic to get the lighting effect you want). Then repeat with bulb no 2. It takes patience and practice to get the hang of this - but it's worth the time you spend getting it correct! Try getting the vertical shading on the panels correct with one bulb and the horizontal shading correct with the other. 15. Now select the back (solid) panel. Change the Mode to Continue Draw. 16. Draw a rectangle in the position shown and then change the Mode back to 3D Round. 17. Keeping this piece selected, click on Format/Brightness and Contrast and then click on the bottom, left-hand rectangle to darken it slightly. 18. Click on the front (panelled) piece and Right Click/Shadow. Change the X-offset, Y-offset and Soft Edge all to 2 and OK. 19. Right Click/Split Shadow. Select the Shadow only (the Layer Manager is probably the best way to do this) and use the Object Paint Eraser to remove the excess shadow from the edge of the door - we only want to retain the shadows in the panels. Your door should now look like the one opposite. |
|
|
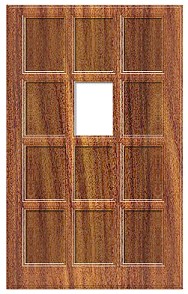
WINDOW AND ACCESSORIES 20. Using the Path Drawing Tool: Shape - Rectangle: Mode - 3D: draw a shape to fill the window space. 21. Open the EasyPalette/Material Gallery/Metallic and fill this with M017 - set the Border to 1 and Depth to 1. 22. On the Menu bar click on Effect/All/Ripple and click the Options button. Use the settings shown opposite: 23. Keeping the 'glass' selected, Right Click/Arrange/Send to Back. 24. Now all that remains is to use the Path Drawing Tool: Shape - Rectangle (or Circle): Mode - 3D: to add the brass accessories. You should add a letterbox/mail slot, a door knob (or fancy handle) and a lock-plate or two (I have one for a Chubb key and one for a dead-lock on mine). I used the Copper 3 preset from the Material Attribute Galley in the EasyPalette to fill my examples - then altered the lighting slightly. I used the Paint Tools/Paintbrush to paint on the lock details. Maybe you could now add a wall, a welcome mat, some plants, a wall-light, windows..... it's over to your imagination now! |
 |
|
|
Free Spirit Graphics If you would then like an invitation to join, please Email Me. We'd love to have you along! |
|
|
If you need any help - or want to make suggestions to improve this tutorial - or for new ones |
|
This site © Rosie Hardman-Ixer 2001/2/3 |