
DIAMOND HEART NECKLACE PI VERSION: 10 (also suitable for PI 8/8.5/XL). LEVEL: Beginner MAIN TOOLS USED: Outline Drawing Tool, Path Drawing Tool, Transform tools/Rotate & flip and Rotate by degree, EasyPalette, Effect/Facet, Photo/Sharpen, Retouch Tools/Sharpen, Object Paint Eraser, Stamp Tool. OPTIONAL DOWNLOADS: White Sparkle Star Stamp TERMS OF USE: Please Read - Thank You! |
|
INSTRUCTIONS |
|
|
TOOL ICONS FOR BEGINNERS
|
|
|
|
THE HEART 1. Open a new canvas - with a black or dark background, 320W x 300H pixels 2. Using the Outline Drawing Tool, Custom Shape - Heart: Mode - 3D Chisel: Path Panel Outline tab/Width - 9: Depth - 30: draw a shape 185W x 135H pixels. 3. Open the EasyPalette/Material Attribute Gallery/ Metallic and fill the shape with preset Silver 2.
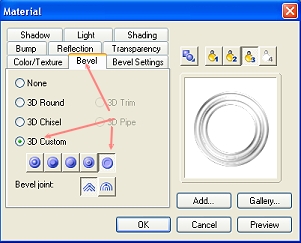
4. Right Click/Duplicate this shape and then fit the two shapes together as shown. 5. Select the upper heart, click on Material/Bevel tab on the Attribute Tool bar and apply the Custom bevel shown opposite.
Your hearts should now look like the illustration left.
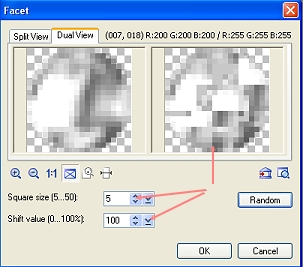
6. Using the Path Drawing Tool, Shape - Circle: Mode - 3D Round: Path Panel/3D tab Width - 6: Depth - 30: draw a shape 20W x 20H pixels. 7. Open the EasyPalette/Material Attribute Gallery/ Metallic and fill the shape with preset Silver 1. 8. Click Effect/Distort/Facet and click on the Options tab. 9. Change the Square Size to 5 and the Shift Value to 100. 10. Now click on the Random button until you have a good distribution of light and shade on the shape in the right-hand preview pane - ideally there should be a couple of very dark patches and also of very bright, white patches (see left). Click OK.
11. Reduce the size of this object so that it fits on top heart and then click on Photo/Sharpen - accept the default setting and OK.
12. Right Click/Duplicate (or Shift + D) this piece and put in place - as many times as it takes to fill the whole of the heart. 13. Right Click/Select All Objects - Right Click/Merge As Single Object.
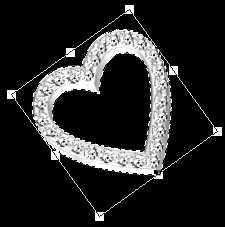
14. Use the Transform Tools/Rotate by degree to rotate the object through 36 o to the left.
15. Use the Retouch Tools/Sharpen to sharpen the gemstones a little. |
|
|
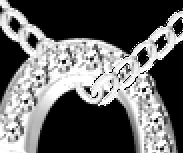
CHAIN AND SPARKLES 16. Use the Outline Drawing Tool, Shape - Ellipse: Mode - 3D Round: Path Panel/3D/ Width -2: Depth-30: draw a small link for your chain. Fill this with Silver preset 2.
17. Use the Transform Tools/Rotate by degree to rotate this link through 36 o to the left. Drag this link to a new canvas.
18. Save this ufo object to the Stamps folder, inside PI, on your hard drive.
19. Select the Stamp Tool - on the settings shown left - and then stamp a line to the heart as shown opposite.
20. Right Click/Duplicate this chain and then use the Transform Tools/Rotate & flip to flip the shape Horizontally and put in place as shown.
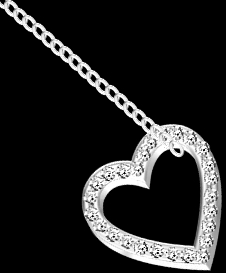
21. Select the left-hand chain and use the Object Paint Eraser to erase that part of the chain that lies directly over the heart. 22. Select the right-hand chain and use the Object Paint Eraser to erase a small part of the bottom link where it lies directly on top of the other chain - so it looks linked to the chain beneath.
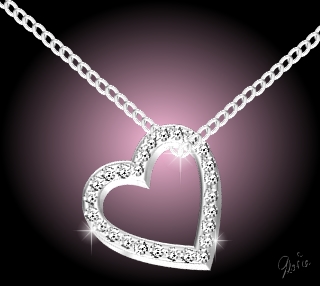
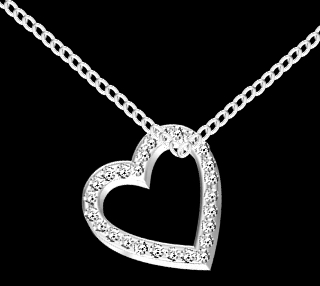
23. Now all that remains is to add a few 'sparkles' to your necklace. If you have a sparkle stamp you may use this but if not you can download the one provided above and save this to your Stamps folder inside PI on your hard drive. I have also added a circular gradient to the background. There is your necklace - all ready to wear or give as a gift to your lady love! |
 |
|
|
Free Spirit Graphics If you would then like an invitation to join, please Email Me. We'd love to have you along! |
|
|
If you need any help - or want to make suggestions to improve this tutorial - or for new ones |
|
 - Outline Drawing Tool
 - Easy Palette


This site © Rosie Hardman-Ixer 2001/2/3/4/5 |