
THE PI7 DREAMCATCHER PI VERSION: 7. LEVEL: Beginner MAIN TOOLS USED: Path & Outline Drawing Tools, Transform Tools ( especially Copy & Rotate), Paint Tools, EasyPalette. OPTIONAL DOWNLOADS: TERMS OF USE: Please Read - Thank You! |
|
INSTRUCTIONS |
|
|
|
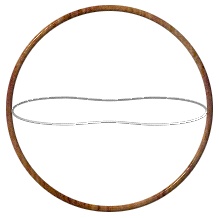
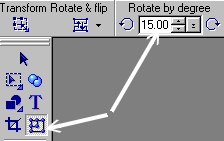
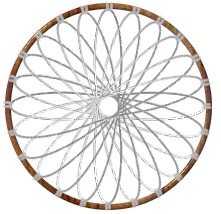
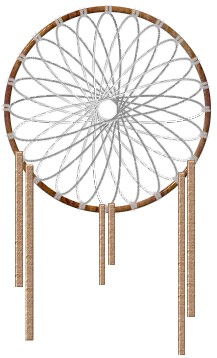
RING & WEB 1. Open a new canvas, 250W x 400H pixels. 2. Using the Outline Drawing Tool - Shape-Circle: Mode-3D Round: Border-3: Depth-30: - Draw a circle approximately 200W x 200H pixels. 3. Fill this with a preset of your choice. I am using a Wood Preset - Vertical 6 by Fr. Michael (hosted by the PIRC, these are available Here. Click on Cool Stuff #3 - Free Presets on the right-hand side). If you use these presets you will need to reset the Border to 3 after applying the preset. 4. Now using the Path Drawing Tool - Shape-Joined Circles: Colour-Grey: Mode-3d Pipe: Border-1: - draw a shape for the first piece of the webbing and then use the Transform Tools/Resize to stretch and squash this shape until it fits exactly inside your ring as shown in the first illustration. 5. Now using the Paint Tools/Paintbrush - Colour-grey: Size-3: Click on the Mode button (to go into Paint as Object mode) and draw two small binding lines at the end of the webbing piece on either side of the circle as shown. Click on the Pick Tool - and choose 'Yes' when the box pops up asking if you want to continue. Keeping the little paint objects you just created selected, hold down the Control key and select the webbing piece as well. Right Click/Merge as Single Object. 6. Keeping this piece selected, click on the Transform Tool and change the number in the Rotate by Degree box to 15 degrees. 7. Now click on the Copy & Rotate Tool a total of 11 times. That's your web done! You will probably find that you have to move the ring slightly to make it fit the webbing you just created. 8. Right Click/Select All Objects. Right Click/Merge as Single Object. |
|
|
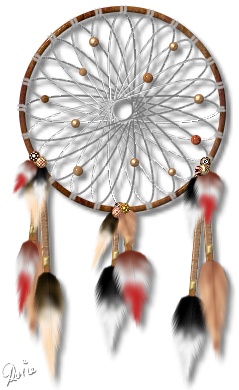
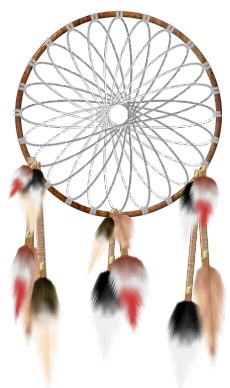
DECORATING YOUR DREAMCATCHER I have provided some feathers and beads in a download (see above) but you may have a collection of feathers you prefer to use. Precious objects, stones and arrowheads etc were also fastened into dreamcatchers and you might like to put some of your own precious objects into your dreamcatcher? 9. Using the Path Tools - Shape-Rectangle: Mode-3D Round: Border-2: Depth-30: Draw some 'leather' strips to hold your decoration as shown (make them about 8 pixels wide if you are using my trims) and fill these with a suitable preset. ( I have chosen NT10 from the Fill Gallery in the EasyPalette). Don't worry about making these symmetrical - they rarely were in real life and you want to create something that looks authentic and has character! 10. If you are going to use my feathers, it might be a good idea to Right Click/Duplicate the feathers now as you are going to need more than one copy of each one. Add a feather trim to a strip and then, selecting both the trim and strip, Right Click/Merge As Single Object. You can leave the trims hanging straight or use the Transform Tools/Rotate Freely to turn the strip to a more interesting angle as I have done here.
11. Repeat with all the strips/feather trims. 12. Use the Transform Tools/Resize to reduce the size of some feathers and then add these where the strips join onto the ring.
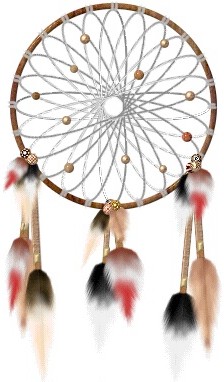
13. Now add some bead trims to the point where the strips meet the circle - you can use my bead trims or make your own using the Path Tools. You can add some beads to the leather strips too if you wish. Using the Path Tools - Shape-Circle: Mode-3D: draw some little beads to go into the webbing and colour these using any preset you prefer from the EasyPalette. Again I have used the Wood Presets from Part 3 of this tutorial and some metallic ones.
14. Once you have completed decorating your dreamcatcher, Right Click/Select All Objects then Right Click/Merge as Single Object. |
|
|
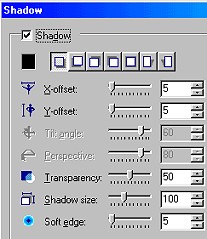
THE FINISHING TOUCHES 15. OK - now let's make that dreamcatcher jump right out of the page at you! Right Click/Shadow. Change the settings to those shown opposite. Check Shadow Box
|
 |
|
|
Free Spirit Graphics If you would then like an invitation to join, please Email Me. We'd love to have you along! |
|
|
If you need any help - or want to make suggestions to improve this tutorial - or for new ones |
|
This site © Rosie Hardman-Ixer 2001/2/3 |