
PATCHWORK HEART CUSHION (Pillow) PI VERSION: 8. LEVEL: Beginner MAIN TOOLS USED: TERMS OF USE: Please Read - Thank You! |
|
INSTRUCTIONS |
|
|
|
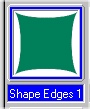
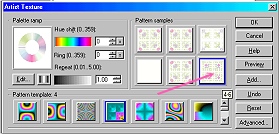
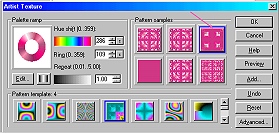
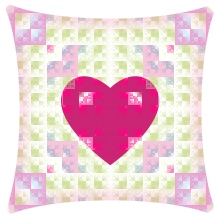
THE MAIN CUSHION PIECE 1. Open a new, white canvas, 400 & 400H pixels. 2. Using the Path Drawing Tool, Custom Shape - Shape Edges 1: Color - Any: Mode - 2D: draw a shape 225W x 225H pixels. 3. Now click on Effect/Material Effect/Artist Texture (In PI 10 this is now Effect/Fills & Textures/Kaleidoscope Fill).
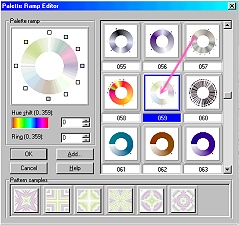
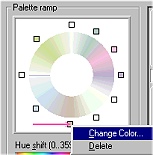
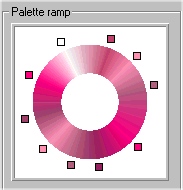
4. Click on the Edit button under Palette Ramp - to open the Palette Ramp Editor (see left).
5. Click on colour 059.
6. Now Right Click on the little brown square at the bottom of the Palette Ramp circle and then click on Change Color.
Change the colour to a bright pink and OK.
7. (Optional) If you wish to keep this colour palette for future use click on the Add button, give the palette a name and OK to return to the Artist Texture box.
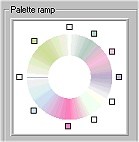
8. (If you have been using the Artist Texture box before - click on the Reset button before you do this next bit - to clear any previous settings). Click on Template 12 and then on Template 4.
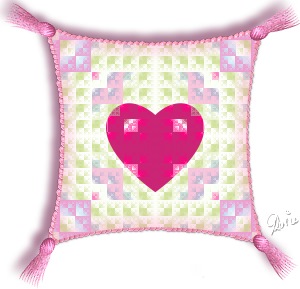
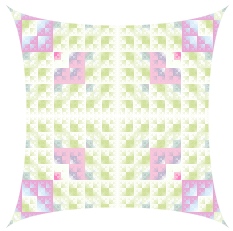
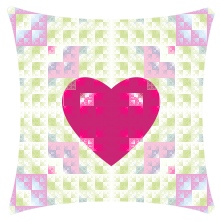
9. Now click on Pattern Sample 4 - 6 (arrowed left) and OK. NOTE: You should see the 4 - 1 to 4 -6 labels come up when you move your cursor over the pattern samples) Your cushion should now look like the one opposite. NOTE: You can experiment with other colours from the Palette Ramp Editor if you wish. Invent your own combinations of colours in the Palette Ramp and save them for future use. Try different combinations of Pattern Templates to obtain different patterns for your pillow (but for a patchwork look a combination of 12 + 4 or 12 + 14 seems to give the best results). |
|
|
THE HEART 11. Using the Path Drawing Tool, Custom Shape - Heart: Color - any: Mode - 2D: draw a heart 100W x 90H pixels. 12. Click on Effect/Material Effect/Artist Texture again. 13. Click on the Edit button under Palette Ramp and this time click on colour 06. 14. Using the same method as above, change some of the darker colours to a brighter red, white or pink (my suggestions can be seen in the illustration opposite) and OK. 15. Now click on Pattern Sample 4 - 3 and OK.
16. Put the Heart in place on your cushion.
17. Shift/Click to select both pieces of your cushion and then Right Click/Merge as Single Object.
18. Now use the Object Paint Eraser to take off the sharp points from the corners of your cushion.
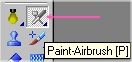
19. Select the Paint Tools/Airbrush - Size 35, Color - pink (Hex #FE80BF): Trans - 0: Soft Edge - 35: and then click on Effect/Creative/Paint on Edges (or Shift + P) TWICE.
That's the main part of the cushion finished - now all we need is to trim the edges and add the tassles! |
|
|
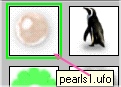
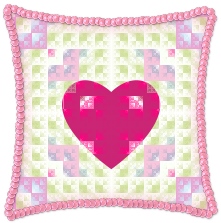
CORD EDGE 20. Using the Stamp Tool, select the pearl1.ufo stamp on the settings shown opposite. Trans - 0 Scale - 35 Spacing - 25 Order - Random Placement - Trail Object - Single object 21. Click on Effect/Creative/Paint on Edges (or Shift + P). 22. Click somewhere in the white area of your canvas to deselect your objects and then reselect just the cord edging. 23.
Click on Format/Color Balance (PI 10 - Photo/Color Balance) and click on the bottom right square three times and the middle right square once to colour your edging a deep pink. 24. Right Click/Arrange/Send to Back and make sure your cushion is positioned correctly with the edging. I found that I had to use the Object Paint Eraser a little more at the corners at this point - to show the edging more effectively. |
|
|
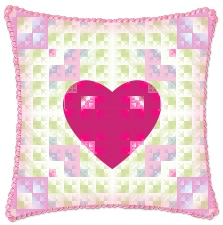
THE TASSLES 25. Using the Path Drawing Tool, Custom Shape - Vertical Waves: Color - pink (Hex #F94689): Mode - 3D Round: Border - 14: Depth - 8: draw a shape 70W x 40H pixels. 26. Click on Material/Shading and change this to Metallic/Silver. Click on the Lighting tab and change the number of lights to 3 and OK. 26. Use the Transform Tools/Resize to narrow the shape to 25. 27. Now use the Transform Tools/Perspective to narrow the top of the tassle. 28. Right Click/Duplicate this shape and layer on top of the previous piece. 29. Using the Path Drawing Tools, Shape -Ellipse: Color - same: Mode - 3D Round: Border & Depth - the Maximum setting possible (if necessary go into the Material box/Border/Depth tab and check the 'Smooth Spine' box to get a higher setting): draw a small ellipse 13W x 19H for the top of the tassle and put in place. 30. Open the EasyPalette/Material Attribute Gallery/Bump and apply bump no M15 to the Ellipse. Close the EasyPalette. 31. Shift/Click to select the three pieces of your tassle and Right Click/Merge as Single Object. 32. Right Click/Duplicate (or Shift + D) the tassle 3 times and put in place at the corners of your cushion, using the Transform Tools/Rotate freely - to rotate the tassles to the required angles. 33. Once you have all parts of your cushion in place, Right Click/Select All Objects, then Right Click/Merge As Single Object. |
|
|
...and there's your finished cushion, |
 |
|
|
Free Spirit Graphics If you would then like an invitation to join, please Email Me. We'd love to have you along! |
|
|
If you need any help - or want to make suggestions to improve this tutorial - or for new ones |
|


This site © Rosie Hardman-Ixer 2001/2/3 |