
'CRYSTAL FLOWER' PIN PI VERSION: 6/7. LEVEL: Beginners MAIN TOOLS USED: Path Tools: EasyPalette/Wrap Gallery: Transform tools: Object Paint Eraser TERMS OF USE: Please Read - Thank You! |
 |
INSTRUCTIONS |
|
|
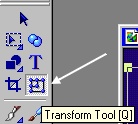
IMPORTANT NOTE - PLEASE READ! When drawing shapes which are later to be used in the Wrap Galleries it is essential that these shapes are drawn to size - i.e. you draw them to the size specified with the Path Drawing Tool. Drawing them approximately to size and then using the Transform Tools to resize them is NOT the same thing and the Wrap Galleries will not work properly if you do this. You will end up with a tiny little shape that does not look like the one in the tutorial. If, for any reason, you cannot draw the shape to size using the numbers at the bottom left of the PI workspace for reference (inexperience with the mouse, shaking hands etc), and HAVE to use other tools to correct the size of your path shape - then you will need to Right Click/Convert Object Type/Reset Text/Path Object before you continue. |
|
|
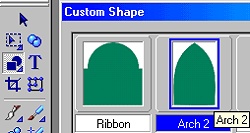
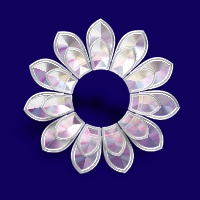
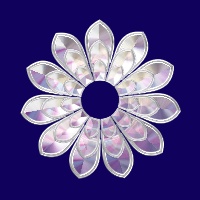
CREATING THE FIRST SHAPE 1. Open a new canvas - 200 x 200 pixels. The background can be any colour you like - but the pin looks best against fairly dark backgrounds. 2. Using the Path Tool - Custom Shape Arch 2 - Colour White - Draw a 2D shape 30W x 38H pixels. 3. In the Easy Palette/Wrap Gallery, click on Path Wrap 16. You should now have the 'flower' shape shown opposite. Right Click and Duplicate this shape. Move the duplicate to one side or drag to a separate canvas for the moment. |
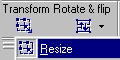
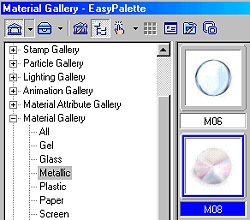  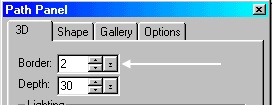 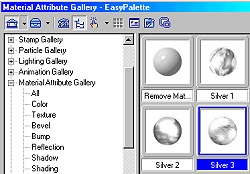  |
CREATING CRYSTAL 'PETALS' 4. Select the first shape again and in the Easy Palette/Material Gallery/Metallic - click on M08. NOTE: In PI6 this preset can be found under Material Gallery/3D Collection/Rainbow Glass. In the Path Panel -click on the Gallery Tab and uncheck the Shadow box. Voila! Crystals! 5. Drag the copy of the shape back on top of the crystals and change the Mode to 3D Pipe. Don't panic - I know it looks awful! all you have to do is change the Border in the Path Panel to 2 and it will look fine! 6. In the Easy Palette/Material Attribute Gallery, click on Silver 3. PI6 Users use Silver 2. 7. Right Click/Select All Objects> Right Click/Align/Centre Both. Right Click/Merge as Single Object. |
|
CREATING MORE 'PETALS' 8. Right Click/Duplicate the object. 9. Using the Transform Tool/Resize, reduce the size of the copy until it is approximately 120W x 120H pixels. 10. Right Click/Duplicate this object. Once again - using the Transform Tool, reduce the size of this copy until it is approximately 80W x 80H pixels. 11. Right Click/Select All Objects. Right click/Align/Centre Both. You should have a pin with three layers of crystals as shown opposite. |
|
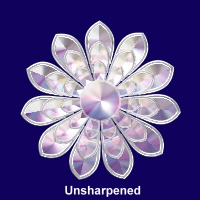
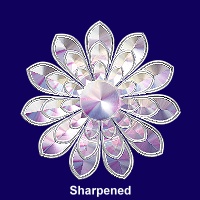
CENTRE STONE 12. Using the Path Tool - Shape-Circle, draw a circle to fill the centre hole in the pin. 13. In the Easy Palette/Material Gallery/Metallic - click on M08 again to fill this. In the Path Panel -click on the Gallery Tab and uncheck the Shadow box. 14. Right Click/Select All Objects. Right Click/Align/Centre Both. Right Click/Merge as Single Object. 15. If you wish to add a bit more 'shine' or definition to your pin you can click (on the Menu Bar) on Effect/Blur & Sharpen/Sharpen and click on the setting you prefer to sharpen the image. |
|
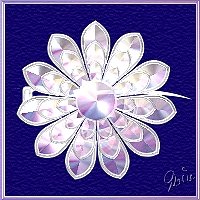
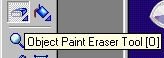
ADDING THE FASTENING PIN 16. Open a new canvas 200W x 30H - same colour background. 17. Using the Path Tool - Shape-Divider 1, draw the shape to fill as much of the width as possible. Use the Transform Tool/Resize to stretch this across the full width of the canvas. 18. In the Easy Palette/Material Attribute Gallery, click on Silver 3. 19. Right Click/Convert Object Type/From Text Path to Image. 20. Using the Object Paint Eraser Tool remove the lefthand side bit of the shape as shown. 21. Using the Path Tool - Shape-Rounded Rectangle, draw a small rectangle as shown. 22. Right Click/Select All Objects. Right Click/Merge as Single Object. 23. Move your fastener to the other canvas, put in place - then Right Click/Arrange/Send to Back. 24. Right Click/Select All Objects. Right Click/Merge All. 25. If you wish you can adjust the brightness (Click on Format/Brightness and Contrast) and sharpness (Click on Effect/Blur & Sharpen/Sharpen) before saving as I have done in the final picture (left) |
 |
|
|
Free Spirit Graphics If you would then like an invitation to join, please Email Me. We'd love to have you along! |
|
|
If you need any help - or want to make suggestions to improve this tutorial - or for new ones |
|
This site © Rosie Hardman-Ixer 2001/2/3 |