
CHRISTMAS PARTY CRACKER PI VERSION: 6/7. LEVEL: Beginner/Intemediate MAIN TOOLS USED: Path/Path Edit Tools: Paint Tools/Airbrush: Retouch Tools/Blur and Burn: EasyPalette OPTIONAL DOWNLOADS:The ufo for the decoration which you can download Here is made in PI6 so that it can be used in either program. TERMS OF USE: Please Read - Thank You! |
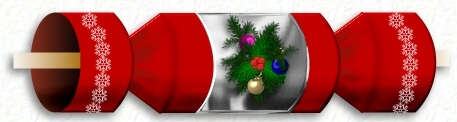 The Party Cracker has been a part of everyone's Christmas in England since Victorian times. The little card 'snap' makes a small bang when pulled apart by two people - hence the name. Inside there are usually three things, a small gift, a party hat made of paper and a joke (a very corny one!). It's customary that crackers are put by each person's place at the dinner table and/or smaller ones are hung on the tree as decorations. |
INSTRUCTIONS |
|
|
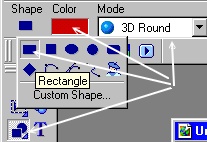
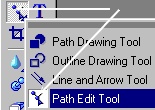
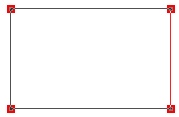
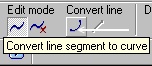
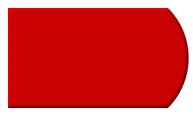
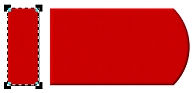
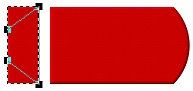
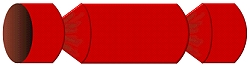
THE CRACKER - PART ONE 1. Open a new canvas 450W x 175H pixels. 2. Using the Path tool - Shape-Rectangle: Color-Red (though you can use any colour your wish - crackers come in silver, gold and patterned paper - not just plain colours!): Mode 3D: Border-3: Depth-30: draw a rectangle 160W x 100H. 3. Click on the Path Edit Tool - then on the rectangle. Move your mouse over the right-hand line until it turns into a pointing hand and click on it - it will turn red. 4. Click on Convert Line (Curved). 6. Click out Path Edit Mode and back into 3DRound. Your pic should now look like the one opposite. |
|
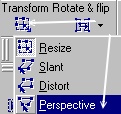
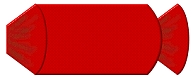
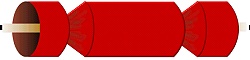
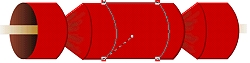
THE CRACKER - PART TWO 7. Using the Path tool - Shape-Rectangle: Color-Red: Mode 3D: Border-3: Depth-30: draw a rectangle 40W x 100H. 8. Using the Transform Tools/Perspective - drag the left hand side inwards to shorten it. 9. Using the same method as in Part One above - convert the right-hand line of this rectangle to a curve. Come out of Path Edit Mode and back into 3DMode. Convert this piece to an Image. (PI6 - click on Object - Convert Object Type/ Path/Text to Image. PI7 - Right Click and do the same). 10. Using the Paint Tool/Airbrush - Shape-round: Color-dark brown: Trans-0: Soft edge-50: draw some lines on the piece as shown. 11. Right Click/Duplicate this piece and move it to the right hand side of the cracker. Right Click/Arrange Send to Back. 12. Put these two pieces in place on the cracker as shown opposite. |
|
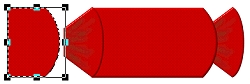
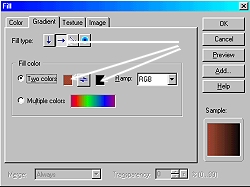
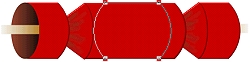
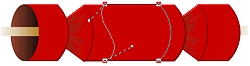
THE CRACKER - PART THREE 13. Using the Path tool - Shape-Rectangle: Color-Red: Mode 3D: Border-3: Depth-30: draw a rectangle 55W x 100H. 14. Using the same method as in Part One above - convert the right-hand line of this rectangle to a curve. 15. Right Click/Duplicate this piece. Move it to the right hand side of the cracker. Right Click/Arrange Send to Back. Put the two end pieces in place as shown. 16. Using the Path Tool - Shape-Ellipse: Mode 2D: - draw a ellipse 50W x 100H and fill with the colours shown opposite with a left-right fill. (Click on Edit/Fill/Gradient). Put this in place on the left hand end.
17. To make the 'snap' - draw a small rectangle - Mode 2D. Fill this with the gradient opposite. Right Click/Duplicate this piece and move it to the right hand side of the cracker. Reverse the colors in the fill. Right Click/Arrange Send to Back.
18. Put the two 'snaps' in place as shown. |
|
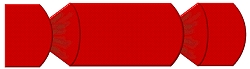
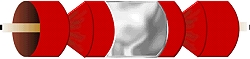
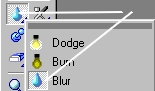
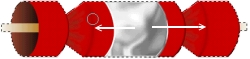
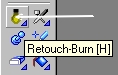
THE CRACKER - PART FOUR - FOIL BAND 19. Using the Path tool - Shape-Rectangle: Color-Grey: Mode 3D: Border-3: Depth-30: draw a rectangle 95W x 100H. 20. Using the same method as in Part One above - convert the right-hand line of this rectangle to a curve. 21. Now click on the left line and convert that to a curve as well. Your pic should now look like the one on the top left of this section. 22. Click on the bottom handle and drag it to the position shown. 23. Drag top handle up into the square at the top of the line. 24. By clicking on the various squares on the right hand line and the bottom of the left line, you can now adjust the curves of the wrapper until they match those of the cracker. (See left) Once you have done this, click out of Path Edit mode. 25. In the Easy Palette Click on the Material Gallery (PI6) or Material Attribute Gallery (PI7)/Metallic/Silver 1to fill your band with silver. 26. Right Click/Select All Objects/Merge as Single Object. 27. Using the Retouch Tools/Blur - on the default settings - run this tool over the curving lines shown to soften them. 28. Using the Retouch Tools/Burn - on the default settings - run this tool along the bottom of the whole cracker to shade it. Your cracker is now finished apart from the decoration! |
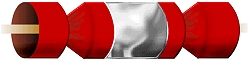
 (Shown at much reduced size - actual size of graphic is at the top of the page) |
DECORATING YOUR CRACKER It is up to you how your decorate your cracker. You can use the ufo (made in PI6 so it will be suitable for BOTH programs - see top of page) which has a number of items you can use to make up a decoration for the front of the cracker. The bauble can be ungrouped, duplicated and recoloured if you wish. |
 |
|
|
Free Spirit Graphics If you would then like an invitation to join, please Email Me. We'd love to have you along! |
|
|
If you need any help - or want to make suggestions to improve this tutorial - or for new ones |
|
This site © Rosie Hardman-Ixer 2001/2/3 |