
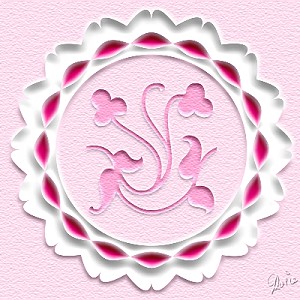
PAPERCUT-LOOK FRAME PI VERSION: 6/7. LEVEL: Beginner MAIN TOOLS USED: Path Drawing Tool, Path Edit, Continue Draw, EasyPalette/Type Gallery/Imprint, Object Paint Eraser, Texturizer Filter (Optional), a fancy font (Optional). NOTE: Illustration opposite shown at 75% of true, finished size. TERMS OF USE: Please Read - Thank You! |
|
INSTRUCTIONS |
|
|
|
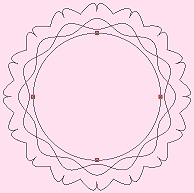
THE FIRST PIECE OF THE FRAME.
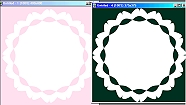
1. Open new canvas, 400W x 400H pixels with a pastel-coloured background of your choice. I am using a pale pink - Hex #FFDFEF. 2. Using the Path Drawing Tool, Custom Shape - Circular 7: Colour - White: Mode - 2D: draw a shape as large as possible on the canvas. 3. Right Click/Duplicate this shape and change its colour to black. 4. Move the black shape to a new canvas and Right Click/Merge. 5. Click on Format/Invert. You should now have two canvasses as shown in the 2nd illustration opposite. 6. Using the original canvas - select the shape and change the Mode to Continue Draw. 7. Draw a circle which will fit inside the centre of the shape as shown. Don't worry if it overlaps the other shape - you can use the Path Edit Tool to correct it. (Click on the Path Edit Tool and move the circle so that it is in the centre). 8. Click out of Continue Draw or Path Edit Mode and return to 2D Mode.
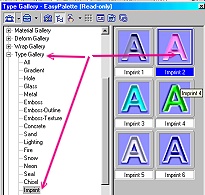
9. Keeping the shape selected, open the EasyPalette/Type Gallery/Imprint. Using Imprint 2 - Right Click/Modify Properties and Apply.
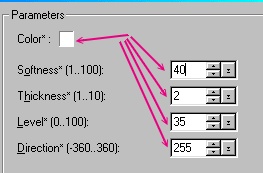
10. In the Type Effect box - use the settings below/on illustration. Color - White Softness - 40 Thickness - 2 Level - 35 Direction - 255
|
|
|
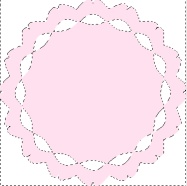
THE SECOND PIECE 11. Using the Black and White canvas, click on Edit/Trace. Accept the defaults and OK. 12. Change the Mode to 2D. 13. Drag the resulting shape to a new canvas. (Should be a white shape on a coloured background again). (You can close the 2nd canvas now). 14. Repeat steps 8 and 9 above but using a deep pink for the color. This should give the result opposite - or similar depending on your chosen colours. 15. Now use the Object Paint Eraser to remove ALL the dark pink except for the inner 'ribbon' circle. 16. Drag the ribbon to the original canvas. Place in position. Right Click/Send to Back. NOTE: Sometimes this piece looks equally nice left at the front - experiment and see which you prefer! 17. Select the two pieces of your frame and Right Click/Merge As Single Object. In Part 3 I will suggest a simple idea for the centre in case you want to make something new for your frame... |
|
|
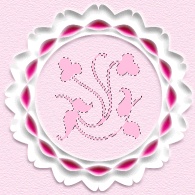
A CENTREPIECE 18. First of all I have applied a texture to the background using the Texturiser Filter (sadly I cannot offer this as a download from this site as it is copyright Adobe). 19. Next I have taken a font called Borderbats Fleur (using 's' - font size 175) and made a large shape for the centre. 20. Now I have applied steps 8 and 9 above once more - this time using a slightly darker tint of the same pink as the background colour. 21. Finally I applied the same texture as I did to the background.
Enjoy! |
|
|
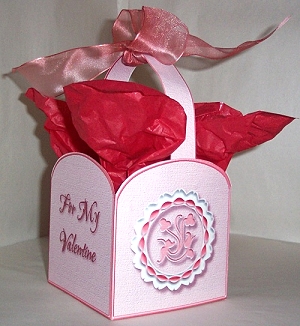
GAYLE'S PRINTED VALENTINE GIFT BOX A super little printed box using the tutorial by Thanks for this Gayle! |
 |
|
|
Free Spirit Graphics If you would then like an invitation to join, please Email Me. We'd love to have you along! |
|
|
If you need any help - or want to make suggestions to improve this tutorial - or for new ones |
|


This site © Rosie Hardman-Ixer 2001/2/3 |