
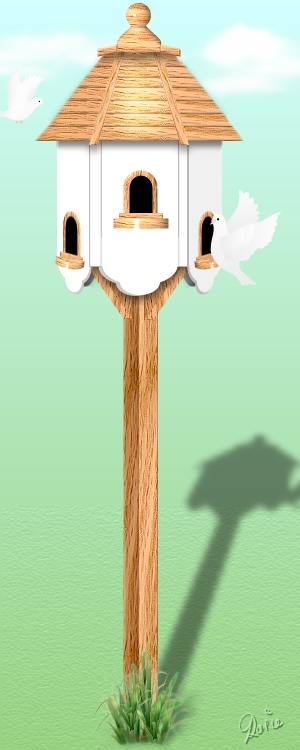
THE DOVECOTE PI VERSION: 12 (also suitable for earlier versions of PI, though some tool names may have changed). LEVEL: Beginner MAIN TOOLS USED: Path Drawing Tool, Transform Tools (Resize, Slant, Rotate & Flip, Rotate by Degree), Object Paint Eraser, Retouch Tools/Dodge, EasyPalette(presets), Photo/Light/Brightness & Contrast, Stamp Tool (Optional). OPTIONAL DOWNLOADS: My Grasses Stamp/UFO from my site at Rosie Hardman.com and my Wood Selection 6 Presets at the same site here TERMS OF USE: Please Read - Thank You! |
|
|
|
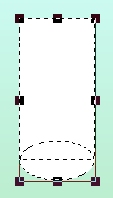
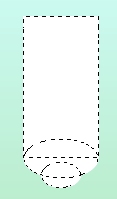
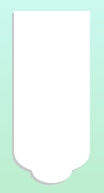
THE BODY OF THE DOVECOTE 1. In PhotoImpact, open a new canvas 300 x 750 pixels and fill this with a pale colour of your choice - I am using a two colour Gradient, top to bottom fill from pale blue Hex#D2FFFF to pale grass green Hex#97D181. 2. Using the Path Tools, Color - white: Shape - Rectangle: Mode - 2D: draw a shape 75 x 140 pixels. 3. Using the Ellipse shape, now draw a circle 75 x 40 pixels put this in place over the rectangle as shown.
4. Now draw another ellipse 40 x 25 pixels and put this in place as shown. Select all 3 objects and then Right Click/Align/Center Horizontally. 5. Right Click/Merge As Single Object.
6. Right Click/Duplicate this shape and then Fill the shape with a pale grey Hex#C8C8C8. Right Click/Arrange/Send to Back. 7. Slightly offset the grey shape as shown. Duplicate the two shapes and drag the copy to a separate canvas for the time being.
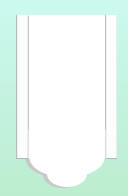
8. Going back to the Rectangle Shape now, change the Mode to 3D Round, and draw a shape 12 x 143 pixels (Width 2: Depth 30). 9. Doesn't look very white does it? So open up the Material Box/Light and add a second light & OK. That's better! 10. Duplicate this object and put both pieces in place as shown. 11. Put the two shapes in place as shown left.
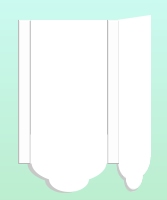
12. Now drag the copy of the white and grey shapes back to the main canvas. 13. Move the grey shape a little more to the left, then select both shapes & Right Click/Merge As Single Object. 14. Right Click/Arrange/Send to Back. Put in place as shown.
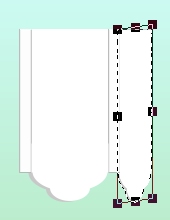
15. Using the Transform Tools/Resize, lessen the Width to 35 pixels and then use the Transform Tools/Slant to slant the object by using the cursor on the right, centre node.
Your picture should now look like the one opposite.
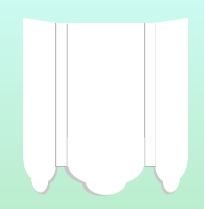
16. Right Click/Duplicate this object and then use the Transform Tools/Rotate & Flip to flip the shape Horizontally. 17. Right Click/Arrange/Send to Back. Put in place as shown.
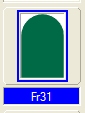
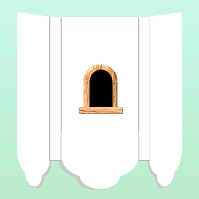
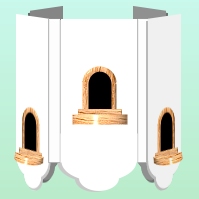
18. Using the Custom Shape - Arch Fr31 (see left): Color - any Wood preset of your choice (I am using 'elm' preset from my Wood Selection 6 Presets at my main site) : Mode 3D Round: draw a shape 33 x 45 pixels (Width 3: Depth 30). 19. This bit is up to you - but I feel for these arches the grain of the wood should (like the post eventually) be Vertical - so if the grain on your chosen wood is NOT Vertical, open the Material Box/Color - click on the Option button and check the 90o button and OK. OK again. 20. Using the same Shape but Color - Black: Mode 2D: draw another shape 23 x 39 pixels. 21. Using the Rectangle Shape: the wood preset (this time with a Horizontal grain: Mode 3D Round: draw a small shape 45 x 7 pixels (Width 2: Depth 30) and put the 3 shapes in place as shown.
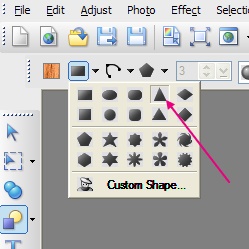
22. Now for the perch.... Change the Mode to 3D TRIM and draw a shape 10 x 54 pixels (Width & Depth should be set to the Maximum possible). 23. Using the Transform Tools/Rotate & flip - flip the shape 90o to the right and OK. (Incidentally we did it this way in order to turn the 'trim' (the shading) to Vertical for lighting, in case you wondered! If we had made it 54 x 10 originally, the shading would have been horizontal - which is wrong for this piece). 24. You may need to adjust the light for this piece (using the lightbulb facility in the path panel) if you want a brighter light on the shape (see left). 25. Put in place as shown.
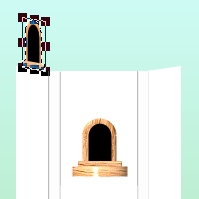
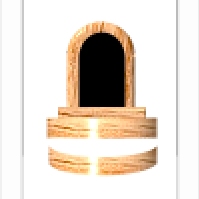
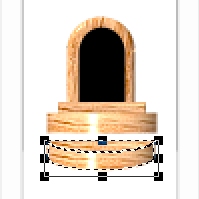
26. Select the two arches and the small rectangle below them and Right Click/Duplicate these. 27. Right Click/Merge As Single Object. 28. Using the Transform Tools/Resize, lessen the Width to approximately 25 pixels and then use the Transform Tools/Slant to slant the object by using the cursor on the left centre node. Try to keep the angle the same as the top of the white section. If in doubt move the object to the top of the white side and use Slant to make it the same angle as shown. 29. Move the door down to the correct place on the dovecote - see left. 30. Now select the 3D Trim shape under the front door which will automatically select the 3D Trim mode and preset for you. The next part is very small - so I am showing you it in close up - and I suggest you Zoom up to 200 - 300% in order to see what you are doing more easily. 31. Using Custom Shape S46 (previously known as Plaque 5 - see left): draw a shape 54 x 17 pixels. 32. Use the Transform Tools/Rotate & Flip to flip the shape Vertically. 33. You will note that the 'trim' (the shading direction) is horizontal on this shape if you try to use the light-bulb feature. We want it Vertical to match the other perch. In order to achieve this - use the Transform Tools/Rotate & Flip to rotate the Object 90o to the right. Now Right Click/Convert Object Type/Reset Text/Path Object. Now rotate the shape back 90o to the left. Your curved perch should now look like the one on the left. 34. I have adjusted the lighting on my curved perch - but it's up to you whether you do this or not.
35. Using Custom Shape B46 (see left): Mode - 3D Trim: draw a shape 54 x 6 pixels then use the Transform Tools/Rotate & Flip to flip the object Vertically. 36. These two objects should now fit together as shown. Select them both and Right Click/Merge As Single Object.
37. Use the Transform Tools/Resize to reduce the size of the object to 30 x 11 pixels and put in place as shown left.
38. Use the Rotate by Degree Tool to Rotate the shape 5o to the right and put in place as shown. This doesn't give perfect perspective but this piece is so small that we can get away with it here LOL!
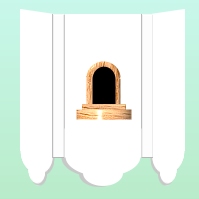
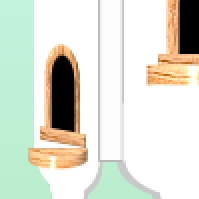
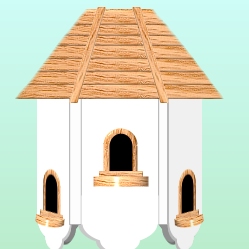
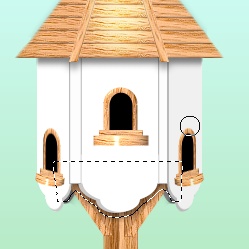
39. Now select the door and perch parts from the left-hand side of the dovecote and Right Click/Duplicate them. 40. Use the Transform Tools/Rotate & Flip to flip the Duplicate Horizontally and put in place on the right-hand side of the dovecote. Your picture should now look like the one opposite.
41. Now Select the right-hand white side-section of your dovecot. Right Click/Duplicate it.
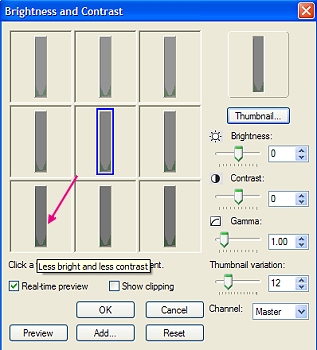
42. Click on Photo/Light/Brightness & Contrast and click on the bottom, left square 5 times to darken the shape (see left).
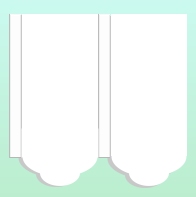
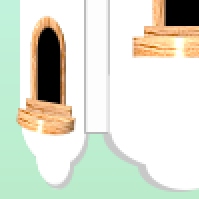
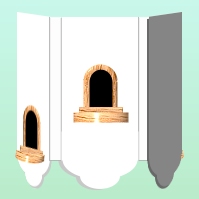
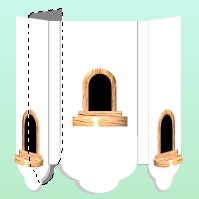
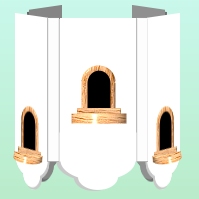
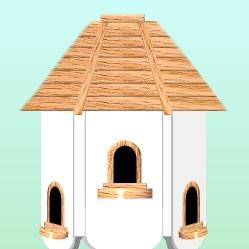
43. Right Click/Arrange/Send to Back. Move it over to the left-hand side of the dovecote and put in place as shown.
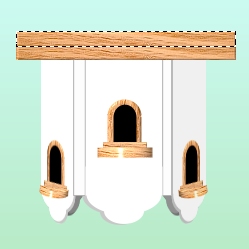
44. Now Duplicate the left-hand white side-section. Right Click/Duplicate it. 45. Click on Photo/Light/Brightness & Contrast and click on the bottom, left square 5 times to darken the shape (see left). 46. Right Click/Arrange/Send to Back and put in place as shown. 47. Select the white, right-hand side of the dovecote and the door/perch assembly on that side and Right Click/Merge As Single Object. 48. Click on Photo/Light/Brightness & Contrast and click on the bottom, centre square once to darken it (see left). All these little touches help to give more dimension and reality to your project. |
|
|
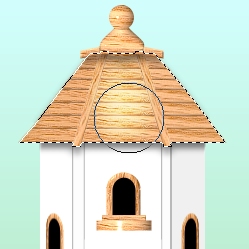
THE DOVECOTE ROOF 49. OK - this looks complicated but I'll show you how to get a good effect by using a fairly simply method ;-) First of all - make sure that you have your woodgrain selected as your Color - and that the grain is Horizontal. 50. Using the Rectangle Shape, Mode - 3D Round: draw a Rectangle approximately 220 x 15 pixels (Width 3: Depth 30). 51. Right Click/Duplicate this shape and layer it on top of the first one at the TOP - see left.
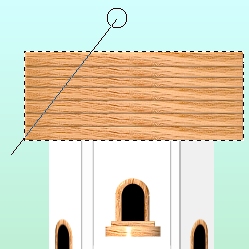
52. Repeat this five more times (7 layers in all) - see left. 53. Select all 7 layers and Right Click/Merge As Single Object.
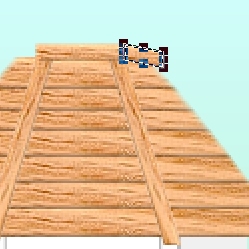
54. Now use the Object Paint Eraser (Default settings but on Straight Lines) to take off the left hand excess. The line of the first 'cut' is shown left. 55. Now do the same on the right - making sure that the angle matches the first side! 56. Make sure that your roof section is central on the dovecote, repositioning if necessary.
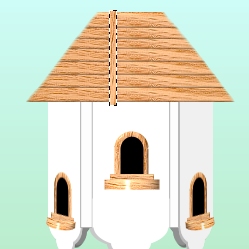
57. Using the Rectangle Shape again, draw a shape as shown (mine is 8 x 96 pixels but this may vary slightly). This time ensure that the grain is Vertical by changing in the Material Box as in Instruction 19. 58. Right Click/Convert Object Type/From Text/Path to Image.
59. Now use the Transform Tools/Slant on one of the bottom nodes to slant the shape to the left as shown.
60. Right Click/Duplicate this piece then use the Transform Tools/Rotate & Flip to flip the shape Horizontally. Put in place on the right (see illustration left). Select these three parts of the roof and Right Click/Merge As Single Object.
61. Now draw a small rectangle to fit across the top of the two vertical lines that you just drew. It should be approximately 4 pixels in height (Width 2: Depth 30).
62. Duplicate this rectangle but reduce the Width to just 20 pixels. Now use the Transform Tools/Slant again on a right-hand node to Slant the shape downwards as shown in close-up left.
63. Right Click/Duplicate this slanted shape. Use the Transform Tools/Rotate & Flip to flip the Duplicate Horizontally and put in place on the left-hand side (see left).
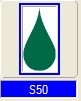
64. Using the Custom Shape S50 (droplet - left): Mode - 3D Round: draw a shape approximately 45 x 40 pixels (Width 7: Depth 30). Right Click/Arrange/Send to Back and then put in place as shown.
65. Using the Circle Shape: Mode 3D Round: draw a shape 24 x 24 pixels and put this in place at the top of your roof as shown in the final 2 pictures in this section.
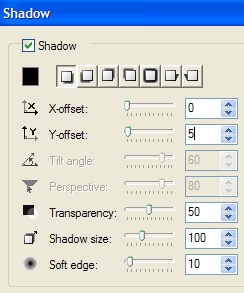
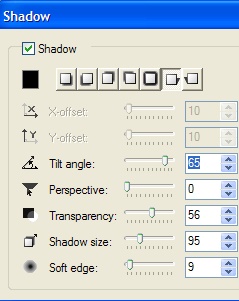
66. Now select the last five shapes that you made and Right Click/Merge As Single Object. Right Click/Shadow - and add a drop-shadow to them, using the settings shown left and OK. 67. Right Click/Split Shadow. Select the shadow ONLY (use the Layer Manager if you find this difficult to select). Change your Object Paint Eraser back from Straight Lines to Freehand and use it to take off all the excess shadow - i.e. anything that doesn't fall on the front of the roof. Again- see final 2 pictures in this section for the finished result. 68. Now select the main part of your roof and add the same shadow; split it again; then erase the excess - i.e. anything that does not fall on the main body of the dovecote.
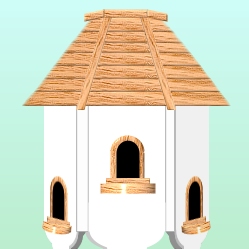
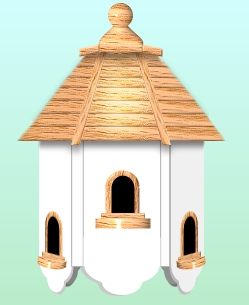
69. Finally, for this section, reselect the main part of the roof and, using the Retouch Tools/Dodge on the settings shown opposite, to add a bit of sunlight to the roof. You can now Merge ALL parts of your dovecote EXCEPT those two very dark shapes at the back.
|
|
|
THE POST AND FINISHING TOUCHES
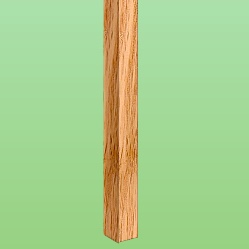
70. Using the Path Tools, Color - your wood preset with a Vertical grain: Shape - Rectangle: Mode - 3D Round: draw a shape 25 x 455 pixels (Width 1: Depth 30). 71. Duplicate this shape and then narrow the width of it to15 pixels. Click on Photo/Light/Brightness & Contrast and click on the bottom, centre square three times to darken it . Put in place to the left of the first rectangle as seen left.
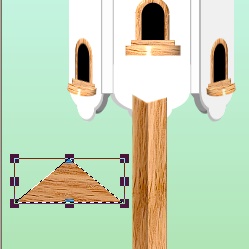
72. If you are not going to use the grasses stamp, you will now need to slant the bottom two edges of these shapes as shown left - by using the Transform Tools/Slant on the centre node of the outside edge of each shape. If you are going to use the grasses though - then of course this isn't needed. 73. Using the Triangle Shape shown opposite (same Color and Mode as the first post piece but with a Horizontal grain), draw a shape 110 x 46 pixels. 74. Click on Photo/Light/Brightness & Contrast and click on the bottom, centre square twice to darken it (see left).
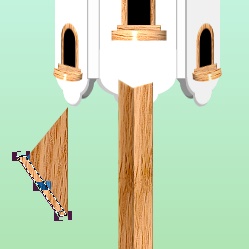
75. Use the Transform Tools/Rotate & Flip, to flip the shape 90o to the left. 76. Now draw a small rectangle (same Color and Mode as the first post piece), 9 x 60 pixels. 77. Use the Slant Tool on one of the top nodes to slant this to the left as shown, so that it lies along the left hand edge of the dark triangle. 78. Select both of these pieces and Right Click/Merge As Single Object.
79. Duplicate this object and use the Transform Tools/Rotate & Flip to flip the shape Horizontally.
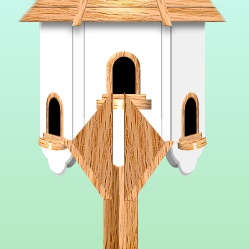
80. Put the two objects in position on the post as shown and then Merge them with the post.
81. Right Click/Arrange/Send Backward so that the post lies between the dovecote and those two dark shapes at the back.
82. Select the dovecote and apply the same Shadow that you use on the roof. 83. Right Click/Split Shadow and erase all the shadow that does not fall on the post, supports and underneath of the dovecote - the shape of my erased shadow can be seen left.
84. You can use your own stamps or objects to finish the picture or you can use my grasses stamp (URL at the top of this tutorial for download). You can put this in your Stamp folder in PhotoImpact on your hard drive - making it possible for you to scale the grasses to the right size with the Stamp Tool - or you can simple download the ufo and open it in PI and use the Resize Tool to make them smaller.
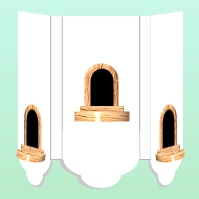
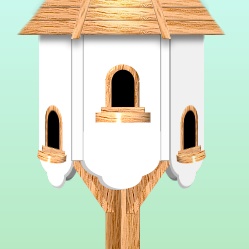
85. Finally - Merge All parts of your picture and add a shadow along the ground. I would suggest using the Shadow Settings shown opposite.
That is your dovecote finished! I hope you enjoyed drawing it!!!
Once you have finished your dovecote - if you Email Me your finished picture, I will send you the path kit for the little dove on my illustration, absolutely free - to use however you wish. :-) It looks like the picture opposite. |
 |
|
|
Free Spirit Graphics If you would then like an invitation to join, please Email Me. We'd love to have you along! |
|
|
If you need any help - or want to make suggestions to improve this tutorial - or for new ones |
|


This tutorial © Rosie Hardman-Ixer 2009 |