
COMPASS PI VERSION: 7/8/XL. LEVEL: Intermediate (some knowledge of basic tools is assumed) MAIN TOOLS USED: Path Tools, Transform Tools (esp. Copy Rotate), Object Paint Eraser, EasyPalette. Thank you to Debbie Hardisty and Wouter Démoet for their creative input - I learned things myself doing this one! TERMS OF USE: Please Read - Thank You! |
|
INSTRUCTIONS |
|
|
|
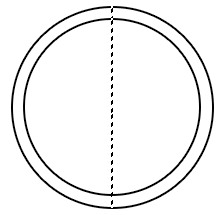
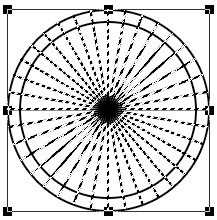
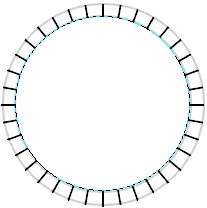
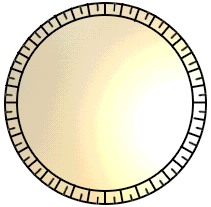
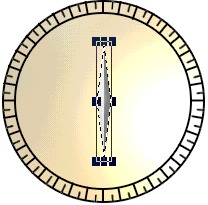
MAKING THE MEASURE This is actually the most time-consuming part of the whole compass, so we'll get it over and done with first! 1. Open a new canvas 300W x 400H pixels. 2. Using the Outline Drawing Tool, Colour-Black: Border-1: Mode-2D: draw a circle 200W x 200H pixels. 3. Now draw a second circle 175W x 175H pixels. 4. Right Click/Select All Objects. Right Click/Align/Center Both. Right Click/Merge as Single Object. 5. Deselect your circle. Using the Line and Arrow Tool, Colour-Black: Border-1: Mode-2D: draw a line from top to bottom of your circle (see illustration 1 opposite). 6. Keeping this line selected, go to the Transform Tools and change the setting in the Rotate by Degree box to 10.00 degrees. Now click on the Copy Rotate tool 17 times. 7. Select all the straight lines you just made (this is probably easiest in the Layer Manager) and Right Click/Merge as Single Object. DO NOT include the circles! YOU CAN USE THREE DIFFERENT METHODS FOR THE NEXT PART: METHOD 1 (Select in Mask Mode) (For PI7 users) 9. Using the Selection Tool, Shape-Circle: draw a circular selection 175W x 175H pixels and move this (using the mouse or the arrow keys on your keyboard) until it lines up with the inner circle. Now hit the Delete key. (Well - don't beat it up - you know what I mean!) Your pic should now look like the one opposite. Come out of Mask Mode. 10. Keeping the little lines selected, go to the Transform Tool and change the Rotate by Degree setting to 5%. 11. Click on Copy Rotate. 12. Keeping the duplicate lines selected, go back into Mask Mode again and once again using the Selection Tool, Shape-Circle: draw a circular selection 190W x 190H pixels. 13. Center this on your circle as before (using the mouse or the Arrow keys on your keyboard) and hit Delete again. Come out of Mask mode again - now your pic should look like the one opposite.
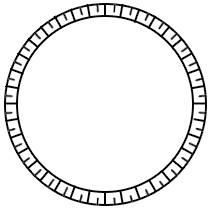
OR METHOD 2 (Select on Objects) (PI8/XL users) Keeping the lines selected, click on the Selection Tool, Shape - Circle: Check the 'Fixed size box and enter 175 in both boxes: Soft Edge - 0. Now click on the 'Select on objects' button and click on your object. Move the selection marquee with the Arrow keys on your keyboard until it lines up with the inner circle and then hit the Delete key. Right Click/None to get rid of the selection marquee. Now follow Instructions 10 - 12 but this time use a larger circle to create the shorter lines. OR METHOD 3 (Object Paint Eraser) (ANY VERSION) Use the Object Paint Eraser to erase the unwanted part of the lines - if you do this you will NOT need to go into Mask Mode. Erase the first set of lines as far as the inner circle, follow instructions 10 and 11and then in section 12/13 erase the duplicated set to a point between the two circles. AFTER EITHER METHOD: Right Click/Select All Objects. Right Click/Merge As Single Object. OK - that's it - the tricky bit is done! Wasn't too bad was it? |
|
|
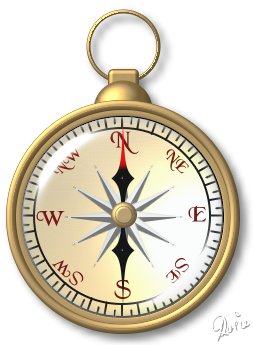
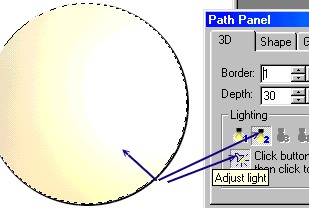
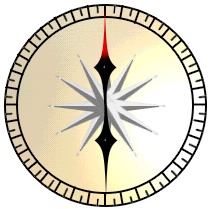
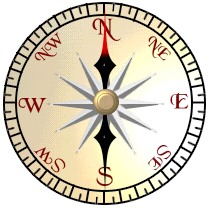
FINISHING THE COMPASS FACE 14. Using the Path Tool, Shape-Circle: Mode-3D: Border-1: draw a circle 200 pixels in diameter. Fill this with a colour or preset of your choice - I used Copper 2 from the Material Attribute Gallery/Metallic in the EasyPalette (PI7). 15. If you are using the same preset as me, in the Path Panel move the Light-bulb for Light 2 over the surface of the circle to get a nice shading. 16. Right Click/Arrange/Send to Back. Right Click/Select All Objects. Right Click/Merge as Single Object. 17. Using the Path Tools, Shape-Diamond, Colour-Light Grey: Mode-3D: Border-15: Depth-30: draw a shape approximately 120 pixels high. 18. Using the Transform Tool/Resize, narrow this to form the shape shown. Right Click/Convert Image Type/From Text/Path to Image. 19. Keeping this piece selected, change the degree in the Rotate by Degree box to 30%. 20. Click on Copy Rotate 5 times to make the central 'star'. Right Click/Select all Objects. Right Click/Merge as Single Object. 21. Using the Path Tools, Shape-A15: Colour-Black: Mode-3D: draw a shape and then use the Transform Tool/Resize to stretch and narrow this shape into a pointer. Right Click/Duplicate this shape and put both pointers in place as shown. (If you wish you can select the top pointer - Right Click/Convert Image Type/From Text/Path to Image - and then use the Paint Tools to paint the top of the pointer red). 22. Using the Path Tools, Shape-Circle: draw a small shape for the central boss and fill this with Copper 4 from the Material Attribute Gallery/Metallic in the EasyPalette. 23. Top this with a smaller circle still using the same preset. Shift/Click to select the pointers and central boss pieces and then Right Click/Merge As Single Object. 24. Using the Text Tool, add the Points of the Compass to your compass face. I used a dark red colour and a font called BD Merced. Tip: Use the Transform Tool/Rotate by Degree (set on 45 degrees this time) to rotate your lettering into place left or right accurately! You will need to rotate it once for NW and NE and 3 times for SW and SE.
Right Click/Select all Objects. Right Click/Merge as Single Object. OK - that's the face done! Now let's make the casing! |
|
|
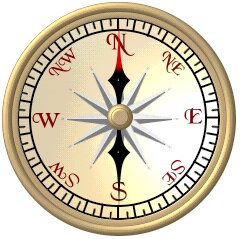
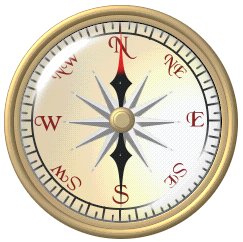
THE COMPASS CASE 25. Using the Path Drawing Tool, Shape-Circle: Mode-3D Pipe: Border-4: Depth-3: draw a shape 210W x 210H pixels. 26. Fill this shape with Copper 4 from the Material Attribute Gallery/Metallic in the EasyPalette. 27. Draw a second shape - Border-10: Depth-16: 225W x 225H pixels. 28. Right Click/Select all Objects then Right Click/Align/Center Both. Right Click/Merge As Single Object. 29. Using the Path Drawing Tool, Shape-Circle: Mode-3D: Border-30: Depth-20: draw a shape 200W x 200H pixels. 30. Fill this shape with Glass 23 from the Material Attribute Gallery/Glass in the EasyPalette. 31. Using the Path Drawing Tool, Shape-Circle: Mode-3D: Border-30: Depth-20: draw a shape 60W x 60H pixels. Right Click/Arrange/Send to Back and put in place at top of compass. 32. Using the Rounded Rectangle Shape,draw a small shape 30W x 25H pixels and Send this to the Back and put in place on the compass. 33. Using the Outline Drawing Tool, draw a circle and fill this with the same Copper preset then Send to Back also and put in place. 34. Right Click/Select all Objects. Right Click/Merge As Single Object. 35. Add a Shadow if you wish and your compass is finished! |
 |
(I wonder why compasses always jiggle about instead of swinging to the N point and staying there!) |
 |
|
|
Free Spirit Graphics If you would then like an invitation to join, please Email Me. We'd love to have you along! |
|
|
If you need any help - or want to make suggestions to improve this tutorial - or for new ones |
|

This site © Rosie Hardman-Ixer 2001/2/3 |