
CHOWDER POT & LADLE PI VERSION: 6/7. LEVEL: Intermediate (Some knowledge of basic tools is assumed) MAIN TOOLS USED: Path Tools, Effects (Whirlpool and Emboss), Paint Tools (Airbrush), Transform Tools, Object Paint Eraser. NOTE: If you wish to use the texture I have used in this tutorial, you will need have the Texturizer Plug-In. However I cannot offer this for download here as it is © Adobe as part of PhotoShop. TERMS OF USE: Please Read - Thank You! |
|
INSTRUCTIONS |
|
|
|
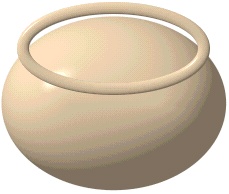
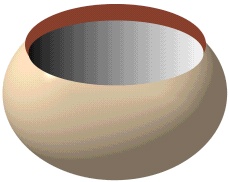
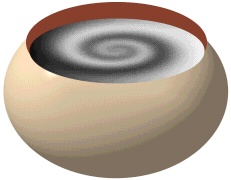
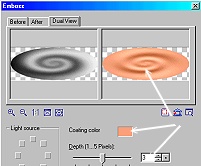
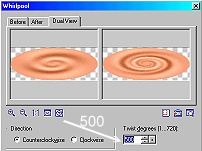
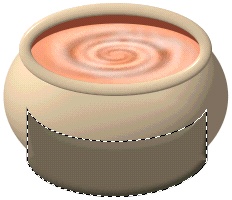
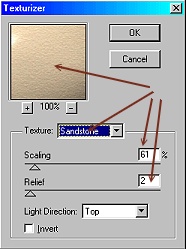
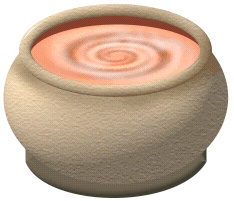
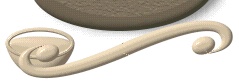
THE POT 1. Open a new canvas, 300W x 300H pixels. 2. Using the Path Tool, Shape - Ellipse: Colour - Light Brown (I have used Hex #D9AE79): Mode - 3D: Border - 88: Depth - 30: draw an ellipse 225W x 175H pixels. TIP: To ensure a nice, smooth shape click on the Material button/Border/Depth tab and make sure that Smooth Spine is checked. This will eliminate that 'ridge' you sometimes get on your round path shapes. 3. Now draw a second ellipse in the same colour: Mode - 3D Pipe: Border - 6: Depth - 17: 180W x 80H pixels and move this to a separate canvas. 4. Now draw a 2D ellipse - in a dark brown colour - 180W x 80H pixels. 5. Draw a third ellipse - 175W x 65H pixels and fill with the gradient shown (black and white). 6. Keeping the black and white ellipse selected, click on Effect/All/Whirlpool - 3 times Your pic should now look like the one opposite. 6. Keeping this piece selected, click on Effect/All/Emboss and click on the Options button in the box that pops up. Change the colour from grey to a nice light tomato-y colour (or one of your choice if you want to make another kind of soup/chowder) and OK. 7. Click on Effect/All/Whirlpool again, then on the Options button. Change the Twist Degree to give an appearance you like (I chose 500) and OK. 8. To add highlights to the chowder use the Paint Tools on Airbrush - colour white - to add some white swirls to the piece. Keep a high Transparency setting and you can create nice steamy appearance. 9. Return the piece you made earlier to the main canvas and put in place as the rim of the bowl. 10. Using the Path Tool, Custom Shape - Plaque 5: Colour - #3F3423: Mode - 3D: Border - 35: Depth - 30: draw a shape (don't worry about size at this stage). Now use the Transform Tool/Rotate & Flip to flip the shape Vertically. 11. Use the Transform Tool/Resize to resize the shape as shown. (The reason I have made it so large is because this way I could get the bottom line of the shape to run parallel with the bottom of bowl - otherwise you would have to use the Path Edit Tool to do this accurately). 12. Right Click/Arrange/Send to Back. 13. Select the main body piece of your pot. Pot Texture Adobe TexturizerIf you have, and are going to use, the Adobe Texturizer plug-in - use the settings shown. If you do not have the Texturizer Plug-In or do not wish to use it, nice alternatives are: PI7 Bump Open the EasyPalette/Material Attribute Gallery/Bump and click on M64. PI6 Bump Open the EasyPalette/Material Gallery/Bump and click Paper 3. Both of these give a nice subtle grained appearance. 14. If you wish - also select the rim of the pot and use the same Texturizer or EasyPalette settings on it that you used in Part 13. 15. Select the main body of the pot and using the Paint Tools/Airbrush on the settings shown, paint a shadow under the rim of the pot. 16. Using the same tool - select the rim and add some shadows to that as well. OK - so far, so good - now to make a moulded handle to lift the pot with..... feeling hungry yet? |
|
|
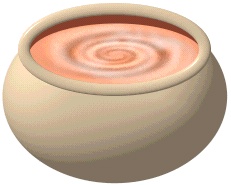
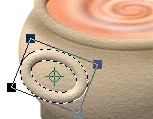
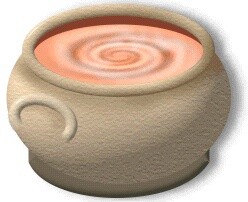
THE HANDLE 17. Using the Path Tool, Shape - Ellipse: Colour - Hex #D9AE79 again: Mode - 3D Pipe: Border - 6: Depth - 30: draw an ellipse approximately 60W x 40H pixels. 18. Apply the Texturiser/EasyPalette Bumps on the same settings as 13. above and then use the Transform Tools/Rotate Freely to rotate this ellipse into the position shown. 19. Use the Object Paint Eraser on the settings shown to careful erase the part of the handle you don't need. The high transparency setting will allow you to blend the handle into the pot more easily. 20. Select the main body of the pot and using the Airbrush again as in 15. above - to paint a shadow under the handle. 21. Right Click/Select All Objects. Right Click/Merge As Single Object. Add a Shadow and your pot is done... Now onto the ladle... |
|
|
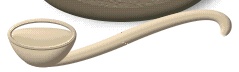
THE LADLE 22. Using the Path Tools, Custom Shape - Round Edges 3: Colour - Hex #D9AE79 again: Mode - 3D: Border - 70: Depth - 40: draw a Shape and then use the Transform Tools/Resize to make this 70W x 40H pixels. 22. Using the Path Tools, Shape - Ellipse: Mode - 3D Pipe: Border - 2: Depth - 30: draw a Shape approximately 65W x 28H to fit the top of this as shown. 23. Using the Path Tools, Custom Shape - S-form: Mode - 3D: Border - 82: Depth - 30: draw a shape and then use the Transform Tools Resize and Rotate Freely to stretch the shape and turn it into the position shown. 24. Right Click/Convert Object Type/ From Text/Path to Image. Now use the Object Paint Eraser to remove the unwanted parts of the handle. Right Click/Arrange/Send to Back. 22. Using the Path Tools, Shape - Ellipse: Mode - 3D: Border - 13: Depth - 30: draw a Shape approximately 65W x 28H to fit the bowl of the ladle and Right Click/Arrange/Send Backward. 23. Now select all parts of your ladle and Right Click/Merge As Single Object. 24. Use the Retouch Tools/Blur to blend the point where the bowl of the ladle meets the handle. 25. Use the Retouch Tools/Burn to add some extra shadows to the bowl and handle. 26. Add a Shadow and your ladle is now complete! All you need to do now is create a lovely setting for your bowl and ladle! |
|
|
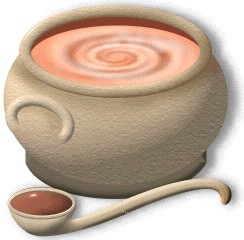
THE FINISHED PICTURE |
|
|
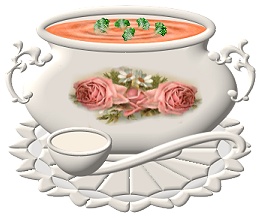
And with imagination and flair.......... |
 |
|
|
Free Spirit Graphics If you would then like an invitation to join, please Email Me. We'd love to have you along! |
|
|
If you need any help - or want to make suggestions to improve this tutorial - or for new ones |
|


This site © Rosie Hardman-Ixer 2001/2/3 |