
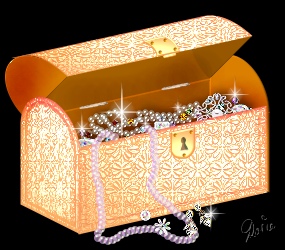
GOLD JEWEL CASKET PI VERSION: 6/7. LEVEL: Intermediate - some knowledge of tools is assumed. MAIN TOOLS USED: Path Drawing Tool, Path Edit, Transform Tools, EasyPalette. NOTE: If you wish to use the preset shown to decorate the casket, you can find this in my Engraved Gold Presets available Here. It is called Bonanza. TERMS OF USE: Please Read - Thank You! |
|
INSTRUCTIONS |
|
|
|
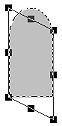
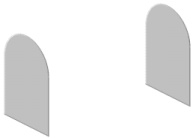
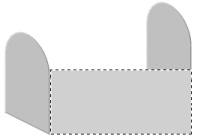
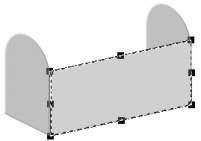
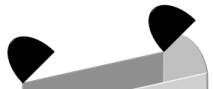
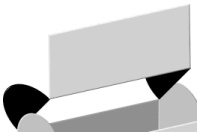
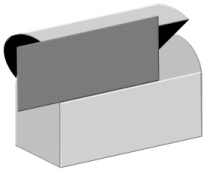
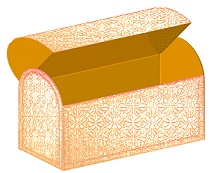
THE BOX 1. Open a new, white canvas, 350W x 275H pixels. 2. Using the Path Drawing Tool, Custom Shape - Arch 3: Colour - Medium Grey: Mode - 3D Round: Border - 2: Depth - 30: draw a shape approximately 40W x 85H pixels. 3. Use the Transform Tools/Resize to change the size to 60W x 120H pixels. 4. Use the Transform Tools/Slant as shown - to change the size to 60W x 150H pixels. 5. Right Click/Duplicate this piece and place into position as shown in the illustration. 6. Using the Path Drawing Tool, Shape - Rectangle: Colour - Light Grey: Mode - 3D Round: Border - 2: Depth - 30: draw a shape as illustrated. (I am using different shades of grey only so we can see the pieces more easily for selecting later). My front piece is 40W x 85H pixels but yours may be slightly larger or smaller, depending on exactly how you arranged your side pieces. The rectangle should stretch the height of the left-hand side piece - up to the beginning of the rounded section - and the width should be the distance between the two front edges of the side pieces. 7. Use the Transform Tools/Slant as shown - to pull the right hand side of the shape up vertically until the bottom right-hand corner meets the bottom corner of the right-hand side shape. Be careful to keep the side line vertical! If it helps - Zoom in to 200% so you can see what you are doing more easily. 8. Right Click/Duplicate this piece and change the colour to a darker grey. Right Click/Arrange/Send to back. Put this piece in place for the back of the casket. It might help to move the front piece out of the way temporarily so that you can position the back piece accurately. Once you have the back in place, reposition the front of the casket. |
|
|
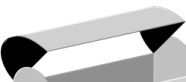
THE LID 9. Using the Path Drawing Tool, Custom Shape - Half Circle: Colour - Medium Grey: Mode - 3D Round: Border - 2: Depth - 30: draw a shape the width of the side piece. 10. Now use the Transform Tools/Resize to make the semi-circle the same height as the rounded top of the side piece.
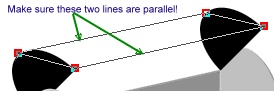
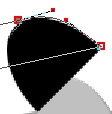
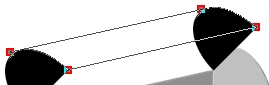
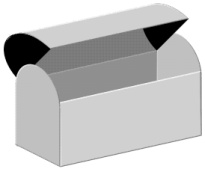
11. Click on the Transform Tools/Rotate Freely and move the rotation point to the bottom left-hand corner of the semi-circle. 12. Use the Transform Tools/Rotate by Degree to rotate this shape 45 degrees to the left. 13. Right Click/Duplicate this piece and then put the two pieces in place as shown. It's a good idea to move the left-hand side piece out of the way so you can place the pieces accurately - this is important - or the next piece will not fit properly. 14. Move the left-hand side piece back into position and then Right Click/Arrange/Bring to Front. Now we come to the one tricky bit! 15. Select the front piece of the casket and Right Click/Duplicate this. Put in the position shown. 16. Click on the Path Edit button. 17. Move the two top Edit Points to the positions shown. Be sure to keep the two lines shown parallel! 18. Select the right-hand line and click on Convert Line/to Curve. It will look like an odd-shaped squiggle at this stage - don't worry - this is fine. 19. Click on the bottom right-hand red square and move the adjustment handles until the curve fits the outside line of the casket lid. TIP! It's a good idea to occasionally click out of Path Edit Mode to check that there are no bumps at the top of the curve! 20. Repeat this procedure with the left-hand side of the lid. (Though you could actually leave this bit out if you want to cheat - because this piece goes behind the left-hand side piece of the lid ;-) ! Note that if you do leave this bit out you will have to select the left-hand side of the lid and then Right Click/Arrange/Bring to Front). Click out of Path Edit Mode. 21. Now select the back piece of the casket and Right Click/Duplicate this piece. 22. Put in place as shown and then Right Click/Arrange/Send to Back. OK - your casket shapes are complete - now let's decorate! |
|
|
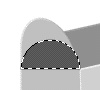
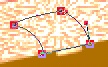
COLOURING AND DECORATING 23. Select the front piece of the box and fill this with a suitable gold preset. I am using one of my own Engraved Gold Presets called Bonanza (downloadable above). I have repeated the use of this on the left-hand side and the lid of the casket. 24. Next I clicked on the Material box/Bevel and changed the bevel to the one shown - for the front and side pieces - and increased the Border size to 9 so that the bevel would show better. 25. For the rest of the box - I use the Eye Dropper to sample a darker colour from the embossed part of the box (it turned out to be Hex #FF9A4F) and I used various shades of this colour to colour the rest of the casket. 26. I have added a lock to my casket - made from simple path shapes in the same way that I made the box and lid. I have shown a sample of the Path Edit for the one on the lid opposite. 27. I painted the keyhole onto the front of the lock using the Paint Tools/Paintbrush but you could just as easily use a circle and triangle from the Path shapes to make one. 28. Finally I added a couple of hinges where the lid meets the back, used the Retouch Tools/Burn to shade some of the inner parts of the casket, filled it with treasures (I added a shadow to them for extra depth) and one or two little sparkles. |
|
|
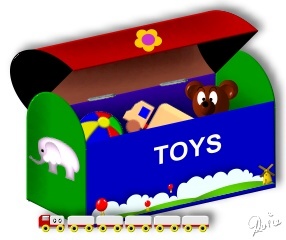
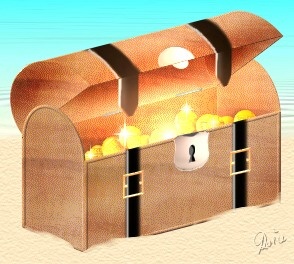
This shape of casket can be used for a number of things - as well as the jewel box you could make this brightly painted, child's toy box or the pirate-style chest full of treasure! Incidentally - all the decorations/toys on and inside/outside the toybox came from the Component Designer in PI7! |
 |
|
|
Free Spirit Graphics If you would then like an invitation to join, please Email Me. We'd love to have you along! |
|
|
If you need any help - or want to make suggestions to improve this tutorial - or for new ones |
|


This site © Rosie Hardman-Ixer 2001/2/3 |