
ANIMATED CANDLE PI VERSION: 6. LEVEL: Beginners MAIN TOOLS USED: Transform Tools: Path Tools: Paint Tools: Gif Animator NECESSARY DOWNLOADS: TERMS OF USE: Please Read - Thank You! |
 |
INSTRUCTIONS |
|
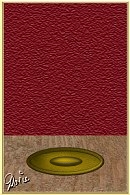  |
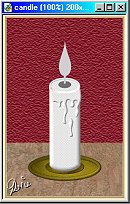
CREATING THE PICTURE - Part One 1. First of all open the candle ufo in PI and prepare a background for your candle. Possible suggestions: Table settings with holly etc for Xmas, flowers for an Anniversary, Cake for Birthday etc. I have used a simple, framed background with a dish for the tutorial. (Tip: Make the background behind your candle-flame as plain as possible because using this method of animation, part of the background will also animate!) 2. Drag the candle ufo to the background and use the Transform Tool/Resize to make the grouped Candle ufo the correct size for your picture. You can now close the candle ufo window. 3. Right Click and Ungroup the candle. Now decide on a colour for your candle. Using the Path Tool, select the main body of the candle, change the colour to the chosen one, Mode 3D; Border 7. 4. Select the dripping wax sections of the candle in turn - for each one, change the colour to the one chosen; Mode 3D; Border 3. |
|
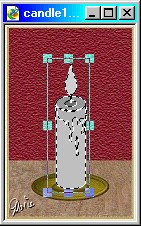
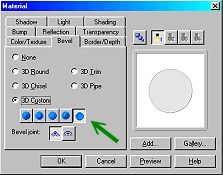
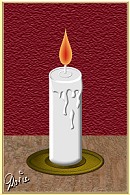
THE TOP OF THE CANDLE 5. Select the oval top of the candle - change the colour to the one chosen, Mode 3D; Border 3. Then click on the Material button/Bevel/3D Custom - on the setting shown and OK. (Make sure that the main 'dripping wax' section sits over the the front edge of this oval). Your candle should now look like the one on the left. 6. Select the small oval in the centre of the top and use the same method as in 5 but with Border 2. 7. Select the wick for the candle - change the colour to White, the Mode 3D.
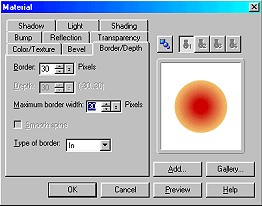
8. Select the flame - Click on Edit/Fill/Gradient - 2 colours and use the colours and settings shown opposite. 9. Click on the Material button/Border-Depth tab; change the Border to 30 and OK.
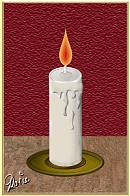
10. Back in PI move the Border slider until you have a flame with a dark center and lighter rim. 11. (Optional) Select each piece of the candle in turn; Convert to Image. Using either the Airbrush Tool (using a darker shade of the colour of the candle) or the Burn Tool, shade the various parts of your candle (I used a little of each on my candle!).
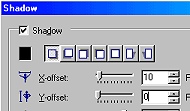
12. With one part of your object selected, Right Click/Select All Objects/Merge As a Single Object. On the Menu Bar click on Object/Shadow and use the settings shown.
At this point it would be possible to make copies of your candle object and resize them to make a group of different sized candles - or also Save the Candle to your Easy Palette for future use. |
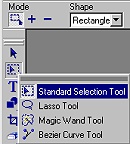 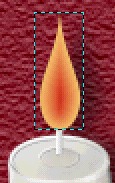 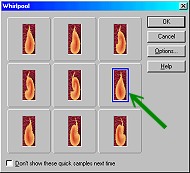 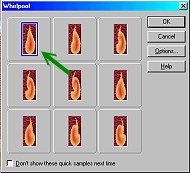 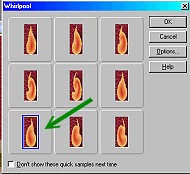 |
ANIMATING THE FLAME 13. Merge your candle with the background. 14. If you are putting anything in front of the candle, such as flowers - add them now and then Merge 15. Using the Standard Selection Tool/Rectangle - select the flame area shown on the left. It helps to Zoom in here to 200% as I have done, to make sure that the correct area is selected - then return to normal 100% view. 16. On the Menu Bar click on Effect/All/Whirlpool; click on the option shown and then OK. 17. Deselect the flame and save this picture as a jpg (I usually to this to my desktop) as Frame 1. 18. Click Undo until your flame is back to its original shape (still selected) and repeat Stages 15-16 - but this time choose the second option shown left. 19. Save this picture as Frame 2. 20. Click Undo until your flame is once more back to its original shape (still selected) and repeat Stages 15-16 again - but time choose the third option shown left. 21. Save this picture as Frame 3. |
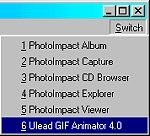 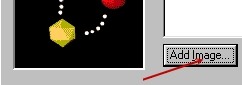 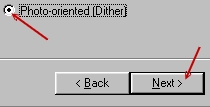  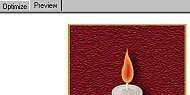 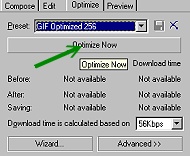 |
ANIMATING THE CANDLE 22. Click on Switch/ULead Gif Animator 23. When Gif Animator opens, click on Animation Wizard. 24. Click on Add Image. Browse to your desktop - click on Frame 1 and Open. Repeat to add Frame 2. Repeat to add Frame 3. Click on Next. 25. Check the Photo-oriented (Dither) radio button and click on Next. 26. In the next box change the Delay Time to 15; click on Next; then Finish in the final box. 27. (If you want to see your candle in action you can click on the Preview tab here!) 28. Click on the Optimise tab and then on Optimise now. 29. Click on File/Save As - give a title to your file and Save! |
|
|
CANDLELIGHT!!! All you need now is some soft lights, sweet music and ?... |
 |
|
|
Free Spirit Graphics If you would then like an invitation to join, please Email Me. We'd love to have you along! |
|
|
If you need any help - or want to make suggestions to improve this tutorial - or for new ones |
|
This site © Rosie Hardman-Ixer 2001/2/3 |