
CAMPFIRE ANIMATION PI VERSION: 8/XL. LEVEL: Beginner MAIN TOOLS USED: Path Drawing Tool, EasyPalette/Material Attribute Gallery/Bump, Effects/Whirlpool, Retouch Tools/Burn & Dodge, Particle Gallery/Smoke, Gif Animator 5. TERMS OF USE: Please Read - Thank You! |
|
INSTRUCTIONS |
|
|
TOOL ICONS FOR BEGINNERS
|
|
|
|
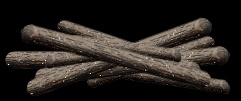
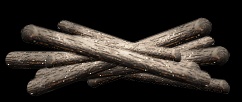
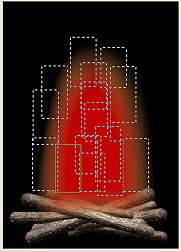
The Wood 1. Open a new, black canvas 250W x 350H pixels. 2. Using the Path Drawing Tool, Shape - Rounded Rectangle: Color - Brown (Hex#6F5E4F): Border - 9: Depth - 30: draw a shape 195W x 15H pixels. 3. Open the EasyPalette/Material Attribute Gallery/Bump - select the M27 preset and Right Click/Modify Properties and Apply. Set the Bump Density to 100% and OK. 4. Using the Circle shape, Border - 1: Depth - 1: draw a small shape to fit the end of the piece of wood. 5. Click on Effect/Distort/Whirlpool. Accept the default setting and OK. 6. Shift/Click to select both pieces of your piece of wood and Right Click/Merge As Single Object. 7. Now using the Retouch Tools/Burn, shade the lower part of your wood. 8. Now you need to build your fire - by duplicating this piece of wood (Right Click/Duplicate) and using the Transform Tools/Resize, Rotate & flip and Rotate Freely to make different size pieces of wood turned to various angles (see illustration left). 9. Once you have your fire built, Shift/Click to select all pieces of wood and Right Click/Merge As Single Object. 10. Now use the Retouch Rools/Dodge (Level - 60) to lighten the tops of the wood to look like ash forming on them. |
|
|
BACKGROUND GLOW Now we're going to make a background 'glow' for the fire - this will also add colour to the flames as it flickers.
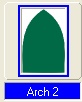
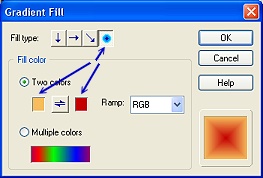
11. Using the Path Drawing Tool, Shape - Arch 2: Mode - 2D: draw a shape 210W x 261H pixels. 12. Fill this with a circular, Two-Color Gradient using Yellow (Hex#F7BC5B) to Red(Hex#C40000) as shown. 13. Open the Material Box/Border/Depth tab and change the Maximum border width to 52 and OK.
14. Right Click/Convert Object Type/From Text/Path to Image. 15. Right Click/Properties - check the Soft Edge box, set it to 60 pixels. (If you want a more subtle 'glow' set the Transparency to a higher number here also). Click OK. 16. Put this piece in place as shown.
17. Using the Object Paint Eraser on the settings shown opposite, gently erase the hard edges from around the 'glow' as shown. 18. Right Click/Merge All. |
|
|
THE ANIMATED FLAMES
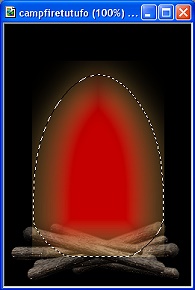
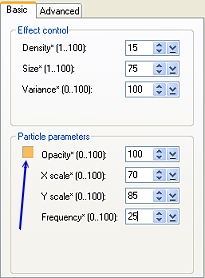
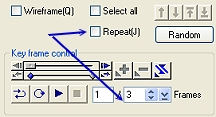
19. Now we are going to add the moving flames. Open the EasyPalette/Particle Gallery/Smoke and select Smoke 1 then Right Click/Modify Properties and Apply. 20. Under the Basic Tab, change the Effect control and Particle parameter settings to those shown opposite, including changing the color box (arrowed) to gold (Hex#F7BC5B) by Right Clicking on it. 21. UNcheck the Repeat box. 22. Set the number of Frames to 3 23. Now check the Wireframe box to change all the flames to wireframe place-markers. 24. Move all the wireframes so that they sit over the 'glow' in the fire as shown opposite. Keep UNchecking the Wireframe box to make sure that the flames are in the correct place and don't come too low on the logs etc. NOTE: When you uncheck the Wireframe box you will find that all the the Effect control and Particle parameter settings have disappeared but one flame remains in wireframe mode in the Preview pane. Click on the black background of your picture to deselect this flame and you will find that all your settings then return on the Basic tab.
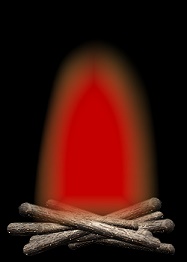
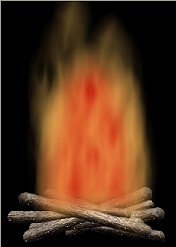
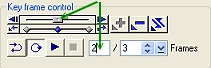
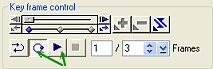
25. Once you are happy with the way the fire looks (mine is shown left), move the slider on the Key Frame Control once place to the right. You will see that the Frame number is now 2/3.
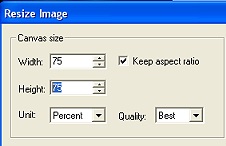
26. Repeat Instructions 19 to 24 once more - this time trying to put all your flames in different positions to last time. 27. Once you are happy with this frame - move the slider on the Key Frame Control one place to the right again. You will see that the Frame number is now 3/3. 28. Repeat Instructions 19 to 24 once more. You should now have 3 frames all with the fire colour changed and the flames in place. 29. Now, for fun, let's play the animation and see how it looks! Click on the Repeat button (looks like a little ring with a dot on it) and then on the arrow button to Play. Click the blue square icon to Stop the animation. 30. Looking good but a little slow moving for fire? Don't worry - we'll put that right in a minute! Click on the Save button and, in the box that comes up, give the file a name, change the Frame delay setting to 18, check the Open with Ulead GIF Animator box and OK. This Saves your animation and opens it in GIF Animator. 31. The animation is quite large in file size so we'll cut down the overall size of the picture. Click on Edit/Resize image and use Percent as the Unit, change the numbers both to 75 and OK. 32. Click on the Optimise tab and using the preset Photo 256 - click on the Save button and save your finished animation to somewhere you can easily find it.
|
 |
|
|
Free Spirit Graphics If you would then like an invitation to join, please Email Me. We'd love to have you along! |
|
|
If you need any help - or want to make suggestions to improve this tutorial - or for new ones |
|
 - Retouch Tools/Dodge & Burn
 - Easy Palette
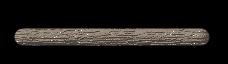
This site © Rosie Hardman-Ixer 2001/2/3/4 |