
DESK CALENDAR PI VERSION: 10 (also suitable for PI 8/8.5/XL). LEVEL: Intermediate MAIN TOOLS USED: Path Drawing Tool, Outline Drawing Tool, Path Edit, Continue Draw, Transform Tools, Retouch Tools, Object Paint Eraser, Shadow. TERMS OF USE: Please Read - Thank You! |
|
|
|
THE CARDBOARD STAND - SIDE
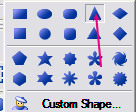
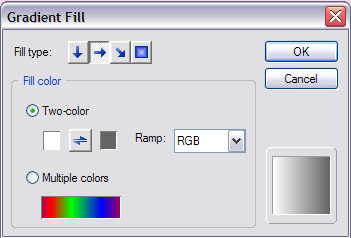
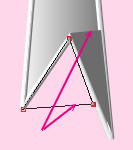
1. In PhotoImpact, open a new canvas, any pale colour of your choice, 700 x 655 pixels. 2. Using the Triangle Shape shown opposite: Color - a Two Color, Side to Side, Gradient from White to Grey #646464: Mode 2D: draw a shape 88 x 516 pixels.
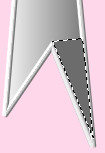
3. Go into Path Edit, add a node to the bottom line and create the shape shown opposite. You may drag my picture into your PI workspace and create your shape on top of it for accuracy if you wish. Exit Path Edit and return to 2D Mode.
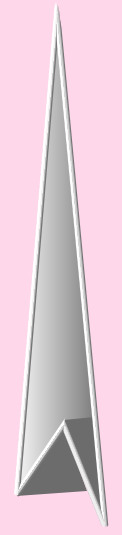
4. Right Click/Duplicate this shape and change the Mode to 3D Pipe. 5. In the Path Panel, change the Width to 3. Change the Color to White. 6. Right Click/Convert Object Type/From Text/Path to Image and, using the Object Paint Eraser, neaten the points of the 3D Pipe object as shown.
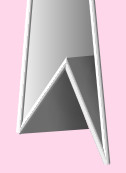
7. Using the Triangle Shape again, Color - Grey #6C6C6C: Mode 2D: draw a small shape and then go into Path Edit and create the shape shown opposite. Exit Path Edit. 8. Now create another triangle, same colour and mode and then go into Path Edit to edit it as shown left. NOTE: MAKE SURE THE TWO LINES INDICATED LEFT ARE PARALLEL. Exit Path Edit.
9. Select the white edging and Right Click/Arrange/Bring to Front.
10. Select each of the two small triangles in turn and Right Click/Convert Object Type/From Text/Path to Image then, using the Retouch Tools/Burn on the settings shown opposite, shade the righthand side of the shapes.
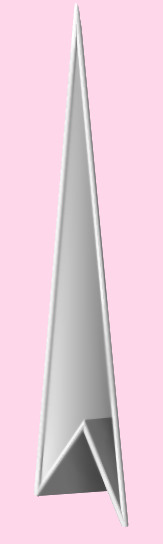
11. Select ALL pieces of your stand and Right Click/Merge As Single Object. 12. Using the Retouch Tools/Blur on the settings shown left, gently soften the edges of the stand so that they blend into the solid shapes as shown. That's the stand finished! |
|
|
THE BLOCK OF PAGES
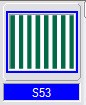
13. Using the Custom Shape S53 (Vertical Lines), Color - White: Mode - 3D Round: Width & Height at Maximum setting: draw a shape 30 x the height of your triangular object (mine was 527 pixels).
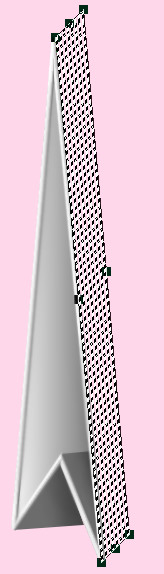
14. Using the Transform Tools/Rotate by Degree rotate this shape 5 degrees to the left. This should align it with the side of the triangle.
15. Now use the Transform Tools/Slant on the MIDDLE NODE ON THE RIGHT-HAND SIDE to slant the shape upwards as shown left.
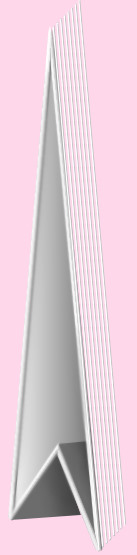
16. This should give you the result shown opposite.
17. Right Click/Duplicate this shape and then use the Transform Tools/Rotate & Flip to flip the shape Horizontally. 18. Now use the Transform Tools/Rotate by Degree to rotate the shape 80o to the right. Put in place as shown.
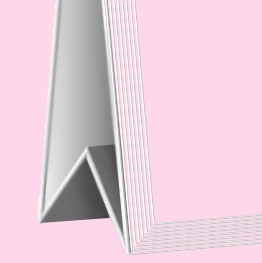
The two sets of lines SHOULD meet at the corner - like a mitre joint - if they don't, adjust the Slant using the CENTRE, RIGHT-HAND node (sliding upwards) on the UPRIGHT piece and the CENTRE, TOP node (sliding right) on the HORIZONTAL piece until the lines meet at the corner. That's as far as we're going to go on the block of pages for the time being. |
|
|
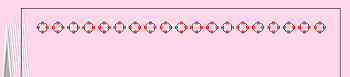
FRONT AND BACK PAGES 19. Using the Path Drawing Tool, Shape - Rectangle: Color - White: Mode - 3D Round: Width - 3 Depth - 30: draw a shape 565 x 482 pixels. 20. Go into Continue Draw mode and, using the Circle shape, draw a small circle 15 x 15 pixels near the top left-hand corner of the rectangle (positioning is not important at this stage). 21. Go into Path Edit, select the circular path and duplicate this 18 times (19 circles in all). 22. Move TWO of the circles to the positions shown opposite - try to get them equal distances from the sides of the rectangle. 23. Holding down the Ctrl button, select ALL the circles and click on the Align button on the Attribute Toolbar and then Align Top. 24. Now click on the Align button again - Distribute Horizontally. This should result in the distribution opposite. 25. Now exit Path Edit and return to 3D Round mode.
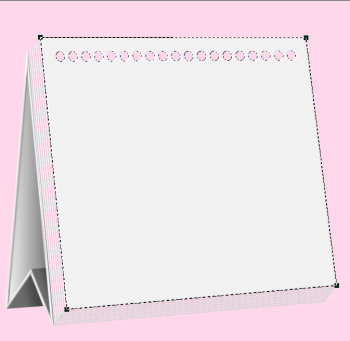
26. Using the Transform Tools/Distort drag the corners of the page to the positions shown.
27. Using the Path Drawing Tool, Shape - Rectangle: Color - Grey #C8C8C8: Mode - 2D: draw a shape approximately 600 x 480 pixels. 28. Go into Path Edit. You now have to edit this shape so that it fits behind the front page and the two sets of lines forming the edges of the block of pages. This will mean adding a few nodes to the path to make this possible - however, they are all simple straight lines and shouldn't give much problem. 29. Once you are happy with the shape, exit Path Edit and return to 2D Mode.
30. Use Right Click/Arrange to Send to Back. The result should be a filling in of all the holes in the front page and behind the lines forming the edges of the block of paper.
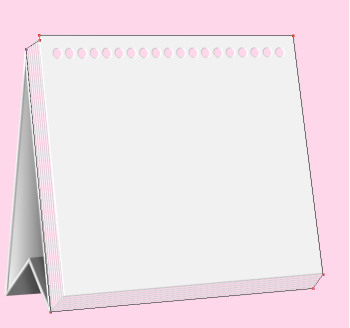
31. Right Click/Convert Object Type/From Text/Path to Image and, using the Retouch Tools/Burn on the settings opposite, shade the areas shown, behind the row of holes and the lines forming the block of pages.
32. Using the Path Drawing Tool, Shape - Rectangle: Color - White: Mode - 3D Round: Width - 3 Depth - 30: draw a shape 515 x 70 pixels. Right Click/Arrange/Send to Back. 33. If you are skilled with the Slant Tool you can adjust this rectangle to form the shape shown - however, if this is a problem for you, instead go into Path Edit and edit it into the correct shape. Either way - be sure to get the edges parallel to those on the front sheet! That's all the pages finished!. |
|
|
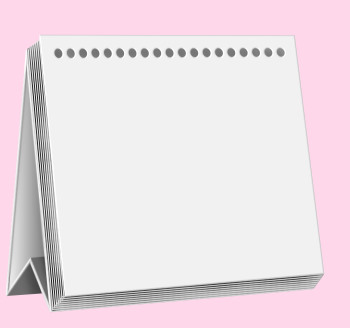
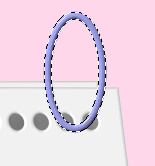
RINGS 34. Using the Outline Drawing Tool, Shape - Ellipse: Color - any you like, mine is a lilac colour - #8487FB: Mode 3D Round: Width - 3 Depth - 30: draw a shape 55 x 113 and put into position as shown.
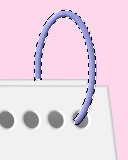
35. Right Click/Convert Object Type/From Text/Path to Image and, using the Object Paint Eraser on the settings shown, remove the part of the Ellipse illustrated.
That's the ring section finished - easy wasn't it? |
|
|
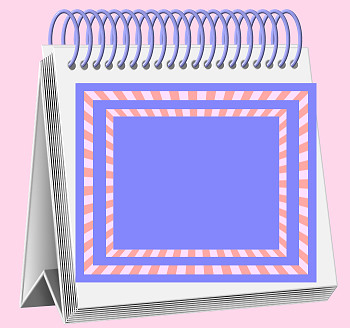
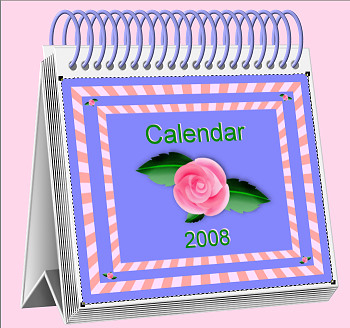
THE FRONT PAGE 37. This section can basically feature anything you wish in the way of photographs or something you have drawn or painted. However - I want to show you how to make a simple but effective frame for your chosen picture. 38. Using the Path Drawing Tool, Shape - Rectangle: Color - something that co-ordinates with the ring colour you chose - I am using the same colour exactly: Mode - 2D: draw a rectangle approximately 482 x 398 pixels. 39. Using the Outline Drawing Tool: Shape - Rectangle: Color - your choice (mine is pink #FFDFFF): Outline Width - 9: draw a shape 430 x 348 pixels. 40. Right Click/Duplicate this shape and then change the Color to a second co-ordinating color (mine is salmon pink #FFA8A6): and in the Path Panel change the Outline Style to the dotted one shown opposite. 41. Select all three objects - the background and the two Outline objects and then Right Click/Align/Center Both. 42. Select the two parts of the pink outline shape and Right Click/Merge As Single Object. 43. Duplicate this object and then reduce the size of the Duplicate and Align this object with the other two. 44. Add any picture or wording that you wish to your Calendar front and then Merge all sections of the illustration.
45. Now use the Transform Tools/Distort again to pull the illustration into shape for the front cover - being sure to keep all the side lines of the illustration parallel with the sides of the white front board (see left). Now all that remains is to add a shadow (you CAN add some more shading to the rings if you wish - highlights on the top and darker shadows where they go into the Board - but this is optional). 46. Once you are happy with your calendar, Right Click/Select All Objects and then Merge As Single Object.
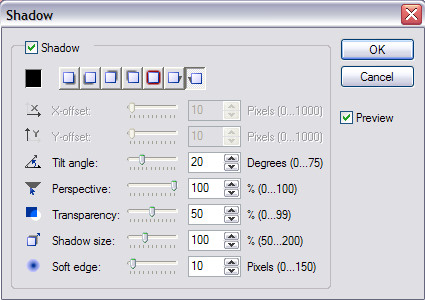
47. Add the shadow shown opposite. This is fine except for that bit of shadow beneath the base line of the calendar - so Right Click/Split Shadow - then select the shadow only and move it slightly upwards to make a clean base line for the calendar.
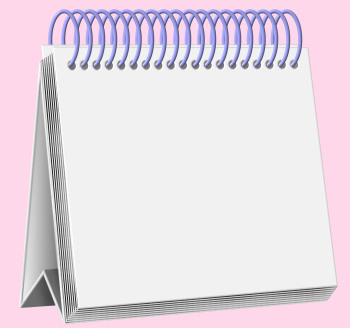
There's your finished Calendar - all ready to record the events of your year - I hope you enjoyed making it! |
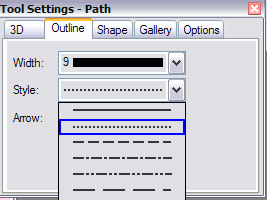
 |
|
|
Free Spirit Graphics We'd love to have you along! |
|
|
If you need any help - or want to make suggestions to improve this tutorial - or for new ones |
|


This site © Rosie Hardman-Ixer 2001-2008 |