
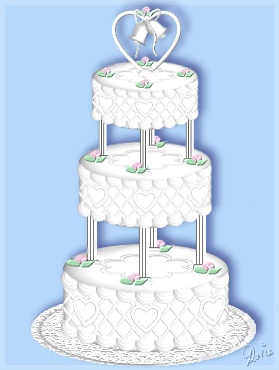
WEDDING CAKE PI VERSION: 7. LEVEL: Beginner MAIN TOOLS USED: NECESSARY DOWNLOADS: TERMS OF USE: Please Read - Thank You! |
|
INSTRUCTIONS |
|
|
|
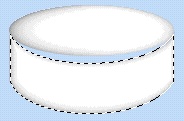
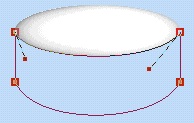
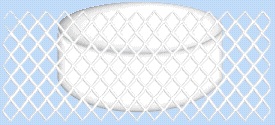
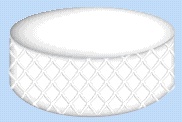
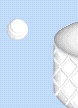
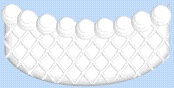
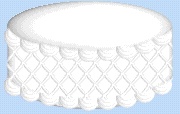
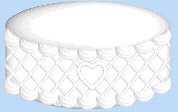
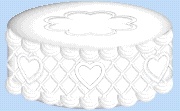
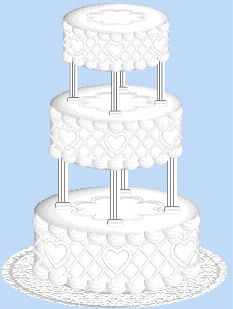
THE BOTTOM TIER 1. Open a new canvas 300W x 400H pixels with any pastel background colour that will show the white cake well. 2. Using the Path Tools, Shape - Ellipse: Colour - White: Mode - 3D: Border - 26: Depth - 20: draw a shape 165W x 50H pixels. In the Path Panel click on the Lighting button and move this over the surface of the cake until you get the shading shown. 3. Using the Path Tools, Shape - Plaque 5: Colour - White: Mode - 3D: Border - 26: Depth - 20: draw a shape the same width as the ellipse. Use the Transform Tool/Rotate and Flip to flip this shape Vertically and put in place as shown opposite. 4. Now click on the Editing button on the Attributes Toolbar to go into Path Edit Mode. 5. Move the Adjustment Handles to the points shown so that the curve of the cake fits the top. Click out of Path Edit Mode and back into 3D Mode. 6. Open the lattice jpg from the zip provided. Click on Edit/Trace/Image - accept the default settings and OK. 7. Now change the Mode from Horizontal Deform to 3D Round. By the way - I have made a good size lattice for you so that if you decide to make a bigger cake sometime this should cover the side! 8. Drag the resulting lattice over to your main canvas and on top of the cake so that the sides are covered by the lattice. Click on the Path Tool and adjust the Border to 5. 9. Once you are happy that the position is correct - Right Click/Convert Object Type/From Text/Path to Image. 10. Using the Object Paint Eraser Tool - erase all the excess lattice from the cake. Don't worry too much about the top and bottom (these are going to be covered by other shapes) but try to get the sides nice and neat (see illustration). 11. Select the side piece of the cake and the lattice and Right Click/Merge As Single Object. 12. Using the Path Tools, Shape - Circle: Colour - White: Mode - 3D: draw three small shapes - the largest about 20W x 20H pixels and getting progressively smaller. 13. Place these on top of one another as shown and then select all three and Right Click/Merge As Single Object. 14. Now - temporarily move your cake top to the top of your canvas. 15. Right Click and Duplicate as many copies as you need of the small, round object you made - to fit around the top of your cake as shown. 16. When they are all in place, Shift/Click and select all of them and then Right Click/Merge As Single Object. Right Click/Arrange/Send to Back. 17. Now use the Object Paint Eraser Again to carefully remove the excess from the top of this piece. Once you have done this - Right Click/Arrange/Bring to Front. 18. Right Click/Duplicate the piece and put the duplicate at the base of the cake as shown. 19. Bring your cake top back down into place. 20. If you are making a birthday cake you may want to choose a different shape here - but as I am making a romantic wedding cake I am using a heart. Using the Path Tools, Shape - Heart: Colour - White: Mode - 3D: Border - 26: Depth - 20: draw a shape to fit between the scallops with a little room to spare. 21. Right Click/Duplicate this shape and then change the mode to 3D Pipe. Change the Border to 2 and put in place around the first heart. 22. Shift/Click to select both pieces of the heart and Right Click/Merge As Single Object. 23. Right Click and Duplicate the heart and put on the left-hand side of the cake.
24. Now use the Transform Tools/Deform to create the shape shown. 25. Right click Duplicate this shape and then use the Transform Tools/Rotate and Flip to flip the copy Horizontally and put in place on the right-hand side of the cake. 26. Using the Path Tool, Custom Shape - Flower 5: Border - 5: Depth - 25: draw a shape approximately 30W x 30H pixels. 27. Use the Transform Tool/Resize to stretch this shape as shown (mine was 100W x 30H pixels) for the top decoration. Place the centrally on top of the cake and then Right Click/Select All Objects. Right Click/Merge As Single Object. |
|
|
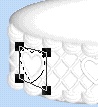
COLUMNS AND BASE 28. Using the Path Tool, Shape - Rounded Rectangle: Border - 2: Depth - 30: draw a shape approximately 3W x 75H pixels. Right Click and Duplicate this twice. Put the three rectangles together as shown, together with two smaller rectangles drawn across the base as shown. Select all the parts of the column and then Right Click/Merge As Single Object. 29. Right Click and Duplicate the column object three times. Put these in place on the cake as shown. 30. Select the bottom tier of the cake and Right Click/Duplicate. 31. Select the duplicate, then click on Format/Image Size and change the percentage to 80% for the width and height. Make sure you have 'Apply to Selected Object' checked! Click OK. Put this piece in place on top of your cake. 32. Select the four columns and the second tier of the cake and then Right Click/Merge As Single Object. Right Click/Duplicate this tier. 33. Click on Format/Image Size and change the percentage to 80% for the width and height. Again make sure you have 'Apply to Selected Object' checked! Click OK. Put in place on the cake. 34. Using the Path Tools, Shape - Ellipse: Mode - 3D: Border - 26: Depth - 20: draw a shape 225W x 75H pixels. Fill this with a preset of your choice. A silver from the Material Attribute Gallery with an added bump is effective. |
|
|
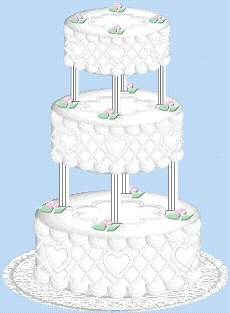
ROSES All the parts for the roses were drawn using the Path Tool/Freehand Drawing Tool. If you are going to use this tool, click on the Shape tab in the Path Panel and make sure that the Freehand Drawing Accuracy is set to 10 before you start! 35. I have shown two illustrations - one is the separate pieces I drew for the rose and the other shows the pieces combined into the complete rose. 36. Once you have the rose complete (and Merged), Right Click/Duplicate this four times. 37. Put four of the five roses you now have onto the bottom tier of the cake. You will need to Right Click/Arrange/Send Backward to put the final rose behind the back column. 38. Take the extra rose and use the Transform Tools/Resize to reduce the size of this rose and then make four more copies. Put four roses on the second tier and repeat this step for the top tier of the cake. |
|
|
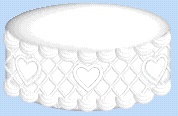
HEART DECORATION There are many decorations you can use for your cake - a bride and groom, flowers, bows etc. Add your own touches here if you wish :-) 39. Using the Outline Drawing Tool, Shape - Heart: Colour - White: Mode - 3D: Border - 2: Depth - 25: draw a heart shape approximately 97W x 70H pixels. Put this in place on top of the cake. Using the Path Tool, add a small ellipse shape to the base of this where it joins the cake. 41. Open the bellshapeufo.ufo file provided and drag this decoration to the top of the heart. You might also like to add a copy of one of the roses from the cake as a finishing touch. 42. Once you have all the pieces of your cake arranged as you wish, you can Right Click/Select All Objects and then Right Click/Merge As Single Object. |
 |
|
|
Free Spirit Graphics If you would then like an invitation to join, please Email Me. We'd love to have you along! |
|
|
If you need any help - or want to make suggestions to improve this tutorial - or for new ones |
|


This site © Rosie Hardman-Ixer 2001/2/3 |