GLASS BOTTLES PI VERSION: 8 (also suitable for 7). LEVEL: Beginner MAIN TOOLS USED: Path Drawing Tool, EasyPalette, Transform Tools, Object Paint Eraser, Transform Tools, Format/Color Balance. TERMS OF USE: Please Read - Thank You! This tutorial has been adapted for PSP in French by Dabba here. |
 |
INSTRUCTIONS |
|
|
|
MAIN BODY OF BOTTLE
1. Open a new, white canvas 200W x 200H pixels with a dark background (this helps to see what you're doing more easily).
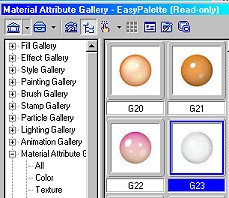
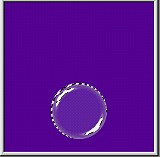
2. Using the Path Drawing Tool, Color - white, Mode - 3D Round: draw a circle 75W x 75H pixels. 3. Open the EasyPalette/Material Attribute Gallery/Glass and fill this with preset G23. 4. In the Path Panel set Border to 12 (leave Depth at 30). |
|
|
BOTTLE NECK 5. With Path Drawing Tool, Custom Shape - Shape Edges : Color - same: Mode - 3D Round: Border - 15: Depth - 30: draw a shape 80W x 80H pixels.
6. Now use the Transform Tool/Resize narrow the shape and place in position as shown, to form the neck of the bottle and put in place.
7. Shift/Click to select both pieces of the bottle, Right Click/Merge As Single Object.
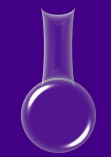
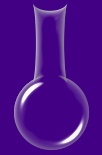
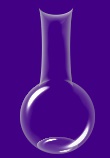
8. Now use the Object Paint Eraser on the settings shown opposite, to erase the join between the neck and the bottle, a little of the centre neck of the bottle and some of the bottle itself. Your result should look something like the bottle opposite. |
|
|
BOTTLE BASE 9. Using the Path Drawing Tool, Shape - Ellipse: Mode - 3D Round: Border - 4: Depth - 30: draw a shape 40W x 15H pixels. 10. Put this in place at the bottom of the bottle, then Right Click/Arrange/Send to Back. 11. Shift/Click to select all pieces of the bottle, then Right Click/Merge As Single Object. |
|
|
BOTTLE RIM 12. Using the Path Drawing Tool, Custom Shape - Plaque 5: Color - same glass: Mode - 3D Round: Border - 8: Depth - 30: draw a shape the width of the bottle neck. 13. Use the Transform tool - Rotate & Flip/Flip Vertically - to flip this shape.
14. Put in place at the top of the neck then select both pieces of the bottle and Right Click/Merge As Single Object.
15. Using the Path Drawing Tool, Shape - Ellipse Color - same: Mode - 3D Round: Border - 3: Depth - 30: draw a shape 35W x 12H pixels. 16. Put in place at the top of the rim then Right Click/Arrange/Send to Back. Do not Merge this piece yet! |
|
|
STOPPER 16. Using the Path Drawing Tool, Shape - Circle: Color - same: Mode - 3D Round: Border - 8: Depth - 30: draw a shape 34W x 34H pixels. 17. Using the Path Drawing Tool, Shape - Rectangle: Color - same: Mode - 3D Round: Border - 13: Depth - 30: draw a shape 22W x 38H pixels. 18. Using the Transform Tool - Perspective - narrow the bottom of the rectangle to form the stopper shape. 19. Right Click/Convert Object Type/From Text/Path to Image. 20. Use the Object Paint Eraser to remove the part that overlaps the stopper top. 21. Select both parts of the Stopper and then Right Click/Merge As Single Object. 22. Put the stopper in place on your bottle - then Right Click/Arrange/Send Backwards. 23. Right Click/Select All Objects then Right Click/Merge As Single Object. |
|
|
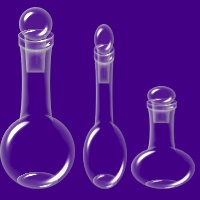
THE FUN BIT! It can't get easier than this...... ;-) 24. Right Click/Duplicate the bottle twice. 25. Using the Transform Tools/Resize - narrow one bottle and lessen the height of the other to make 3 different shaped bottles as shown!
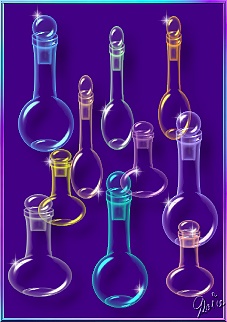
26. To recolour the bottles - first Right Click/Duplicate to make as many copies of the different shaped bottles as you require.
27. Select each bottle in turn and click on Format/Color Balance. In the box that opens, click away on the squares until you have bottle the colour you like. Repeat until all bottles are coloured... Ta-da! |
 |
|
|
Free Spirit Graphics If you would then like an invitation to join, please Email Me. We'd love to have you along! |
|
|
If you need any help - or want to make suggestions to improve this tutorial - or for new ones |
|
This site © Rosie Hardman-Ixer 2001/2/3 |
