EASY DECORATIVE BUTTERFLIES PI VERSION: 7/8/XL. LEVEL: Beginner MAIN TOOLS USED: Path Drawing Tool, Easy Palette/Wrap Gallery/Path Wrap, Line & Arrow Tool, Transform Tools/Resize & Rotate freely. TERMS OF USE: Please Read - Thank You! |
|
INSTRUCTIONS |
|
|
TOOL ICONS FOR BEGINNERS
|
|
|
|
WINGS 1. Open a new, white canvas, 300W x 300H pixels.
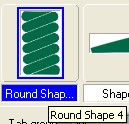
2. Using the Path Drawing Tool, Color - any of your choice (I am using a two-color Gradient fill): Custom Shape - Round Shape 4 (see pic, left): Mode - 2D: draw a shape approximately 30W x 46H pixels.
3. Now open the EasyPalette/Wrap Gallery/Path Wrap and, on Path Wrap 5, Right Click/Modify Properties and Apply.
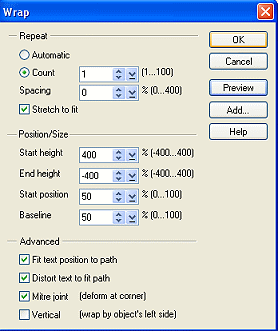
4. In the Wrap dialog box, enter the settings shown:
Spacing - 0 Stretch to fit - Checked Start height - 400 End height - (MINUS) - 400 Start Position - 50 Baseline - 50 Fit text position to path - Checked Distort text to fit path - Checked Mitre joint - Checked Vertical - UNchecked Try clicking the Preview button to check how this affects your path shape. If you like the shape of the wings you can now save this setting to your EasyPalette by clicking on the Add button. Choose an available Gallery to add it to and OK. Click OK again to apply the wrap to your path shape.
There are your wings!
5. If you wish to you can Right Click/Duplicate this piece then use the Transform Tools/Resize to make it smaller and use this smaller piece with a different colouring to add more interest to your wings (see pic opposite).
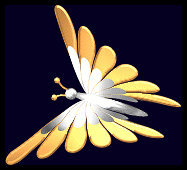
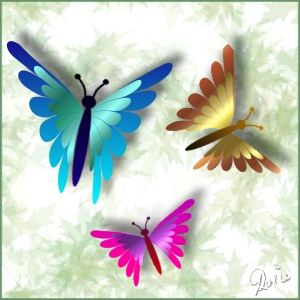
TIP! By changing the numbers in the Start height and End height boxes you can change the shape of the wings! However you should always have one of these numbers a PLUS number and one a MINUS number. Opposite you can see the results of using 225 and - 225 as the numbers. By using two different numbers (again though - one Plus - one Minus) you can turn the two wings to different angles to create perspective (see my finished brown/gold butterfly in the main picture). |
|
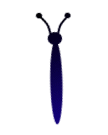
BODY 6. With the Path Drawing Tool, Color - any you wish - draw an Ellipse shape and a small Circle shape for the body and head. 7. Using the Line & Arrow Tools (I have used the Spline Tool to create a curve but you might prefer to draw straight lines) - draw two antennae and top these by drawing two small circle shapes with the Path Drawing Tool as shown. 8. Shift/Click to select all parts of the body and head and then Right Click/Merge As Single Object. 9. Use the Transform Tools/Rotate method/Rotate freely - to rotate the body and head into place and then Shift/Click to select all parts of your butterfly and Right Click/Merge As Single Object. ...and there's your butterfly!
Of course you might like to make 3D butterflies, brightly painted ones, silver and gold ones as jewellery... it's up to your imagination now! |
|
...aren't they pretty? |
 |
|
|
Free Spirit Graphics If you would then like an invitation to join, please Email Me. We'd love to have you along! |
|
|
If you need any help - or want to make suggestions to improve this tutorial - or for new ones |
|
This site © Rosie Hardman-Ixer 2001/2/3/4 |
 - Easy Palette