
BEADED CURTAIN PI VERSION: 6. LEVEL: Intermediate - Advanced MAIN TOOLS USED: Selection Tools: Stamp Tools NECESSARY DOWNLOADS: TERMS OF USE: Please Read - Thank You! |
 |
INSTRUCTIONS |
|
|
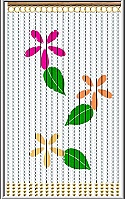
If you would prefer to make a plain curtain (or use a picture of your own) you should open a new canvas/picture 210W x 350H pixels at this stage.  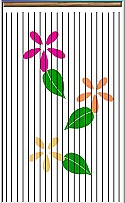 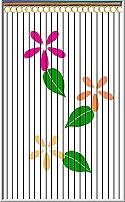
|
THE HANGING RAIL 1. Open the flowerpattern jpg provided in PI6. (See note left re alternatives). 2. Using the Path Tool - Shape, Rectangle; Mode 3D; Border 6; Depth 30 - Draw a bar across the top of the design as shown. 3. (Optional) Open the Easy Palette, Fill Gallery and double click on Wood 3. 4. Open the grid.gif provided and drag the lines over on top of the flower design as shown - leaving a small space at the top between the bar you drew and the lines. (It is possible to use the Grid and Guidelines feature here - to draw your own guidelines - I provide the grid.gif only as a time-saver!) 5. Using the Outline Drawing Tool - Shape, Circle; Colour, Gold; Mode 3D; Width 1; Depth 30 - Draw a small ring at the top of each line to touch the bar. (You could use Cut and Paste for these). 6. In the Easy Palette/Layer Manager, select all the rings, Right Click and Align Vertically. Right Click again and Merge As Single Object. 7. Make sure that the rings are touching the hanging bar and then Merge the rings and the Bar as a single object. |
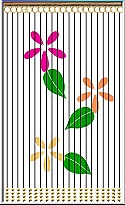  |
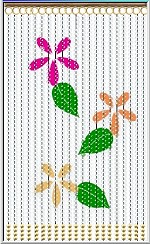
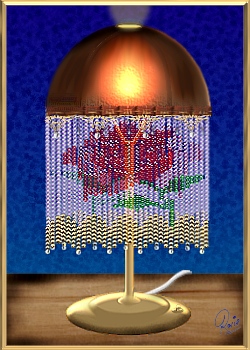
THE CURTAIN 8. Using the Gold Bead Stamp - Trans, 0; Scale, 100; Spacing, 100; Order, Random; Placement, Trail, Object, Single Object; Lines, Straight Line - Stamp a row of 4 gold beads at the bottom of the first line. 9. Copy and Paste these four beads and place at the bottom of each line as shown. (You can arrange these in a chevron pattern if you wish - see lamp picture at bottom of page). 10. In the Easy Palette, Layer Manager, select all the groups of gold beads, Right Click, Align Vertically (see picture). 11. Using the Light Bead ufo - stamp a row of light beads on the lines where these are not crossed by flowers or leaves. Take your time here - this requires a LOT of patience. I usually do my beading in several sessions with rest in between! (The picture on the left shows the curtain with most of the light beads in place). 12. Using the pink, green, yellow and orange stamps complete the design - you may need to stamp individual light beads for the centres of flowers. |
|
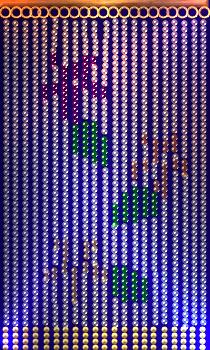
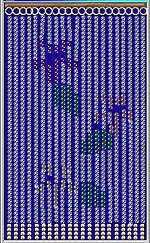
FINISHING THE BEADING 13. When the initial beading is almost complete (opposite) - in the Easy Palette, Layer Manager - first of all remove the grid.gif (highlight the grid.gif, Right Click and Delete) and then Right Click/Select All Objects and Merge as Single Object. 14. Click on the flower picture background - Click on Edit/Fill and Fill with any dark colour to show up gaps in the beading. 15. Fill in any gaps to complete your pattern. (Tip! If you want to get a bit of shading into your flowers, stamp the occasional coloured bead on top of a light bead.) 16. When you are satisfied that your curtain is complete - Right Click/Select All Objects and Merge as Single Object. |
|
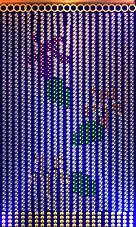
FINISHING YOUR PICTURE Now your curtain is ready to be used as part of a bigger picture! Here I have merely added an effect from the Lighting Gallery. |
|
ANOTHER USE FOR THE BEADING The picture that started this tut! My version of a lamp we used to have at home. |
 |
|
|
Free Spirit Graphics If you would then like an invitation to join, please Email Me. We'd love to have you along! |
|
|
If you need any help - or want to make suggestions to improve this tutorial - or for new ones |
|
This site © Rosie Hardman-Ixer 2001/2/3 |