
A FAVOURITE OLD BASKET PI VERSION: 6. LEVEL: Beginner MAIN TOOLS USED: Path Tools: Transform Tools: Mask Mode: Background Designer: Burn Tool TERMS OF USE: Please Read - Thank You! |
 |
INSTRUCTIONS |
|
|
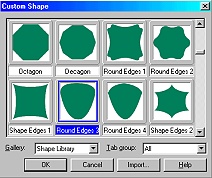
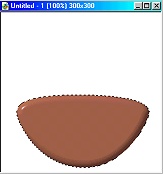
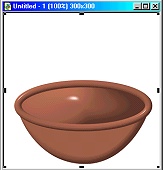
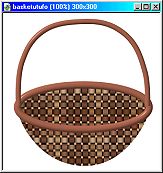
SHAPING THE BASKET 1. Open a new canvas, 300 x 300 pixels. 2. Using the Path Tool, Custom Shape, Round Edges 3, Mode 3D, Colour brown, Border 15, Depth 30, draw the shape shown opposite. |
  |
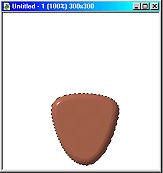
SHAPING THE BASKET continued 3. Using the Transform Tool/Resize, stretch the basket until it looks like the picture opposite |
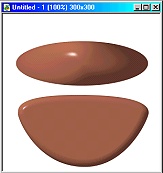 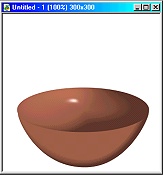 |
SHAPING THE BASKET continued 4. Using the Path Tool, Shape-Ellipse, Mode 3D, same colour, draw an oval the same width as the widest part of the basket as shown. (For the Border size - slide this up to maximum number on the right). 5. Move this piece down onto the top of the basket as shown - adjust width if necessary. |
|
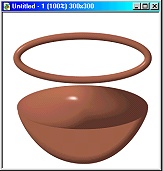
THE BASKET RIM 6. Copy and paste the oval shape and then change the Mode of the copy to 3D pipe. Don't panic! Change the Border to 6 and it will look more like a basket edge! See picture opposite. 7. Move the rim into place as shown. |
|
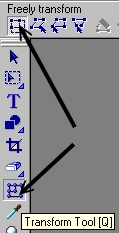
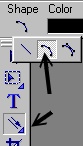
THE HANDLE 8. Using the Line/Arrow Tool/Spline Tool (shown opposite), Mode 3D Round, Width 5, (Style and Arrow both straight line) draw a curving handle over the basket as shown. Click to start handle, click occasionally around curve, double click to finish. We now have all the pieces we need for our basket. |
|
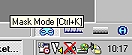
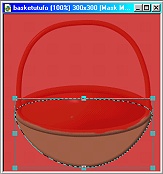
SHAPING THE FRONT PIECE OF THE BASKET Before we can add the weave we need to cut down the front piece of the basket level with the rim we've made - so that items can be put 'inside' the basket. 9. Select the main body of the basket (the first piece you created) and click on the Mask toggle button (see left). (Your mask may be a different colour to mine - but it will work exactly the same way) 10. Select the Paintbrush on the settings shown - make sure that the colour is black. 11. Paint over the upper part of the front of the basket to within the rim - see pic left (it doesn't matter if your line is not perfect as it will sit 'under' the rim and not be seen). Click out of Mask Mode. |
|
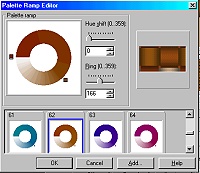
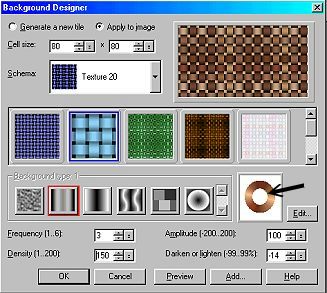
ADDING THE WEAVE 12. Select the main body of the basket (the first piece you created). 13. On the Menu Bar Click on Web/Background Designer. 14. Click on Texture 20 and select the blue basket weave pattern shown opposite. 15. Click on Edit next to the Palette Ramp Editor (the little coloured circle - arrowed) and click on Colour 7. Click OK. 16. Alter the settings to those shown Opposite: Cell Size 80 x 80 Frequency: 3 Density: 150 Amplitude: 100 Darken/Lighten: -14 Make sure that 'Apply to Image' is checked Click OK. 17. Select the back part of the basket and use the same procedure. Your basket should now look like the picture opposite. |
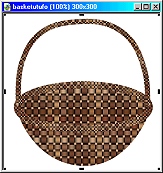 |
ADDING THE WEAVE continued 18. Select the rim of the basket. 19. On the Menu Bar Click on Web/Background Designer. Use exactly the same settings EXCEPT change the Frequency setting to 6. Click OK 20. Select the handle and use the same procedure - keeping the settings the same as 12. Your basket should now look like the picture opposite. |
|
Settings for body of basket 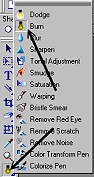  Setting for rim and handle |
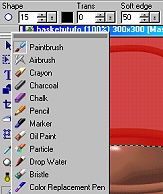
FINISHING THE BASKET continued 21. Select the main body of the basket and using the Burn Tool (shown opposite) on the default settings (Shape 20, Level 100, Soft Edge 50), add shading to the basket. 22. Select the back of the basket (the oval) and using the Burn Tool (default settings), shade as shown. 23. Select the rim of the basket. Select the Burn Tool - this time changing the Shape setting to 8 and shade as shown (for detailed picture of shading see final picture). 24. Do the same with the handle (this also helps to cover the join between the handle and rim!) 25. At this point you can choose to leave the parts of the basket separate - so that you can place items 'inside' between the layers or merge the whole basket as a single object. (If you choose to save the basket as a single object, select all the pieces of your basket, Right Click/ Merge as a Single Object). |
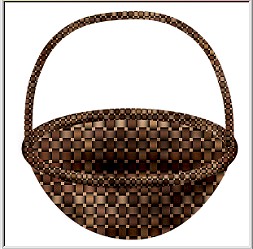 |
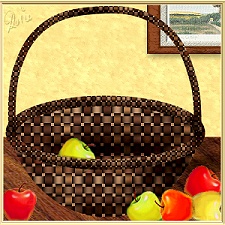
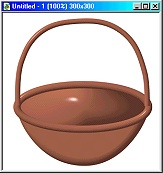
Your basket is finished and ready to be filled with goodies! |
 |
|
|
Free Spirit Graphics If you would then like an invitation to join, please Email Me. We'd love to have you along! |
|
|
If you need any help - or want to make suggestions to improve this tutorial - or for new ones |
|
This site © Rosie Hardman-Ixer 2001/2/3 |