
STONE ARCHWAY & WALL PI VERSION: 8 (also suitable for version 7). LEVEL: Beginners MAIN TOOLS USED: Path Tools; Easy Palette/Wrap Gallery: Transform Tools: Burn Tool TERMS OF USE: Please Read - Thank You! |
 |
INSTRUCTIONS |
|
|
IMPORTANT NOTE - PLEASE READ! When drawing shapes which are later to be used in the Wrap Galleries it is essential that these shapes are drawn to size - i.e. you draw them to the size specified with the Path Drawing Tool. Drawing them approximately to size and then using the Transform Tools to resize them is NOT the same thing and the Wrap Galleries will not work properly if you do this. You will end up with a tiny little shape that does not look like the one in the tutorial. If, for any reason, you cannot draw the shape to size using the numbers at the bottom left of the PI workspace for reference (inexperience with the mouse, shaking hands etc), and HAVE to use other tools to correct the size of your path shape - then you will need to Right Click/Convert Object Type/Reset Text/Path Object before you continue. |
|
|
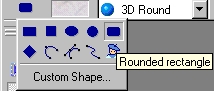
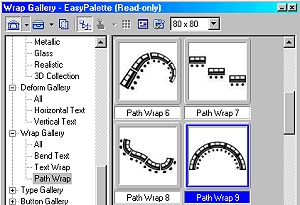
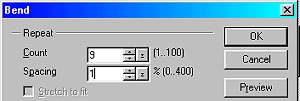
CREATING THE ARCH TOP 1. Open a new canvas 350W x 300H pixels. 2. Using the Path Tool - Shape-Rounded Rectangle: Color - Grey: Mode-3D Round: Border - 5: Depth-30, draw a square shape 30W x 30H pixels. (Keep your eye on the numbers bottom left of your screen - the size is important here! Note: If you keep your finger on the Shift Key whilst you draw this shape it will constrain it to a square. Right Click and Duplicate this Shape and drag the copy to a separate canvas until later. 3. Open your Easy Palette/Wrap Gallery/Path Wrap 9. Right Click and click on Modify Properties and Apply. In the Window that comes up, set the Repeat - Count to 9 and Spacing to 1 as shown (leave all other settings at the Default). Click OK.
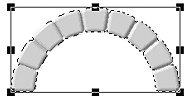
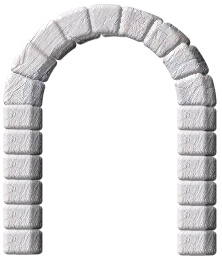
4. Move the arch to the top of the canvas and it should now look like the illustration opposite.
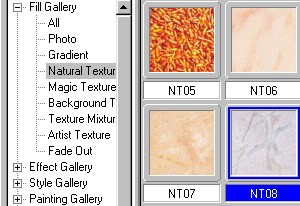
5. Keeping the arch top selected - use the Easy Palette/Fill Gallery/Natural Texture/NT08 - Click on this to apply to your arch top.
6. Then, from the Easy Palette/Material Attribute Gallery/Bump/M46 - Click on this and apply to your arch top.
Your arch top should now look like the illustration opposite. |
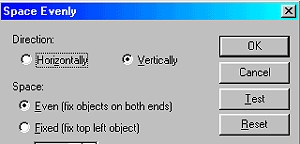      |
COMPLETING THE ARCHWAY 7. Drag the shape you put to one side at the beginning back onto the main canvas and apply the same material and bump to it that you applied to the arch top in 5 and 6 above. Duplicate this shape now and put the copy to one side until later.8. Use the Transform Tool/Resize to lessen the height of the stone block slightly - then Right Click and Duplicate this shape 5 times. 9. Line up the 6 shapes vertically - then, keeping your Shift key depressed click on each of them to select them all. Right Click/Align/Left. Right Click again/Space Evenly/Vertically: Even (Fix objects on both ends checked). Click OK.10. Right Click and Merge (the 6 blocks) As Single Object. 11. Right Click and Duplicate the side piece of your arch. Put in place on the opposite side of the arch. Select the two side pieces and the top of your arch and Right Click/Merge As Single Object. Your archway should now look like the illustration opposite.
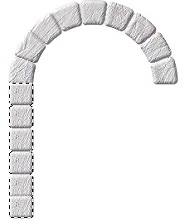
12. Right Click and Duplicate the arch section.
Place the copy in front of the first arch section and slightly offset to the left.
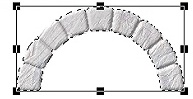
Select the back arch and lower the top slightly - your pic should now look as shown left.
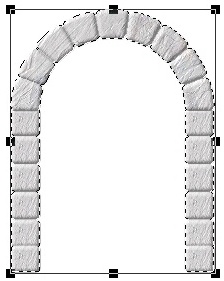
13. Keeping the back arch section selected, use the Retouch Tool/Burn Tool to shade the back arch section as shown.
Do NOT combine the arch pieces yet! |
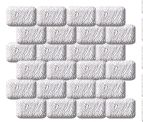 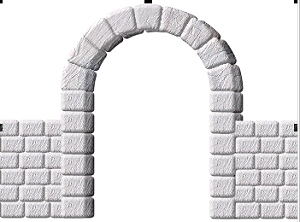 |
CREATING THE WALL 14. Using the shape that you you put to one side in 7 above, again lessen the height slightly using the Transform/Resize Tool. Right Click/Duplicate this shape 3 times. 15. Place the 4 shapes next to one another to form a row of stones for the wall. Keep your finger on the Shift Key and click on each section to select all 4 blocks. Right Click/Align/Bottom. Then Right Click and Merge As Single Object. Right Click and Duplicate this section 5 times. 16. Arrange the 6 sections as shown in the illustration. Try to overlap the sections very slightly to eliminate any gaps in the wall. 17. Once you are satisfied with your wall section, Right click and Merge As Single Object. 18. Right Click and Duplicate the wall section and put in place as shown opposite. (Use Right Click and Send Backwards to place the wall sections between the two arch sections. This is especially important on the right hand side!). |
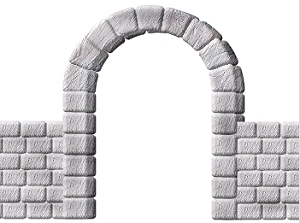 |
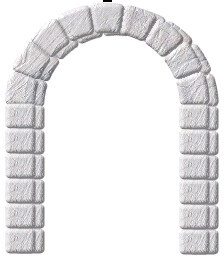
FINISHING THE ARCH & WALL 19. Using the Retouch Tool/Burn you can add a lot of depth and extra shading to your wall quite quickly and easily (see illustration opposite). 20. Now all that remains is to find a suitable setting and other items to finish your picture - but this is where I leave you to use your imagination! |
|
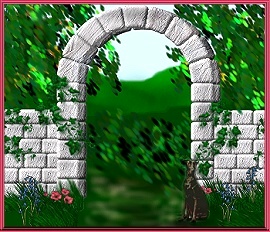
Ready for a Walk? |
|
|
|
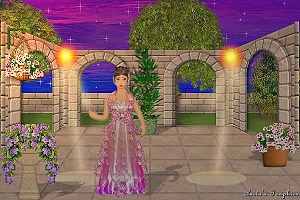
An imaginative picture based on this tutorial Thanks Anita! |
 |
|
|
Free Spirit Graphics If you would then like an invitation to join, please Email Me. We'd love to have you along! |
|
|
If you need any help - or want to make suggestions to improve this tutorial - or for new ones |
|
This site © Rosie Hardman-Ixer 2001/2/3 |