
BEDSIDE LAMP PI VERSION: 7/8/XL. LEVEL: Beginners MAIN TOOLS USED: Path Drawing Tool, Line & Arrow Tool, Transform Tools/Perspective, Object Paint Eraser, EasyPalette, Lighting Gallery, Gif Animator 5. TERMS OF USE: Please Read - Thank You! |
|
INSTRUCTIONS |
|
|
TOOL ICONS FOR BEGINNERS
|
|
|
|
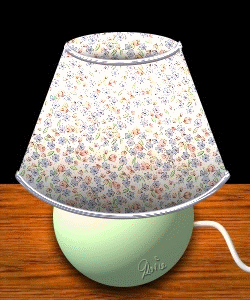
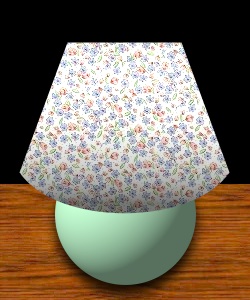
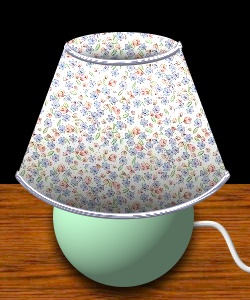
LAMP & BACKGROUND 1. Open a new canvas, 250W x 300H pixels, with a black background (if you wish to use a different coloured background create this now. You may use a different colour or gradient, use a fill from the EasyPalette/Fill Gallery, or create a rectangle (the same size as your canvas) using the Path Drawing Tool, fill this with a preset and Merge this before you start. 2. Using the Path Drawing Tool, Shape - Rectangle: Color - any you wish - I am using a wood preset for mine: Mode 3D - Round: Border - 1: Depth - 1: draw a shape 250W x 115H pixels and put in place at the bottom of the canvas. 3. Right Click/Merge.
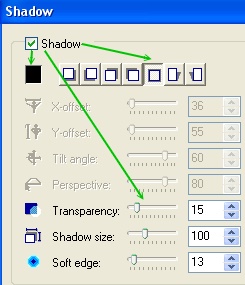
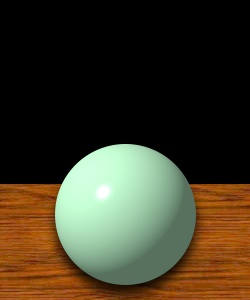
4. Using the Path Drawing Tool, Shape - Circle: Color - any you wish - I am using pale green Hex#9CEBAE: Mode 3D - Round: Border - 70: Depth - 30: draw a shape 140W x 140H pixels and put in place at the bottom of the canvas. 5. Right Click/Shadow and use the Shadow and settings shown opposite.
6. Right Click/Split Shadow. 7. Select the shadow only (best done in the Layer Manager) and put in place just below the lamp base as shown.
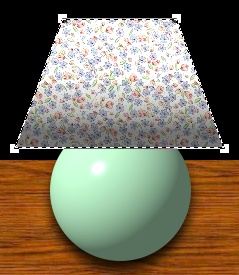
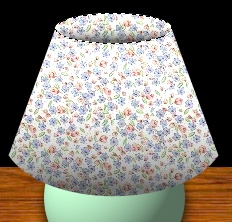
8. Using the Path Drawing Tool, Shape - Rectangle: Color - any you wish - I am using a fine detail flower preset: Mode 3D - Trim: Border - 65: Depth - 30: draw a shape 210W x 130H pixels. 9. Now use the Transform Tools/Perspective to narrow the top of the rectangle as shown. 10. Now Click on the Editing button to go into Path Edit.
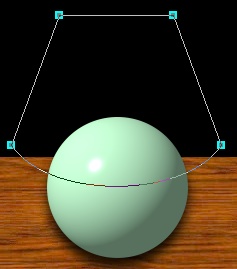
11. Select the bottom line of the rectangle by moving the cursor over the line until it becomes a little pointing hand.
12. Under 'Convert line' on the Attribute Toolbar, click on the curved line to convert the line to a curve.
13. Click on the editing button again to exit Path Edit mode and return to 3D Trim mode. NOTE: Some presets may have different lighting included. If this is the case you may need to add or subtract lights in the Material box. My preset has two lights - both Direct.
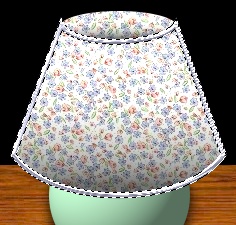
15. Using the Path Drawing Tool, Shape - Ellipse: Color - same: Mode 3D - Trim: Border - 15: Depth - 30: draw a shape to fit across the top of your shade x 30H pixels. 16. Select the main part of your shade and Right Click/Duplicate. Change the Mode to 3D Pipe and change the Border to 3. 17. Pick a colour for the trim and then click on the Material Box/Shading and change this to Metallic. 18. Open the EasyPalette/Material Attribute Gallery/Bump and add a bump such as M15 to add a little texture to the trim. 19. Now click on the Editing button to go into Path Edit again. 20. Select the top line of the shape and under 'Convert line' on the Attribute Toolbar, click on the curved line to convert the line to a curve.
21. Click on one of the top red nodes to produce the control handles and use these to create a shape following the line of the ellipse as shown. 22. Once you are happy with the line, click on the Editing button again, to exit Path Edit and return to 3D Pipe mode.
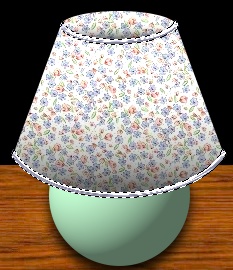
23. Right Click/Convert Object Type/From Text/Path to Image. 24. Now use the Object Paint Eraser to erase the excess trim from the sides of the shade.
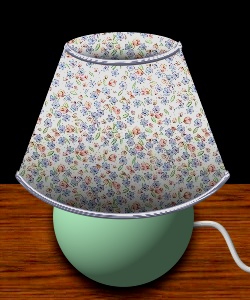
25. Using the Line & Arrow Tool/Freehand, Color - White: Mode - 3D Round: Outline Width - 3: draw a line for the flex. 26. Right Click/Arrange/Send to Back and put in place as shown. Finally - before we animate, we need to Merge certain pieces - please do this carefully! Save the lamp as an object now if you wish - for future use. 27. Shift/Click to select the base and its shadow plus the flex and Right Click/Merge these with the background. 28. Shift/Click to select all 3 pieces of the shade and Right Click/Merge As Single Object. |
|
|
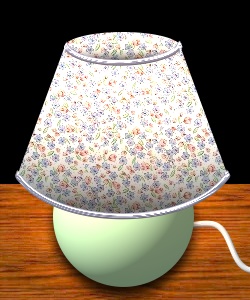
MAKING THE FRAMES For this animation we need to make 2 frames. The reason I have left the ufo in two pieces is because I wish to leave the edge of the shade darker but light the base and table underneath when the light comes on.... as if the light is shining down from within the shade. If I Merge everything, the edge of the shade will also be lit and the lighting will not be as effective. 29. First of all, click on Edit/Duplicate/Base Image with Objects to produce a second copy of the lamp. 30. Using the Duplicate, Right Click/Merge All. 31. Click on Format/Brightness and Contrast and click on the bottom, centre square twice and OK.
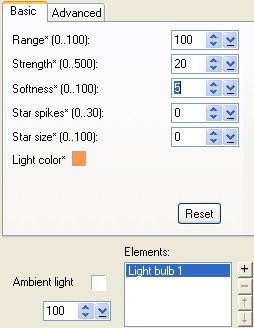
32. Save this picture to your hard-drive as Frame 1 - somewhere you can locate it easily (I use the desk-top. Close this canvas. 33. Back on the original canvas, make sure the shade is deselected and then open the EasyPalette/Lighting Gallery. Select Light Bulb 1 thumbnail and then Right Click/Modify Properties and Apply. 34. In the box that appears, Move the light in the left-hand preview pane using your mouse - so that it is near the top of the circular base. Now put in the settings shown opposite and OK.
35. Now select the shade only. Select Light Bulb 1 thumbnail again and then Right Click/Modify Properties and Apply. 34. In the box that appears, Move the light in the left-hand preview pane using your mouse - so that it is near the centre of the shade. Now put in the settings shown opposite and OK.
36. Save this picture to your hard-drive as Frame 2. OK - now we're ready to animate! |
|
|
THE ANIMATION 37. Open Gif Animator 5 by clicking on the Switch button at the top right of the PI Screen. 38. In the Startup - Wizard Box, click on Animation Wizard. In the box that appears, put in the Width (250) and the Height (300) dimensions and click Next. 39. Click on the Add image button. Browse to the folder containing your frames. Hold the Ctrl button down and select both Frame 1 and Frame 2 and then click on Open. 40. Click Next. 41. Click Next again and then Finish. 42. Select the dark version of the lamp from the thumbnails at the bottom left of the screen and then Right Click/Frame Properties. Change the Delay to 200 and OK. 43. Select the lit version of the lamp from the thumbnails at the bottom left of the screen and then Right Click/Frame Properties. Change the Delay to 350 and OK. 44. Click on the Optimize tab. From the Preset list choose Photo 256 (or - if you can do this without losing too much quality, Photo 128 - this will depend on the chosen colourings/presets you have used in the picture.) 45. Click on the Save button and Save the animation to your hard drive! And there's your lamp ready to light up your bedside....! |
 |
|
|
Free Spirit Graphics If you would then like an invitation to join, please Email Me. We'd love to have you along! |
|
|
If you need any help - or want to make suggestions to improve this tutorial - or for new ones |
|
 - Transform Tools/Perspective
 - Easy Palette
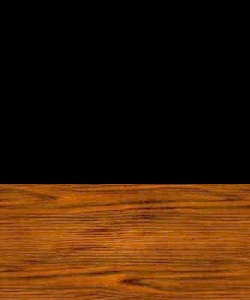


This site © Rosie Hardman-Ixer 2001/2/3/4 |