
SNOWGLOBE TUTORIAL PI VERSION: All from 8 - 10! LEVEL: Beginners MAIN TOOLS USED: EasyPalette (Material Attribute Gallery/Presets and Particle Gallery) Transform Tools, Layer Manager, Gif Animator 5. DOWNLOAD: Path-kit for the globe and base |
|
INSTRUCTIONS |
|
|
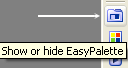
TOOL ICONS FOR BEGINNERS
|
|
|
|
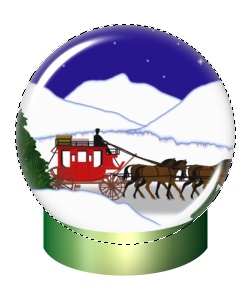
MAKING THE GLOBE 1. Download and unzip the kit provided in the link above. The kit consists of three path objects - two circles of the same diameter (mine is 220W x 220H pixels) + a base shape made using Custom Shape - Plaque 5 (PI 10 - S46) measuring 164W x 79H pixels. Using the Transform Tools/Rotate & flip, I rotated the base shape through 90 degrees, then used Right Click/Convert Object Type/Reset Text/Path Object. 2. Select both circles and Right Click/Align/Center Both. 3. Select the top circle and change the Mode to 3D Round, Border (Width in PI 10) - 22: Depth -30. 4. Open the EasyPalette/(Text/Path Effects in PI 10)/Material Attribute Gallery/Glass and apply the G23 preset to the object. 5. Select the black base shape and change the Mode to 3D Trim. 6. Apply a preset of your choice to the shape - I am using Green 1 from the Material Attribute Gallery/Plastic. 7. Using the Transform Tools/Rotate & flip, flip the shape 90o to the right and put in place. Your globe should now look something like the one on the left. |
|
|
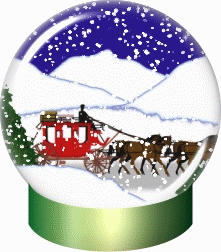
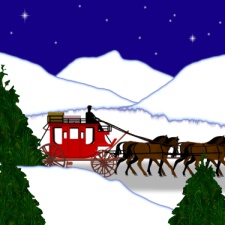
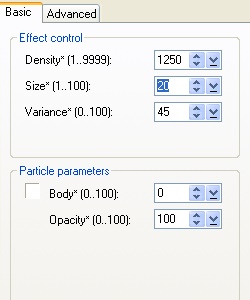
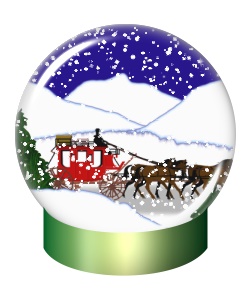
THE BACKGROUND PICTURE Although the traditional subject for these globes is a snow scene, you may, if you wish, use a completely different type of animation in your globe - a twinkling Christmas tree perhaps or a specially created animation. I am going to give instructions for a basic snowglobe. For this you could use a photograph - as long as you make sure that it is royalty and copyright-free (they are two different things!) for the background but I prefer to make my own scene. To make a picture with a snowy theme completely from scratch with the path tools, you could use my Snow Scene Tutorial if you are stuck for ideas! If you do this, do try to come up with ideas for a scene of your own i.e. use the tutorial for the method rather than just copying the design. We don't want a lot of globes all with the same picture on LOL!!! Whatever type of picture you use, you need to have one approximately 225W x 225H pixels. 8. Import the picture into PI and Right Click/Copy. You can now close the picture. 9. In the Layer Manager, select the darker circle and change the Mode to Selection. 10. Click on Edit/Paste Into Selection and keep your finger on the mouse-button until you have moved the picture into the best possible position, then release the button. You can, if you wish, at this stage add other items to the base of your snowglobe, perhaps a gift box or two, Christmas Trees etc. Let your imagination run riot here! For the purposes of this tutorial though I am sticking to just the basic kit. 11. Once you have all your objects made, select them all and then click on Crop, to delete all unwanted spare, white space. 12. In the Layer Manager, click on the little space, next to the Eye Icon - to Lock ALL the pieces of your globe into position. 13. Now click on Edit/Duplicate/Base Image with Objects TWICE so you now have a total of 3 copies of your globe. 14. Select any of these 3 canvasses and, in the Layer Manager, select the 'picture' object only. 15. Open the EasyPalette (PI 10 - Image Enhancements)/Particle Gallery/Snow and select Snow 2 - Right Click/Modify Properties & Apply. 16. Using the settings shown left, click on 'OK/Apply current frame effect to image' to add snow to your picture. 17. Select the picture object on the other two canvasses in turn and apply the snow in the same way, using the same settings but before clicking OK - click on the Random button a few times to ensure a different distribution of snow. 18. Make a note of the dimensions of your pictures and then save each of your pictures to your hard-drive, somewhere you can find them easily - I usually use the Desktop - as snow1.jpg, snow2.jpg, snow3.jpg. Now we're ready to animate! |
|
|
THE ANIMATION 18. Either click on the Switch button at the top right of the PI screen to go into Gif Animator 5 - or close PI and open Gif Animator 5 separately. 19. In the dialog box that appears click on Animation Wizard. 20. Add the dimensions of your picture that you noted at the end of the last section and click Next. 21. Click on Add Image..... browse to your three images and, holding your finger on the Ctrl button, click on all three images to select them. Click on Open. In the case of this particular animation it doesn't matter which order they open in. Click Next. 22. Click on Next once more, then Finish. Your three frames appear in Gif Animator. 23. Click on the Optimise tab and select the Photo 256 preset. Click Save and save the animation to your hard-drive. ...and there's your little snow globe! |
 |
|
|
Free Spirit Graphics If you would then like an invitation to join, please Email Me. We'd love to have you along! |
|
|
If you need any help - or want to make suggestions to improve this tutorial - or for new ones |
|
 - Easy Palette
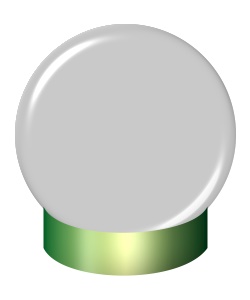
This site © Rosie Hardman-Ixer 2001/2/3/4/5 |