Courses in the Path Tools


Please note that all my Path Tool courses, apart from Creative Animation, are written and illustrated in PI XL, however they have been updated with instructions for PI Version 10. Creative Animation is written in PI 10 with added notes for V 12. However it should be perfectly possible to do this in earlier versions of PI as well, though you may find that some of the tools and presets etc are differently named.

Please click here to go to the PayPal payment page.
(Personal cheques & POs (UK ONLY) and currency (US Dollars or UK Sterling ONLY) sent by Registered Mail also accepted.


AdvancedNEW COURSE - AUGUST 2007Advanced

CREATIVE ANIMATION

Subjects

I have found, over the years, that even though a lot of people have become quite expert at making objects with the path tools, they are still nervous of making animations - even though the skills required are, difficulty-wise, WAY below those they have already developed!

My goal in this course is two-fold... a) I am continuing to teach people how to make objects with the path tools but b) I want to show how easy it can be to make effective animations. Most of this course is suitable for anyone who has already achieved my Exploring PI Paths Certificate and should be easily done by anyone with experience of Intermediate Level tutorials for the path tools. Absolute beginners at animation should be capable of making all the animations with ease as long as the instructions are followed carefully.

I have explored a number of ways of making the basic ufos or frames for animation and also explored ways of using the Animation/Particle Galleries in PI to make elements of the animation in an imaginative and unique way.

My course consists of 6 lessons. The course is downloaded, in full, by the student once payment has been made and there is a student number limit of 10 pupils at any one time. Although there is no actual time limit set for exercises to be completed, as regular work provides the best reinforcement for information that is being assimilated, it is hoped that most students will complete the course within 3 months. Students have a number of exercises (between 3 and 10 - some accompanied by free downloads) in each lesson and a spreadsheet record will be kept of all exercises that have been completed.

I am confident that when you complete this course you will have learned how easy Gif Animator 5 is to use.

I WILL TAKE STUDENTS FOR THE COURSE WHO WISH TO SIMPLY MAKE THE OBJECTS - HOWEVER A CERTIFICATE WILL NOT BE GIVEN FOR THESE.

The cost of the course is £15.00 (approximately $30.00 US at the present exchange rate)

Support throughout the course is by email and although you are not obliged to share your finished results from the Lessons, you may do this on a dedicated forum at the Free Spirit Graphics Bulletin Board if you wish. It will be necessary for you to Register at this Board as a member in order to do this.

Certificates - in both web and printable form are given to successful candidates immediately upon completion of the course.

All course content is contained within the lessons and other on-line resources so no textbook is required.

Here is an outline of what is contained in the course:

Lesson One - The Watering Can (watering a flower-border)

Path Objective - Creating a Watering Can
Animation Objective - Creating an Effective Water Spray

The full picture includes a flower border being watered by a tilted watering can and uses a brand new way of making an effective water spray that can be used for shower-heads or other similar animations. This lesson uses a ufo, imported into Gif Animator. The frames are then created in GA5 itself. The flowers can be made from a simple tutorial on my site (link provided) or you can use any flower ufos that you happen to have. The background can also be decorated but it has to be remembered that the file size of the finished animation will increase with the amount of detail included.

Lesson Two - The Howling Wolf (baying at the moon)

Path Objective - Creating a Shadow Picture from Clip Art/Fonts/Path Shapes with movable parts.
Animation Objective - Creating an Effective Animated Shadow Picture

This picture depicts the shadow of a wolf - howling at the moon and shows how to create the path shapes needed from line art and fonts and how to manipulate those shapes in PI to make the animation. This lesson explores the method of making animations frame by frame in PI before importing into GA5.

Lesson Three - Snowfall behind a Moonlit Window

Path Objective - Creating an Effectively Lit, Moonlit, Stained Glass Window.
Animation Objective - Creating a more realistic snowfall than the simple one achieved with the Snow Particle in PI, more commonly used in snowglobes.

The aim of this picture is to make a simple but stunning looking stained glass window (and showing how easy digital stained glass techniques are), with snow that actually FALLS instead of swirling in a random and UNlifelike way common in snow-globe animations. Again, the ufo is made in PI and imported into GA5 where Tween is used to make the formation of frames almost automatic in GA5! The little plant pot is not obligatory and you can use any object you like on the windowsill - anything from cats to sailing ships!

Lesson Four - the Launch of the Saturn V Rocket

Path Objective - Creating a detailed picture of the Saturn V Rocket
Animation Objective - Creating a launch of the rocket using fire frames made in the Animation Gallery in PI in a new way!

This lesson looks hard but is in fact MUCH easier to draw and animate than it looks. There is a minimal amount of Path Edit to be done. There is also a unique way of using one of the Animation Gallery presets in PI to form part of the animation. Frames are made in GA5 again and the lesson shows how to use the Object Manager and the editing pane to great effect. And YES - you can put your own country's flag and wording on!

Lesson Five - a digital photo-viewer with keyring and clip

Path Objective - to create a small, digital photo-viewer keyring - with a metal chain and clip.
Animation Objective - Creating a moving picture slide-show in the keyring.

This viewer can be made in any shape that the artist wishes as long as the basic instructions are followed. Any photographs of a suitable size can be used for the lesson, though a file of photos of flowers is provided for those who wish to use it. The lesson has an explanation of how to use path shapes changed to Selection to complete the ufo, which is then imported into GA5 for creating the frames.

Lesson Six - 'The Illusionist' Necklace (also known as the Butterfly Locket)

Path Objective - to create the shape-transforming necklace/locket from the film 'The Illusionist' (also known as the butterfly necklace).
Animation Objective - Creating a superb smooth running animation

This is a necklace that magically seems to be able to rotate about two different planes at right angles to one another (and yes, it CAN and HAS been made, though the mechanism inside that allows it to do so is incredibly complicated Although there is a certain amount of path editing to be done, it is NOT difficult. The various frame pictures can be dragged into PI and objects formed on top of them to ensure accuracy. This is a LONG lesson that takes time, patience and precision to achieve but is NOT technically difficult and is well within the scope of anyone prepared to take time when doing it. I have included a small version of the finished locket above but it is actually made at a much larger size.

READ WHAT FORMER STUDENTS SAY...

This is the course for two groups of people, those who don't like animating and those who do. Why both groups?

Because if you don't like animating you will after doing this course, it's beautifully laid out to make the process of animating as easy as falling off a log. If you already do like animating then you are about to learn some wonderful new ways to animate things.

So what is an animation course doing in amongst Rosie's path tool courses? It's there because to animate you need something to do it with. Rosie has combined a path tool course with animation to make some really lovely and unusual animations.

I loved doing the tutorial proof reading for this, I learned a lot of Rosie's "sneaky" little tricks to take shortcuts in PI.I gained the knowledge to use the animation techniques to apply them to other things.

On first seeing some of the completed animations, my first thought was "how on earth did she do that?" I always look at things wondering how they were done and this time I got my answers! :-) Some look complicated but Rosie's super teaching techniques make them become easy and next thing you know you are saying..did I just make that?

The course has enough to challenge advanced users of PI but not too much as to scare off people more new to the program.

Overall, a great course with some very interesting techniques for both path tools AND animation.

Jeaney Borland - Scotland (Proof Reader)

I have taken all of Rosie's Courses. All of her Courses are very Informative.

Every one of them will teach you all you need to know about the Path tools.

I am not one for Animation but she made it very easy to understand.

The courses do get harder as you go. But I highly recommend all of them if you want to learn the path tools and all that goes along with them.

Rosie is a great Teacher and willing to help when you need it. I will be back if she offers more courses to take to!

Wendy Beck - California

This is a two-in-one course! Here you learn how to draw the object and afterwards learn how to animate it. Each animation has a different method - So cool , eh?...

We learn how several techniques and tricks of animation, without losing the essence of the Path Tool side of Rosie's courses... :-)

Always, well written, without complications and with huge support and affection that is peculiar to Rosie... and all of the tutorials possess very interesting subjects...

Thank you again dear teacher, for another wonderful course... :-)

Cami - Brazil

If you have any questions, please don't hesitate to e-mail me!


EXPLORING PI PATHS - BEGINNERS' LEVEL COURSE

Subjects

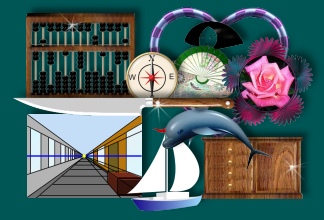
If you are looking for a faster, more efficient way to learn the path (vector) tools in PhotoImpact, I'd like to suggest this course. I wrote it so that PhotoImpact users could start with the basics in vector graphics and follow a logical progression of learning these tools. Although this is a starting level course in the Path Tools, it is assumed that students KNOW their way around the basic tools in the program such as creating new canvasses, using the EasyPalette, Layer Manager etc.

My goal is to provide a fun, hands-on and more in-depth learning experience than I can offer using only tutorials. I feel that by structuring the course with well-organized material and relevant exercises covering all the tools and commonly used features, it provides my students with a solid foundation of knowledge and experience, and will give them the confidence to move on to more advanced features.

My course consists of 6 in-depth lessons. The course is downloaded, in full, by the student once payment has been made and there is a student number limit of 10 pupils at any one time. Although there is no actual time limit set for exercises to be completed, as regular work provides the best reinforcement for information that is being assimilated, it is hoped that most students will complete the course within 3 months. Students have a number of exercises (between 3 and 10 - some accompanied by free downloads) in each lesson and a spreadsheet record will be kept of all exercises that have been completed.

I am confident that when you complete one of my courses you will feel much more comfortable and confident using PhotoImpact Path Tools.

The cost of each of these courses is £15.00 (approximately $29.00 US at the present exchange rate) per course.

Support throughout the course is by email and although you are not obliged to share your finished results from the Lessons, you may do this on a dedicated forum at the Free Spirit Graphics Bulletin Board if you wish. It will be necessary for you to Register at this Board as a member in order to do this.

Certificates - in both web and printable form are given to successful candidates immediately upon completion of the course.

All course content is contained within the lessons and other on-line resources so no textbook is required.

Here is an outline of what is contained in the course:

Lesson One
Basics - The tools and starting to use them...

  • Introduction - the difference between vector and raster images.
  • The Path Drawing, Outline, Line & Arrow & Path Edit Tools.
  • Drawing Shapes - The Path Drawing Tool.
  • Modes.
  • The Material Box.
  • The Path Panel.
  • Managing Layers.
  • Alignment.
  • The Outline and Line & Arrow Tools.

    Lesson Two
    Exploring colouring of Path Objects.

  • Applying Presets from the EasyPalette
  • Creating New EasyPalette Presets
  • Modifying Existing EasyPalette Presets
  • Frequently Asked Questions (FAQs) - About Using/Making Presets.
  • Gradients - Using, Creating and Adding to the Palette Ramp Editor.
  • Magic/Natural Texture Fills.

    Lesson Three
    Path Editing

  • Accessing Path Edit
  • Definition of Terms.
  • The Attribute Toolbar.
  • Edit Mode/Edit Point/Toggle.
  • Duplicate, Align & Group.
  • Converting lines
  • Creating new shapes by using photographs and clip art as reference for basic shapes.

    Lesson Four
    Creating your own path shapes.

  • Saving new shapes in the EasyPalette.
  • New shapes from old:
    • Using multiple shapes with Edit/Trace
    • Ribbon shapes using Duplication.
    • Continue Draw.
    • Using clip-art/Trace.
    • Using Text.
    • Filling Outline shapes to make solid ones.
    • Using the Transform Tools to change shapes.
  • Using the Outline and Line & Arrow Tools
  • An Introduction to the Spline, Bezier/Polygon and Freehand Tools.

    Lesson Five
    Working with Bevels, Borders, Wrap & Type Galleries.

  • 3D Bevels and Borders.
  • Wrapping it up:
    • Path/Text Wrap & Bend Text Galleries.
    • Using Multiple Wraps.
    • Wrap - Fit together command.
  • Type Gallery.

    Lesson Six
    Those all-important rules of drawing...

  • Introduction: A Little Puzzle For You.
  • Improve your graphics by using the path tools to help you with:
    • Correct Perspective.
      • One Point Perspective.
      • Colour in Perspective.

    • Light & Shade.
      • Shading.
      • Shadows
  • Correct Proportion.
  • Displacement Mapping (PI XL Only).
  • A brief look at Z-Merge

    READ WHAT FORMER STUDENTS SAY...

    "It was an absolute pleasure to complete the course. It felt like play not work to me! I am using so much of what I learned with my digital scrapbooking. In fact today, I made a frame using continue draw and I was so happy I knew how to do it (and line all the windows up etc) without trying to make a series of frames and grouping them. I would heartily recommend this course to anyone!"
    Jacqueline Sheppet - Vancouver, Canada

    "Rosie's PI Path Tools Class is not the usual "skim over the top" type class. I finished EVERY lesson feeling excited about all I had learned. Rosie explains each technique in depth, but if you need extra help, you get it. I love Rosie. I love her class. What about some more classes, Rosie? I am standing in line already!"
    Lucy Page - Oklahoma City, USA

    "This course surpassed all my expectations! I learned more than I expected and was surprised by the little tricks Rosie showed us. Rosie is patient, inventive and most of all encouraging. Her enthusiasm to share her knowledge shows in her well planned course. I can’t say enough good things about it and my only regret is that it has to end."
    Anna Schwartz - USA

    "I am a software engineer with 20+ years experience and have taken many courses on related subjects, I can say without hesitation that this course was by far the best value and most useful one I've taken in a long time, well worth the price."
    Stephen Rivera

    "Rosie's Path Tools Course for PhotoImpact users was phenomenal. I learned so much more than I had expected when I enrolled. I had been using PI for over 3 years and didn't consider myself a newbie. But Rosie taught me and the other students so many things that we never would have discovered on our own.

    The course covers a wide range of tools, tips and techniques from basics through advanced topics. The lessons are clear, concise, and easy to follow. There is plenty of interaction with other students. And Rosie is a fabulous teacher - tactful, patient, funny and best of all - she knows her material. Take this class!"
    Tess Goldman- California/USA

    "I highly recommend that anyone from beginner to expert take Rosie's PI Paths course! The course is extremely informative, easy to follow, and you will learn things you never expected a graphics program could do. Rosie is a wonderful teacher who will answer your questions (no matter how silly they seem to you) give you ideas and instructions and guide you through the course with ease. I thoroughly enjoyed my time with Rosie and the PI Paths course!"
    Terry Smith - Ontario Canada

    "There was a lot I didn't know about the path tools and how you can use them in so many different ways. Anyone who wants to get the most out of PI Path Tools - I really recommend you to take this course - I have learned so much from it.

    I think the content in the course is excellent and Rosie really engages with all the students.

    I'm from Sweden and my English isn't so good but I had no problems following the instructions and there were lots of illustrations. I enjoyed it and will highly recommend it... it's worth every penny!"
    Solen - Sweden

    "Exploring PI Paths offered a more in-depth procedure, whereby I could evaluate my ability with a determination and skill previously unknown. I have the confidence now to enlist the material dialogue and path tool attributes to create a more professional looking image.

    I also found the atmosphere to be very congenial."
    Valery - Washington/USA

    If you have any questions, please don't hesitate to e-mail me!


  • 'PATHS TO SUCCESS' - INTERMEDIATE LEVEL COURSE

    Please note that this course is open to graduates of 'Exploring PI Paths ONLY'.

    Subjects

    The course consists of 6 in-depth lessons. The course is downloaded, in full, by the student once payment has been made and there is a student number limit of 10 pupils at any one time if all courses are full. I may be able to take more pupils on this course if other courses are not fully booked. Although there is no actual time limit set for exercises to be completed, as regular work provides the best reinforcement for information that is being assimilated, it is hoped that most students will complete the course within 3 months. A spreadsheet record will be kept of all exercises that have been completed.

    Lesson One
    Swiss-Army-Style Multi-Tool Knife.

      Creating metal instruments by various methods. This knife looks like a very complicated piece of work to put together but is, in fact, relatively easy, once one or two basic techniques have been mastered.

    Lesson Two
    Wooden plate rack with crockery

      Using the Transform Tools/Resize, Slant and Distort when working with fonts and grain in wooden objects. In PI, the colouring for presets cannot be turned to any angle that may be needed - it can only be turned through 90, 180 and 270 degrees whereas in 'real life' the grain of wood appears at various angles, depending on perspective. This tutorial is a guide to the processes which can be used to achieve this.

      In the second exercise I ask students to create simple cubes - with the grain at the correct angles on the three sides. Notes are then included to help students to create matching painted lettering and appropriate shadows when the cubes are stacked.

    Lesson Three
    Lift (Elevator) Animation

      Using the Path Tools to create the scene and Gif Animator to animate. A lot of people are quite nervous of making animations, when really they are very easy to do in Gif Animator - unless of course one is attempting something very complicated. GA5 provides us with several tools, one of which, Tween, makes one aspect of animation much quicker and easier and that, combined with use of the Object Manager in the program, can make animations can be a LOT simpler than you think!

      This Lesson will also shows students one or two novel ways of using Continue Draw including a trick for cutting down the number of objects you are eventually working with in Gif Animator by merging objects and converting the resulting picture into a path object that can then be edited.

    Lesson Four
    A clear plastic water-filter jug.

      Path Edit exercise using Transparency in PhotoImpact. This lesson shows how to use layers of transparent shapes to create an object that has a contoured body with opaque objects showing behind the transparent ones. By using varying the shades of the same blue, different light and transparency settings and a couple of painted lines we can create an object with realistic optical depth relatively easily.

    Lesson Five
    A Hanging Oil Lamp

      Creating meshes and effective lighting on metals. The lesson describes how changing the modes and light settings on path shapes can create a complex contoured object. The object was chosen because it is a strange one from the perspective point of view too because of its height.

    Lesson Six
    Landrover 4-wheel drive vehicle

      Using Modes, Textures, Reflections & Continue Draw. This lesson shows how using painting with textures and adding reflections to path shapes can really add shape and character to an object - in this case an old Defender-type Landrover. I also describe a few short-cuts for making some types of objects which students might not have used before.

    If you are interested in joining it, please e-mail me to put your name on the Reserved Places List as numbers of students will be limited to 10 at any one time (unless lower numbers on the other two courses allow).

    READ WHAT FORMER STUDENTS SAY...

    "For anyone having doubts about this one after doing PI Paths, don't doubt, do it........it's an excellent course with a nice learning curve and has some very, very interesting little techniques that you won't find anywhere else. Rosie has these wonderful little tips and techniques for making what looks hard and time consuming turn into something a lot easier and faster and I think that helps add enjoyment to the courses. Sure we all want to learn, but it's much nicer to have fun while we do it. :-)
    For who has already done Adventurous Paths and wondering if this one has enough in it to challenge you, the answer is YES YES YES. Doing the testing was great fun, not too easy, not too hard. I learned new things from all of the 6 lessons and can honestly say each lesson has such beautiful results that I was tempted to go faster than my brain wanted just so I could see MY end result. :-)
    It's SO satisfying to get to the end and think WOW, I just made that. :-) I am 100% sure that everyone, no matter what level of ability, who does this course, is going to enjoy it and learn a lot from it. Everyone has room for more improvement and though doing tutorials can and does improve our skills, there is nothing quite like having each step explained on a course. I know what I have learned from this new course will find it's way into my work and hopefully improve it.
    Rosie, It's a WINNER and bridges the gap between the two existing courses perfectly. You must have thought long and hard on this one to be able to produce something that suits both the PI Path graduates and the Adventurous Paths graduates. You came up with the goods though and I have enjoyed every minute of proof-reading and testing it. Thanks for all the hard work that lets us all have the experience of doing courses written by...The Queen of PI Paths."
    Jeaney Borland - Scotland (The best proof-reader and tester I could wish for! - Rosie)

    "I have taken all 3 of your path courses and can say without a shadow of doubt this is the best course available anywhere... for anyone interested in learning and I mean learning how to use path tools this course will give you the needed knowledge along with a good dose of confidence to unleash all that creative talent!!! You will not find anyone with the patience Rosie has. Thanks again for being there!!!"
    Candace Cleveland - Virginia, USA

    "This is really again an excellent course from Rosie. Tutorials are awesome, easy to follow, and I did learn so much again! Rosie brings out the best in you! Highly recommended for every PI-lover."
    Annette Sleeswijk - The Netherlands

    "This course is crammed full of many different ways to bring out the best in our use with PI. It gave me the confidence needed to explore different and interesting techniques on my own. The knowledge gained from your course is outstanding. When completed I felt as if I had earned a certificate. As your no nonsense approach is the only way to learn. I would and will, recommend anyone to take this course, it is well worth the time. Thanks for your patience and guidance in Paths to Success, and for sharing your knowledge with all of, us as well as all your courses, You're the Best. When is the next course?"
    Jane Davidson - USA

    "I have taken all 3 of your path courses and in every courses I have learned something new. I'm really admire you for the way you can do every little detail so realistically... and it's so easy to follow your lesson... This is the best course, containing a lot of detail and again I have learned how important the "Trim Mode" and the "Light" are in Path Tool work. I recommend you to take all Rosies course's so you can learn how much you can do in PI. Rosie... I'm first in line for the next course :-))"
    Solweig Larssen - Sweden

    "Another precious course from the Rosie' s Path Tools Courses! Here I learned more about the use of the path tools and many applications such as plastic, metal, glass, light, shadow, depth, transparency, etc... And also a great lesson about animation! This is simply amazing course. It was even easier to learn how with all attention and patience that to dear Rosie gives... :-) Thank you sweet teacher. "
    Cami - Brazil


    ADVENTUROUS PATHS - ADVANCED LEVEL COURSE

    (6 advanced exercises for the PhotoImpact Vector and associated tools).

    Subjects

    This course is ONLY open to graduates of 'Exploring PI Paths'. The course is limited to 10 students at any one time.

    Students are expected to know the location and general method of use of all the relevant tools covered in the first course e.g. being able to take a basic shape and edit it into a new one without detailed instructions etc.

    All the exercises require painstaking attention to detail and a lot of patience but the results ARE worth it! If you're good with the path tools, have taken my first course and you like a challenge - this is the course for you!

    The course consists of 6 weekly, in-depth lessons. The course is downloaded, in full, by the student once payment has been made. Although there is no actual time limit set for exercises to be completed, as regular work provides the best reinforcement for information that is being assimilated, it is hoped that most students will complete the course within 3 months. A spreadsheet record will be kept of all exercises that have been completed.

    The cost of each of this course is £15.00 (approximately $29.00 US at the present exchange rate).

    Support throughout the course is by email and though you are not obliged to share your finished results from the Lessons, you may do this on a dedicated forum at the Free Spirit Graphics Bulletin Board.

    Certificates - in both web and printable form are given to successful candidates immediately upon completion of the course.

    All course content is contained within the lessons and other on-line resources so no textbook is required.

    A brief outline for the course is given below:

    Lesson One
    Indoor Scene – The bottom of the stairs.

      Working with path shapes, modes, lighting and Trace to create the basic layout of an indoor scene – walls, panelling, skirting boards, stairs and banisters. Shading the various shapes to give depth.

    Lesson Two
    The pearl-handled pocket gun

      Contouring metal. Using various modes, shapes, presets and lighting to produce a realistic, 3D image of a turn-of-the-century firearm.

    Lesson Three
    Containers

      How to create 4 realistic-looking containers – including an open, wooden storage box, a glass jar with a screw-top lid, a traditional Irish Cruiskeen (Whiskey jar) and a metal bucket. This lesson will show (amongst other things) how to use turned grains in wood, making mitred corners in perspective, creating different lighting on parts of a jar with two different textures, using different modes to get correct shading and some new ways of ensuring that curving parallel lines are edited accurately. It will also show how to adapt simple shapes, downloaded from the web, to make more intricate objects, rather than just filling them with a preset.

    Lesson Four
    The old fashioned Singer treadle sewing machine

      Working in wood, surfaces with gilded decoration and wrought iron metal components. Uses Line & Arrow (Spline), Outline Drawing Tool, Path Edit, Transform (especially Distort & Perspective), Gradients, Modes, Lighting, Shading and Paintbrush to produce a complex graphic; also how to create lattices using the Trace command.

    Lesson Five
    The waterlily

      A workout for the Bezier/Polygon Tool, (plus Path Edit, Gradients, the Retouch Tools/Burn, Dodge and associated tools) in order to create a luminescent, beautifully shaded flower.

    Lesson Six
    Outdoor Scene - An English thatched country cottage

      Working with the Line & Arrow Tool, Format/Mask & Shadow, the Retouch Tools, Path Edit, Presets, Paintbrush, Wrap Galleries, Stamp Tool and Clone Tool - to produce a complex scene of sky & background trees, an English thatched country cottage, flower and tree filled garden and stone path.

    READ WHAT FORMER STUDENTS SAY...

    With each course that I do with teacher Rosie, I am more impressed with what we are able to do in PI...

    And once again I learned how to use new techniques use of the tools for that mean I can do my own graphics much better!... :) There are so many things that we are able to create...

    No better place exists than here with Rosie's Courses for those that really want to learn about the path tools in PI... It is simply amazing!... I can't wait for the next course (4th)... Humm?... :))

    Thank you darling teacher for more a great course and by all patience and encouragement that you give... :)
    Cami - Brazil

    Truly one of the most exiting, challenging and awesome path courses EVER!

    I thought I knew almost all it takes with the path tool and I was certainly wrong. There were so many more new things to learn that really amazed me. I'm SO thrilled to have taken this course, now I feel I can give the path tools a good workout every time I work in PI.

    Thank you so much Rosie, you are the best teacher anyone could wish for. Your lessons are impeccable and your taste in objects is flawless.

    Thank you again, Love Bladecroft
    Paula (Bladecroft) - Chile

    Rosie's classes are a must for anyone who wants to learn to create realistic looking objects. Her classes are extremely well written, easy to follow and the illustrations are wonderful. She is a excellent teacher and she is always honest in her evaluation of your work. Something which I appreciate very much.

    Not all the lessons were easy for me, lol, but with Rosie's help and encouragement, all can be completed with wonderful results. She is readily available with help, suggestions and encouragement.

    Rosie, you never fail to surprise and delight me in the way you come up with new things that can be done in PhotoImpact. You blew my mind using the "Frame & Shadow" in that manner.

    Thank you for six delightful weeks of creating. I am looking forward to taking your next class. Hint, Hint.
    Sue Owens - OR, USA

    "As a 2 year PI user, I thought I had learned pretty much most of the program's abilities....when I took Rosie's Adventurous Paths Course, I found out how wrong I was!! Under Rosie's excellent instruction, I found myself pushing the envelope and learning things I had overlooked, plus I increased my ability to do things I never thought possible. I'm more confident in working on things that seemed impossible but now I know they really aren't. I recommend this course to anyone who has learned all the basics of path tools. Push yourself, challenge yourself, and learn more than you ever thought possible in taking this outstanding class!"
    Jeri Hoskins - USA

    "Having just completed “Adventurous Paths” I have to say how appropriately named this course is! It was fun, full of surprises and the momentum never slowed down. I loved it. With no other formal study of Art I am now able to use those path nodes and handles with ease…I can create the illusion of depth using shading and applying light in all the right places. By adding touches of paint and the careful placement of rendered shapes as well as creating shadows in various ways I can make much more realistic images that stun my family and friends - I actually feel like an artist! My favorite lesson was creating an image using the Bezier Tool. With its power packed capabilities and Rosie’s explanations and one-on-one mentoring I completed an image that seemed impossible for me to make. I just can not believe how affordable “Adventurous Paths” is! Each lesson is well worth £15.00. Thank you Rosie for the opportunity to learn so much and the encouragement you have given every step of the way. You have made it possible for many to grow and to improve their skills. There is no gift more precious than to help others to learn. You are an outstanding artist, a dedicated teacher and a loyal friend to all of your students."
    Patricia Patterson - USA

    "If you are serious about learning all that can be done with the path tools in Photo Impact then this course is one you cannot miss! It takes you way beyond the basics with ideas and hints galore. Rosie has found ways to do things that give great effects and save time. Want realism, learn with Rosie!"
    Carol Leather - England

    "Rosie I think you should have books with cds all over the world... LOL... Without a doubt this is the best course I have ever taken... I learned more about PI with you than anyone or anything else... Thanks for all you patience!!!!"
    Candace Cleveland - VA, USA

    "To all you ladies and gentlemen thinking of taking Rosie's course I could not recommend it highly enough! Some are tough but all of the lessons make you think and when you finally get Rosie's approval you will be just so proud of yourself!

    Gone will be the days when you "cut out" something to make a picture, or searched for "tubes".......yours will be your own originals!

    Go for it....shell out a measly few bucks and learn something that will either be useful to your webpages or just something you can stand back, admire, and think "I did this all by myself!"

    I can't believe how far I've come, I still need to work on a lot of things, but Rosie started this old brain working again, and no more can I stand the mediocre garbage I was posting on other Boards.

    Let's hear it for Rosie.....Hip, Hip, Hooray!"
    Kaye - A West Aussie, in Northern California!

    If you have any questions, please don't hesitate to e-mail me!


    RETURN TO MENU PAGE


    This site © Rosie Hardman-Ixer 2000-2009