
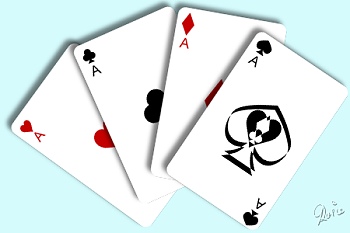
ACES PI VERSION: 8. LEVEL: Beginner MAIN TOOLS USED: Path Drawing Tool, Path Edit. TERMS OF USE: Please Read - Thank You! |
|
INSTRUCTIONS - PAGE 2 | |
|
|
PART 4 - THE CLUB 23. First of all - using the Path Drawing Tool, Shape - Circle: Color - Black: Mode - 2D: draw a shape 130W x 130H pixels. 24. Right Click/Duplicate this shape TWICE and then place the three shapes together on the canvas as shown. (I have coloured mine in three shades to show you how they fit together - but you should keep them all black). 25. Now using the Custom Shape - Triangle (A08 in PI8), draw a black shape, approximately 140W x 120H pixels. Put in place as shown. 26. Now click on the Editing button to go into Path Edit mode. NOTE: 27. We don't actually need the middle edit points (nodes) on each line - so we're going to get rid of them.
Click on the Minus sign (-) under 'Edit point' and then click on each of those three edit points. NOTE: As soon as you have deleted (or added) any editing points necessary, always make sure you click back on the Pick point button under 'Edit point'. In the case of the triangle we have here, the program reselects the Pick tool for you - because it is impossible to delete more points from this particular shape. However with more complex shapes this will not be the case and you should ensure that you return to the Pick point - otherwise you might find yourself adding or subtracting points by mistake or completely unable to accomplish other tasks! 28. OK - Now select each of the side lines and click on the curved line under 'Convert line' to convert them to curves. 29. We want to shape the two side lines.... so remember which edit point we click on? You got it - the TOP one! (Remember - this gives us all the adjustment handles needed for the lines on either side of the point clicked on.... just what we need for this part of the exercise!). 30. Now move the adjustment handles to the places shown to form the curves in the side lines. Don't forget to use that Toggle button to check your shape in 2D now and then! 31. Once you have a good shape, click back on the Edit button to return to 2D mode and adjust the positioning of your shapes if necessary to make a good club shape (see illustration). To turn these four shapes into a single, new path shape we are now going to use Trace. 32. First of all, Right Click/Merge All. 33. Click on Edit/Trace/Image - accept the defaults and OK. 34. Change the Mode from Horizontal Deform to 2D and you have created a new Path Shape to work with! NOTE: This is particularly useful when you are creating more complex shapes. 35. Drag this shape to the EasyPalette with the other completed shapes (as outlined in Part 2 of the tutorial) and save it for future use. You can now close the canvas you used to make the Trace. We're doing well - just one to go - so let's make the spade! |
|
|
PART 5 - THE SPADE 36. Draw another black ellipse (255W x 230H pixels) and click on the Edit button to take you into Path Edit Mode again. 37. Click on the bottom, centre edit point and move it upwards to the point shown. 38. Now click on the top, centre edit point and move the adjustment handles as illustrated. 39. Now repeat the method in instructions 25 - 36 above to make the bottom shape of the spade, add it to the first shape, Merge All and use Trace to make a new path shape. 40. Save this shape in your EasyPalette with the others. Need to go back to check anything? No? - on we go to.... |


This CD & Tutorial |